5. Maintenance
5-2-6. Replacing the Ink Cartridge
The ink indicator on the Display flashes when the Ink Cartridge is getting low. Prepare the new Ink Cartridge
(option*), and replace it when “Empty XXXX (color)” is displayed. (* See "1-3-5. Consumable Requirements and
Options" for part code.)
<Note>
Use the Ink Cartridges described in “1-3-5. Consumable Requirements and Options”.
Be careful not to get ink on your hands or clothing. Wash with soap if stained with ink. You cannot wash away
the stained ink on the material because the ink may be absorbed into the fiber.
Do not replace cartridges while printing or head cleaning; is in operation it may cause damage to your printer.
Do not disassemble the Ink Cartridge.
Clean the Caps and Wipers, replace the Wiper Cleaners, Fan Filter, Roller Felts (4), Flushing Plate Sponge
(top) and Flushing Plate Felt (bottom) every week and when replacing the Wiper Cleaners to maintain good
print quality. Replace them when you see the warning indicated on the display too. Print quality may be
reduced by insufficient cleaning, e.g. dirty printed materials, mis-firing. See "5-2-1. Replacing the Wiper
Cleaner and Cleaning the Caps / Wipers", "5-2-3.Replacing Flushing Plate Sponge and Flushing Plate Felt",
"5-2-4. Replacing the Fan Filter", "5-2-5. Replacing the Roller Felts" and "5-2-7. Cleaning the Encoder Strip".
To keep the best print result, your printer will show empty status for the color cartridge that is empty. To keep
print quality, a small amount of ink remains to avoid damage to your printer.
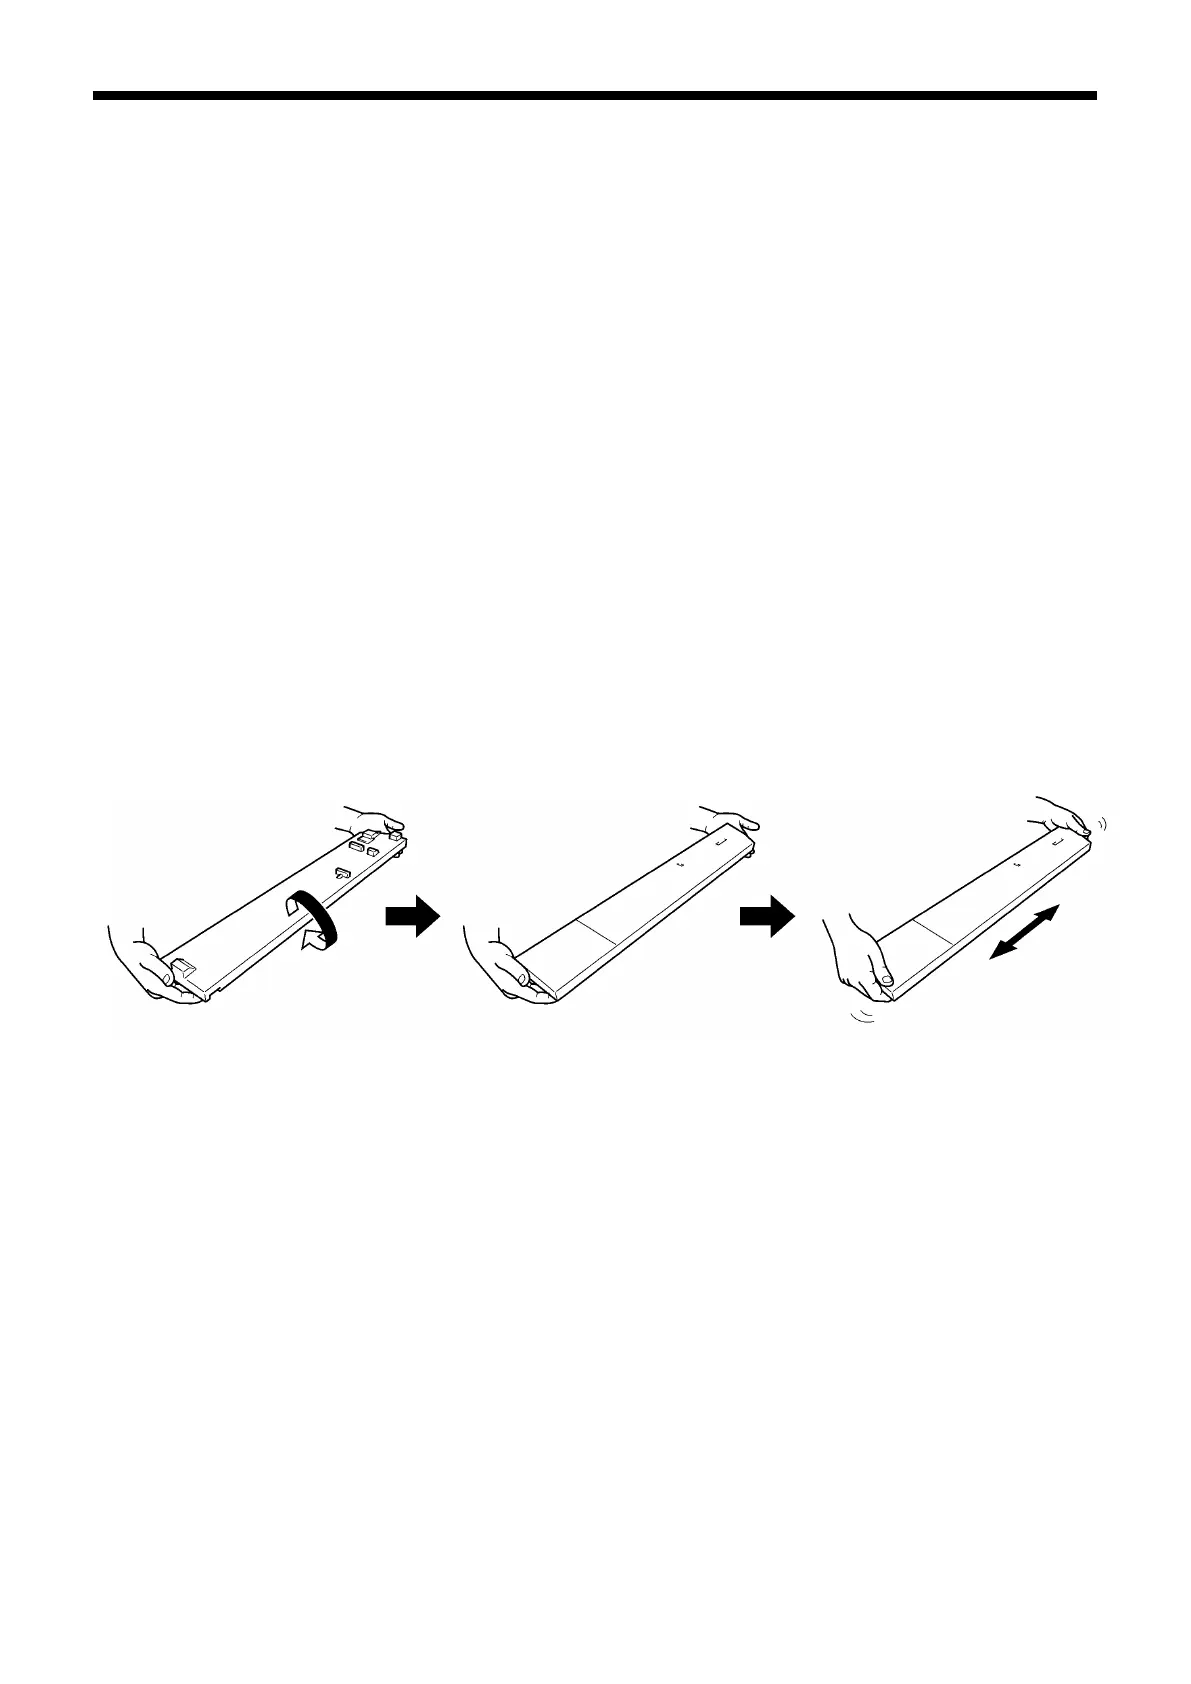
(1) Open the new Ink Cartridge.
<Note>
Pigments in the White Ink are sinking little by little all the time. Hold the cartridge with both hands, upside
down from the mounted position, and shake it in 1-2 minutes so that the pigments inside can be mixed
enough. Do it one by one.
0054Y
GT-3 Series
75

 Loading...


