if there appears tO be interferenCe, start Over at step 3, being
Careful tO prOperly mate and align the barrel lug’s hinge pin
reCess and the reCeiver hinge pin.
DISASSEMBLY
always keep the muZZle pOinted in a safe direCtiOn. befOre
starting disassembly prOCedures, Open the aCtiOn and visually
inspeCt the Chambers tO be absOlutely Certain the firearm is
COmpletely unlOaded. plaCe the “safety” in the On safe
pOsitiOn. failure tO fOllOw this warning COuld result in
seriOus injury Or death.
1 Close the action, anchor the buttstock against your upper leg and
lift outward on the forearm takedown latch. At the same time,
grasp the forearm and with the help of the left hand pivot the
forearm away from the barrels, removing the forearm.
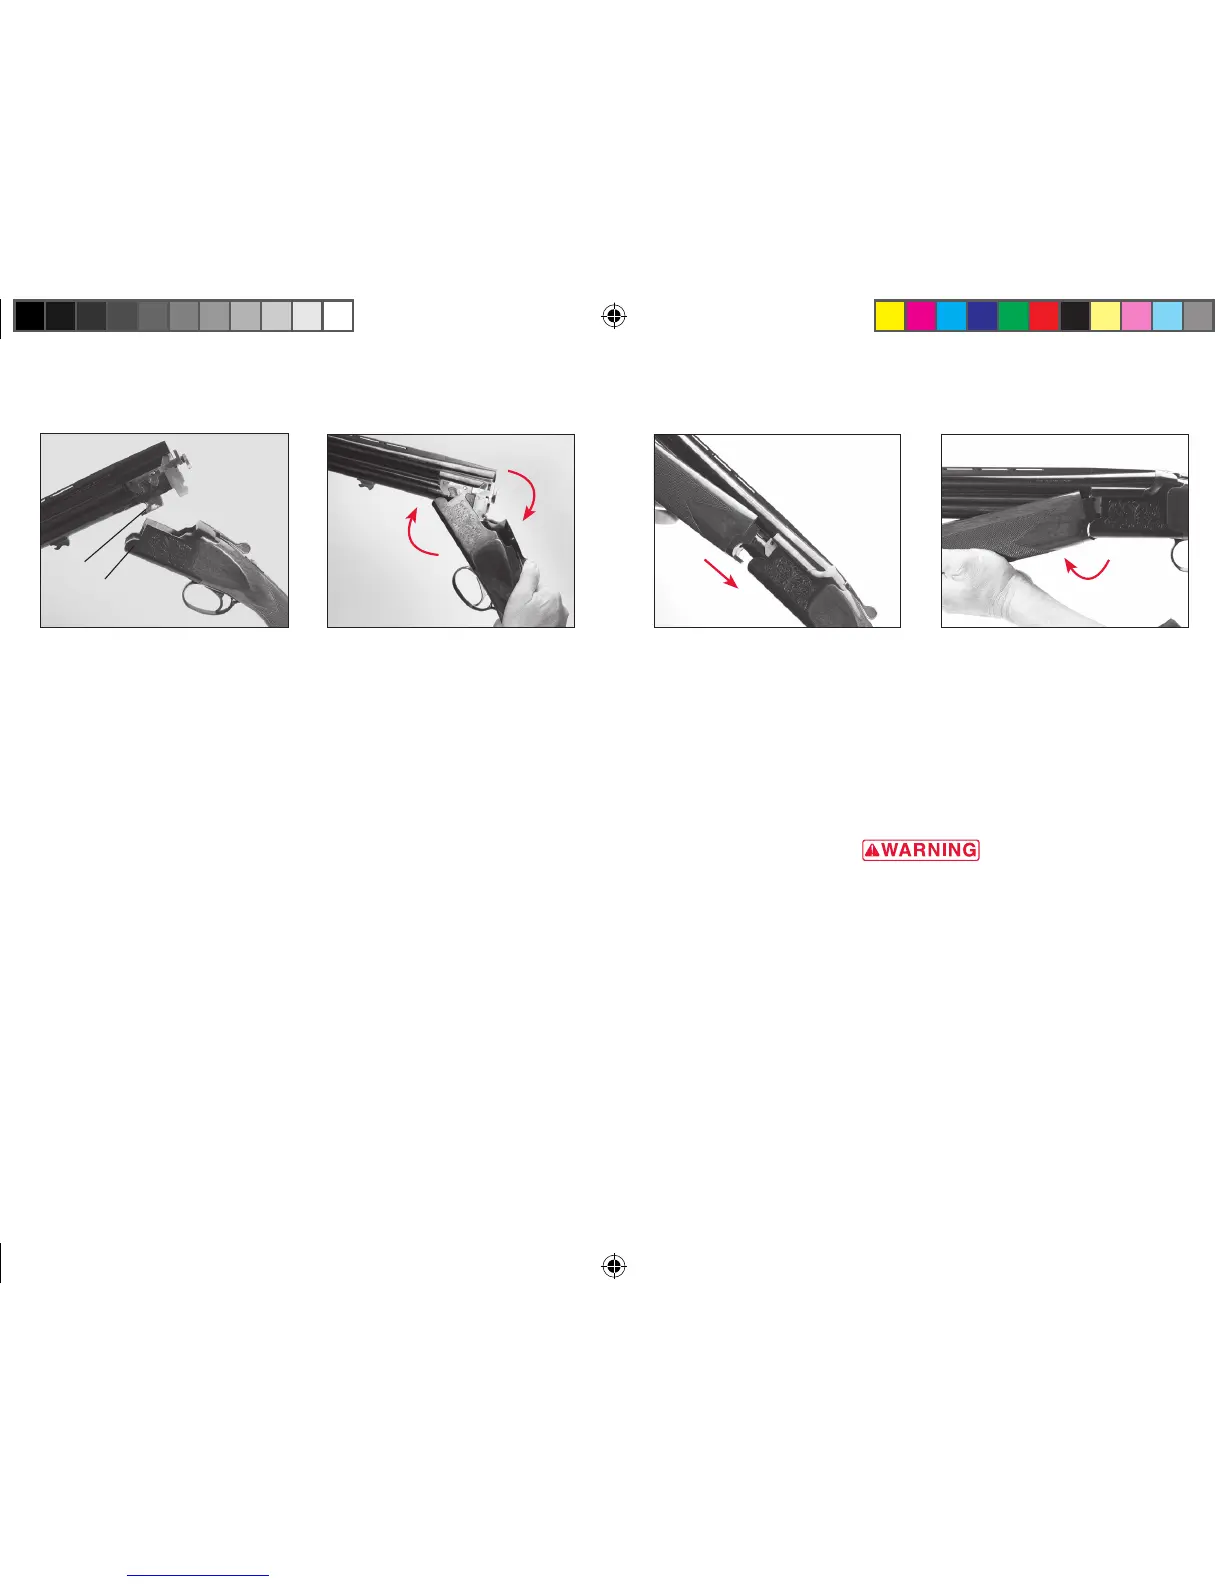
2 Open the action. Carefully disengage the barrel lug from the hinge
pin and lift the barrels upward and out of the action.
figure 10
Pivot the forearm up to the barrel until
the forearm engages tightly on the barrel.
You should hear an audible “click.”
3 Attach the barrels to the action by grasping the buttstock’s grip
with your right hand and anchoring the buttstock between your
right forearm and right side. With the thumb of your right hand,
move and hold the top lever sideways to the extreme right. Grasp
the barrels in the left hand and engage the barrel lug’s circular
hinge pin recess (A) with the action’s (B) hinge pin (Figure 7).
4 While keeping pressure on the barrels to keep the hinge pin
aligned in the barrel lug’s circular recess, rotate the barrels upward,
fully closing the action (Figure 8). Release the top lever. It should
snap back into place.
5 Place the rear of the gun’s buttstock against your upper leg and
slide the projecting steel tab on the rear of the forearm bracket
into the opposing recess in the receiver bottom (Figure 9). Pivot
the forearm up to the barrel tightly. This will cause the forearm to
engage onto the barrel. You should hear an audible “click” which
signifies that the forearm is properly attached (Figure 10).
NOTICE! when assembling yOur shOtgun, dO nOt use undue
fOrCe when ClOsing the aCtiOn. if the tOp lever is nOt tO the
right Or the aCtiOn and barrels are nOt prOperly aligned
undue fOrCe will Only Cause them tO grind tOgether and sCOre
Or mar the finely fitted surfaCes.
figure 8
Rotate the barrels completely upward, closing
the action.
figure 7
Engage the barrel lug’s circular hinge pin recess
with the action’s hinge pin.
figure 9
Slide the projecting steel tab on the rear of the
forearm bracket into the opposing recess on the
receiver bottom. The forearm engages on the
barrel. You should hear an audible “click.”
A
B