weAr eye protection when disAssembling And cleAning your
shotgun to prevent springs, spring-loAded pArts, solvents or
other Agents from contActing your eyes, resulting in injury.
keep All Ammunition AwAy from the cleAning AreA. never
test the mechAnicAl function of your shotgun with live
Ammunition. fAilure to follow these wArnings could result
in serious injury or deAth.
The trigger group and bolt can be removed if the action becomes
excessively dirty or wet. If this occurs, disassemble the action for a
complete cleaning as explained in the following sections. The trigger
group and bolt assembly of your Silver shotgun are designed to be
removed in the field, without special tools.
Disassembly of the action involves the removal of the bolt assembly
and the trigger group. Disassembly beyond this point should only be
performed by a qualified gunsmith.
R E M O V I N G T H E T R I G G E R G R O U P
1 Place the bolt in the forward position by holding the operating
handle and depressing the carrier release button.
NOTICE! never Allow the Action to slAm closed by pressing the
cArrier releAse button without the bArrel instAlled. if the
bolt is releAsed forwArd with the bArrel removed, the
operAting hAndle will hit the receiver And cAuse dAmAge.
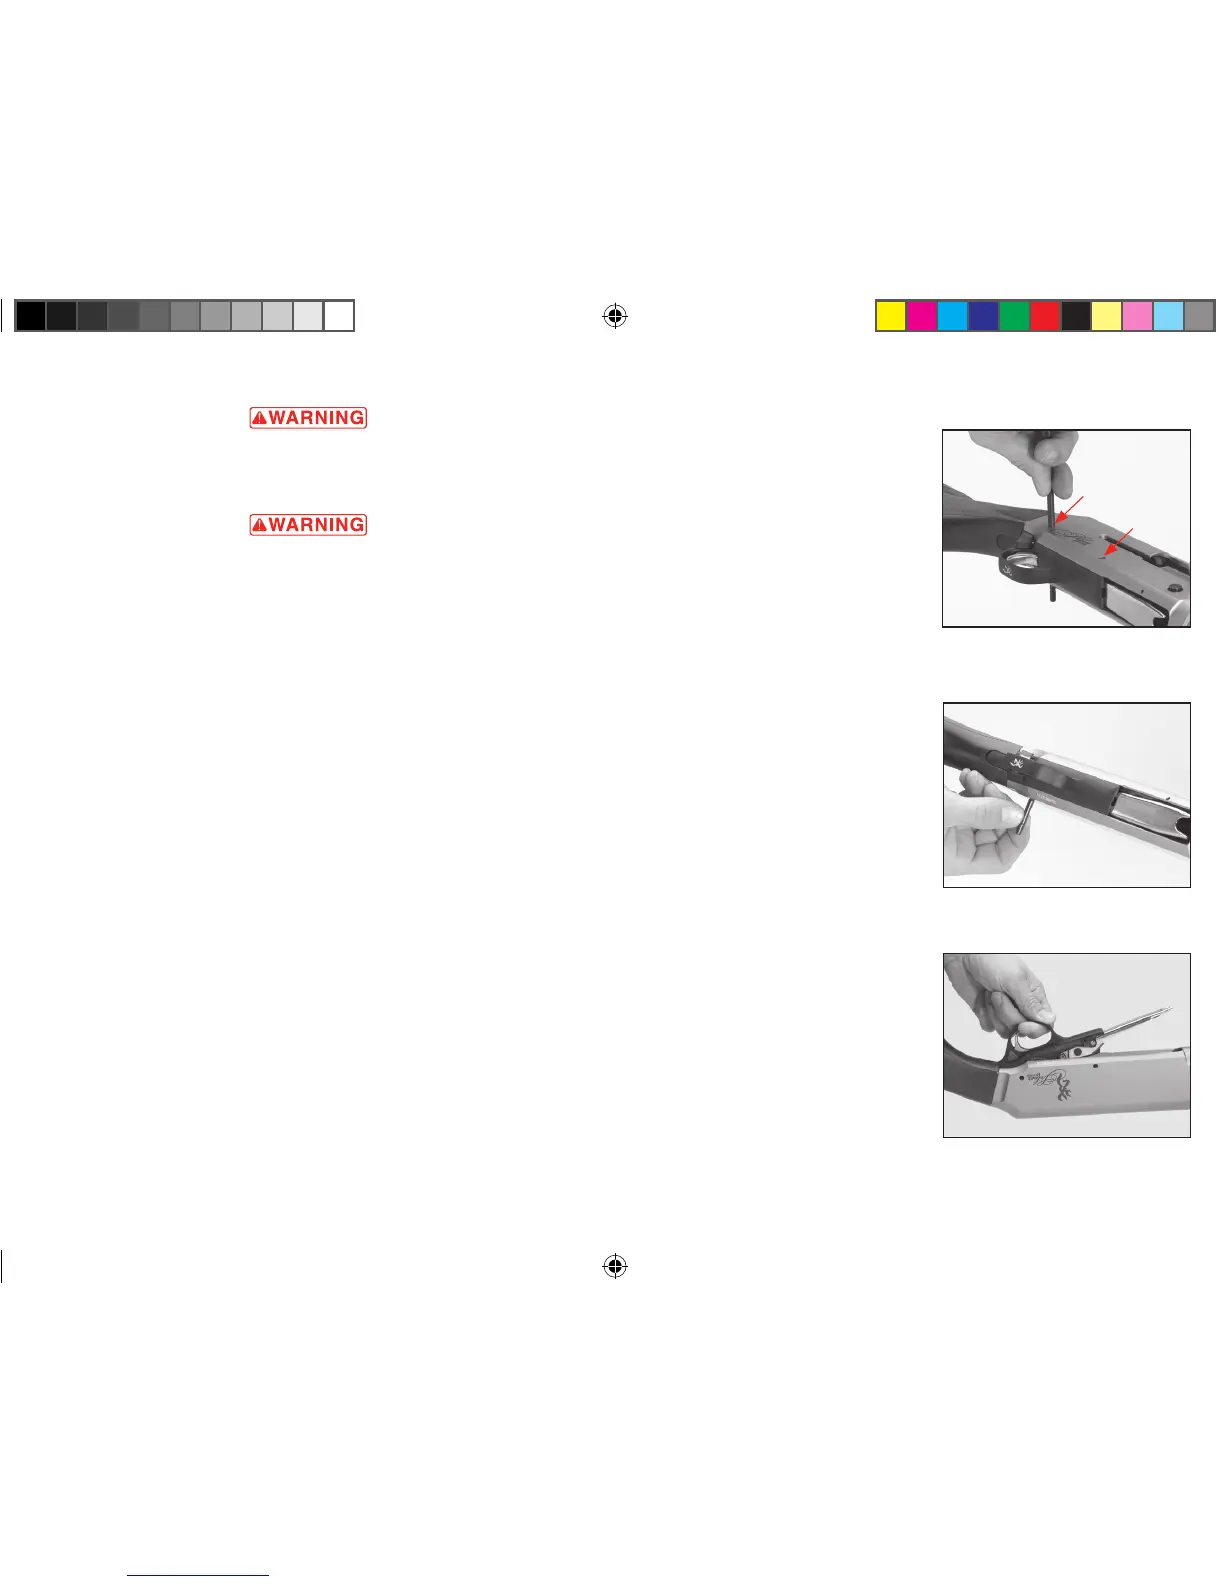
2 Use a punch or similar object to push inward on the trigger guard
pins, taking care not to scratch the receiver (Figure 18). Trigger
group pins may be removed from either side of the receiver. Push
the trigger group pins through the receiver. Pull on them from the
opposite side to remove them (Figure 19).
3 Grasp the trigger guard and pull it up and out of the receiver
(Figure 20).
4 Perform any cleaning of the
parts and receiver cavity as
necessary. We suggest cleaning
the trigger group with a quality
aerosol gun solvent. Allow it to
dry and then very lightly oil the
moving parts.
NOTICE! do not disAssemble
the trigger group beyond
this point.
R E I N S TA L L AT I O N O F T H E
T R I G G E R G R O U P
1 Make sure the bolt is in the
forward position.
2 Insert the trigger group into the
receiver. Align the holes in the
trigger group with the holes on
each side of the receiver.
3 Reinsert the trigger guard pins
and gently tap them into place
with a plastic or wooden mallet,
again using caution not to
scratch the receiver.
R E M O V I N G T H E B O LT A S S E M B LY
1 To remove the bolt assembly
it is preferred to first remove
the trigger group, as explained
previously.
2 Remove the barrel, gas piston,
sleeve bar and sleeve bar spring
as explained previously.
figure 19
Grasp the pins and remove them.
figure 20
Lift the trigger group from the receiver.
37
figure 18
Push the trigger group pins through
the receiver.