Chapter 3 – Taking Measurements
Taking Measurements
BB 1219 – 11
21
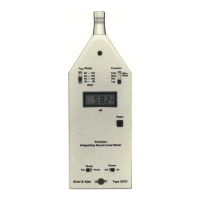
Integrating Sound Level Meter Type 2239 A
User Manual
3.2 Taking Measurements
There are two ways to take a basic measurement. One is to
start and stop the instrument manually, the other is to use a
preset measurement period. In both cases, the sound level
meter must be correctly configured before you start the meas-
urement. See section 3.4 for more information about configur-
ing the range and measurement settings.
3.2.1 Manually Timed Measurements
To take a manually timed measurement, the preset time must
be set to “
Off”. See section 3.4.4 for more information about
making this setting.
1. Press to switch on the instrument. (If the instrument
is already switched on but not measuring, then press
and skip to step 4.)
2. Wait for the sound level meter to start up (about 8 seconds).
3. Measurement begins automatically.
4. Wait an appropriate amount of time. In some situations,
the measurement time will be prescribed by regulations.
Otherwise, watch the Measurement Window until the
Leq
reading has stabilized (if necessary, press until Leq
is visible).
5. Press to stop measuring.
6. Check the upper limit of the measurement range, if it is
blinking (see Fig. 3.3), then an overload has occurred and
the measurement may be invalid. If an overload has oc-
curred, then increase the measurement range by pressing
(check the measurement range on the screen as
shown in Fig. 3.3). Begin a new measurement by pressing
and repeat from step 4.
7. Step through the displayed measurement parameters by
pressing . If some of them show no value (
---.- dB),
bb221911.book Page 21 Tuesday, July 24, 2001 11:23 AM
 Loading...