MATRON-Light with 2250-M Field Guide, Page 16
3.1.7 Apply sound level calibrator Type 4231 to the microphone and activate by pressing
On/Off
(
on some models).
3.1.8 Tap on
(Menu) and then select .
3.1.9 Follow the instructions on the top of the display.
3.1.10 During the calibration sequence, an Information message will ask you to accept the
calibration. Tap on
.
3.1.11 When calibration is complete, tap on
.
3.2 Recording a memory card “full” dummy file
3.2.1 In order to ensure that you will be able to carry out a calibration check at the end of the
measurement even if the memory card has been filled, we recommend recording a “Card
Full” file at this stage. In the event of the user filling the card, the Card Full file may be
deleted to make space for the calibration check.
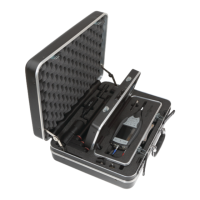
3.2.2 Remove the hand-switch and its cable from the brief case and connect the plug to the
corresponding socket on the small inner case.
3.2.3
Press
(Start/Pause) and the measurement will start (flashing amber traffic lights
change to green).
3.2.4 Press the hand-switch to start the sound recording. A red light in the switch indicates sound
recording is taking place.
3.2.5 After approximately 90 seconds (the sound marker will then be filling the screen), stop the
sound recording by pressing the hand-switch. The red light extinguishes.
3.2.6
Press the
key (Pause/Start) once. The traffic lights will now change to a flashing
amber colour.
3.2.7 Press
(Store) to save the results. Note the File Number in which your results have been
stored – this is found at the top left-hand part of the screen, e.g.
. The first part is
the date (year:month:day) and the 001 is the first set of results that day (see section 2.2.7 for
details on Auto-naming your results).
3.2.8 Press
to reset the measurement.
3.2.9 Tap on
(Menu) followed by .
3.2.10 Tap on the file name (e.g.
in the above example) and choose from the
drop-down list.
3.2.11 You can now delete the name of the file (use
) and tap in, for example,
.
 Loading...