User Guide
BT Studio 4500 Plus
Ofces worldwide
The services described in this publication are subject to availability and may be
modied from time to time. Services and equipment are supplied subject to
British Telecommunications plc’s respective standard conditions of contract.
Nothing in this publication forms any part of a contract.
© British Telecommunications plc 2010.
Registered Ofce: 81 Newgate Street, London EC1A 7AJ.
Registered in England No. 1800000.
Designed and produced by The Art & Design Partnership Ltd.
Printed in China / Issue 1 / ADP08-10
1 Plug in
2 Charge
3 Go!
General information
For information on safety instructions,
cleaning, technical information or
connecting to a switchboard, please
refer to the ‘General Information’
section in the full user guide at
www.bt.com/producthelp
Guarantee
Your BT Studio 4500 Plus is guaranteed for a period of
12 months from the date of purchase.
Subject to the terms listed below, the guarantee
will provide for the repair of, or at BT’s or its agent’s
discretion the option to replace the BT Studio 4500
Plus, or any component thereof, (other than batteries),
which is identied as faulty or below standard, or as a
result of inferior workmanship or materials. Products
over 28 days old from the date of purchase may be
replaced with a refurbished or repaired product.
The conditions of this guarantee are:
• The guarantee shall only apply to defects that
occur within the 12 month guarantee period.
• Proof of purchase is required.
• The equipment is returned to BT or its agent
as instructed.
This guarantee does not cover any faults or defects
caused by accidents, misuse, fair wear and tear,
neglect, tampering with the equipment, or any
attempt at adjustment or repair other than through
approved agents.
This guarantee does not affect your statutory rights.
For further information within and outside the 12
month guarantee, please refer to the full user guide at
www.bt.com/producthelp
Product disposal instructions
The symbol shown here and on the product
means that the product is classed as Electrical or
Electronic Equipment and should not be disposed with
other household or commercial waste at the end of its
working life.
The Waste of Electrical and Electronic Equipment
(WEEE) Directive (2002/96/EC) has been put in place
to recycle products using best available recovery and
recycling techniques to minimise the impact on the
environment, treat any hazardous substances and
avoid the increasing landll.
Product disposal instructions for residential users
When you have no further use for it, please remove
any batteries and dispose of them and the product as
per your local authority’s recycling processes. For more
information please contact your local authority or the
retailer where the product was purchased.
Product disposal instructions for business users
Business users should contact their suppliers and check
the terms and conditions of the purchase contract
and ensure that this product is not mixed with other
commercial waste for disposal.
Warning
This equipment is not designed for making
emergency telephone calls when the power fails.
Alternative arrangements should be made for
access to emergency services.
R&TTE Directive & Declaration of Conformity
This product is intended for use within the UK for
connection to the public telephone network and
compatible switchboards.
This equipment complies with the essential requirements
for the Radio Equipment and Telecommunications
Terminal Equipment Directive (1999/5/EC).
For a copy of the Declaration of Conformity
please refer to www.bt.com/producthelp
Setting up is easy. Just follow the simple steps in this guide.
If you need further assistance, please visit our website www.bt.com/producthelp
to view our advanced user guide or call our helpdesk on 0800 218 2182*
2 Charge
1 Remove the protective lm from the handset screen
and the base lens and activate the batteries by pulling
the plastic tab away from the back of the handset.
2 Place the handset on the base to charge.
3 After 24 hours, plug the telephone line cord into the
telephone wall socket.
Important: Charge the handset batteries for 24 hours
or your phone may not work.
Set up your additional handsets (multipacks only)
1 For each additional handset and charger: plug the mains power adaptor (item code
048610) into the socket on the back of the charger, secure the cable behind the
retaining clip and plug the other end into the mains wall socket and switch the
power on.
2 Remove the protective lm from the handset screen and activate the batteries as
shown above.
3 Place the handset on the charger to charge for 24 hours.
If you ever need to remove the batteries, simply slide open the battery
compartment cover and using the nger holes grip the batteries and pull them out.
Your BT Studio 4500 Plus is now ready for use.
Please
turn
over
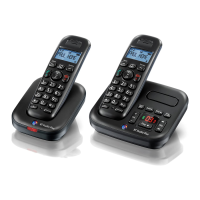
Check box contents
Handset Mains power adaptor
(item code 048611)
Telephone line cord
(pre-installed)
2x AAA NiMH 500mAh
rechargeable batteries
(already in handset)
Base
1 Plug in
* Calls made from within the UK mainland network are free. Mobile and International call costs may vary.
BT &
Working together, supporting energy saving products
BT & British Gas have joined forces to help our customers nd new ways to save energy
around the home, so we can all do our bit for the environment & save money too!
Rechargeable batteries
already fitted
Remove this tab
and charge batteries
for 24 hours before use.
Important: Only use the mains power adaptors, cables and rechargeable batteries
supplied in this box, or this product may not work. Any replacement rechargeable
batteries must be of the same type. BT accepts no responsibility for damage
caused to your BT Studio 4500 Plus by using any other type of batteries.
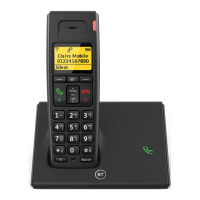
Handset Charger Mains power adaptor
(item code 048610)
2x AAA NiMH 500mAh
rechargeable batteries
(already in handset)
Contents for each additional handset (multipacks only)
1 The telephone line cord
is pre-installed but don’t
plug the other end into
the wall socket yet.
3 Plug the other end of
the power adaptor
into the wall socket
and switch on.
2 Plug in the mains power
adaptor with the blue
ring on the connector
(item code 048611).
Secure power adaptor
cable behind retaining
clip on back of base.