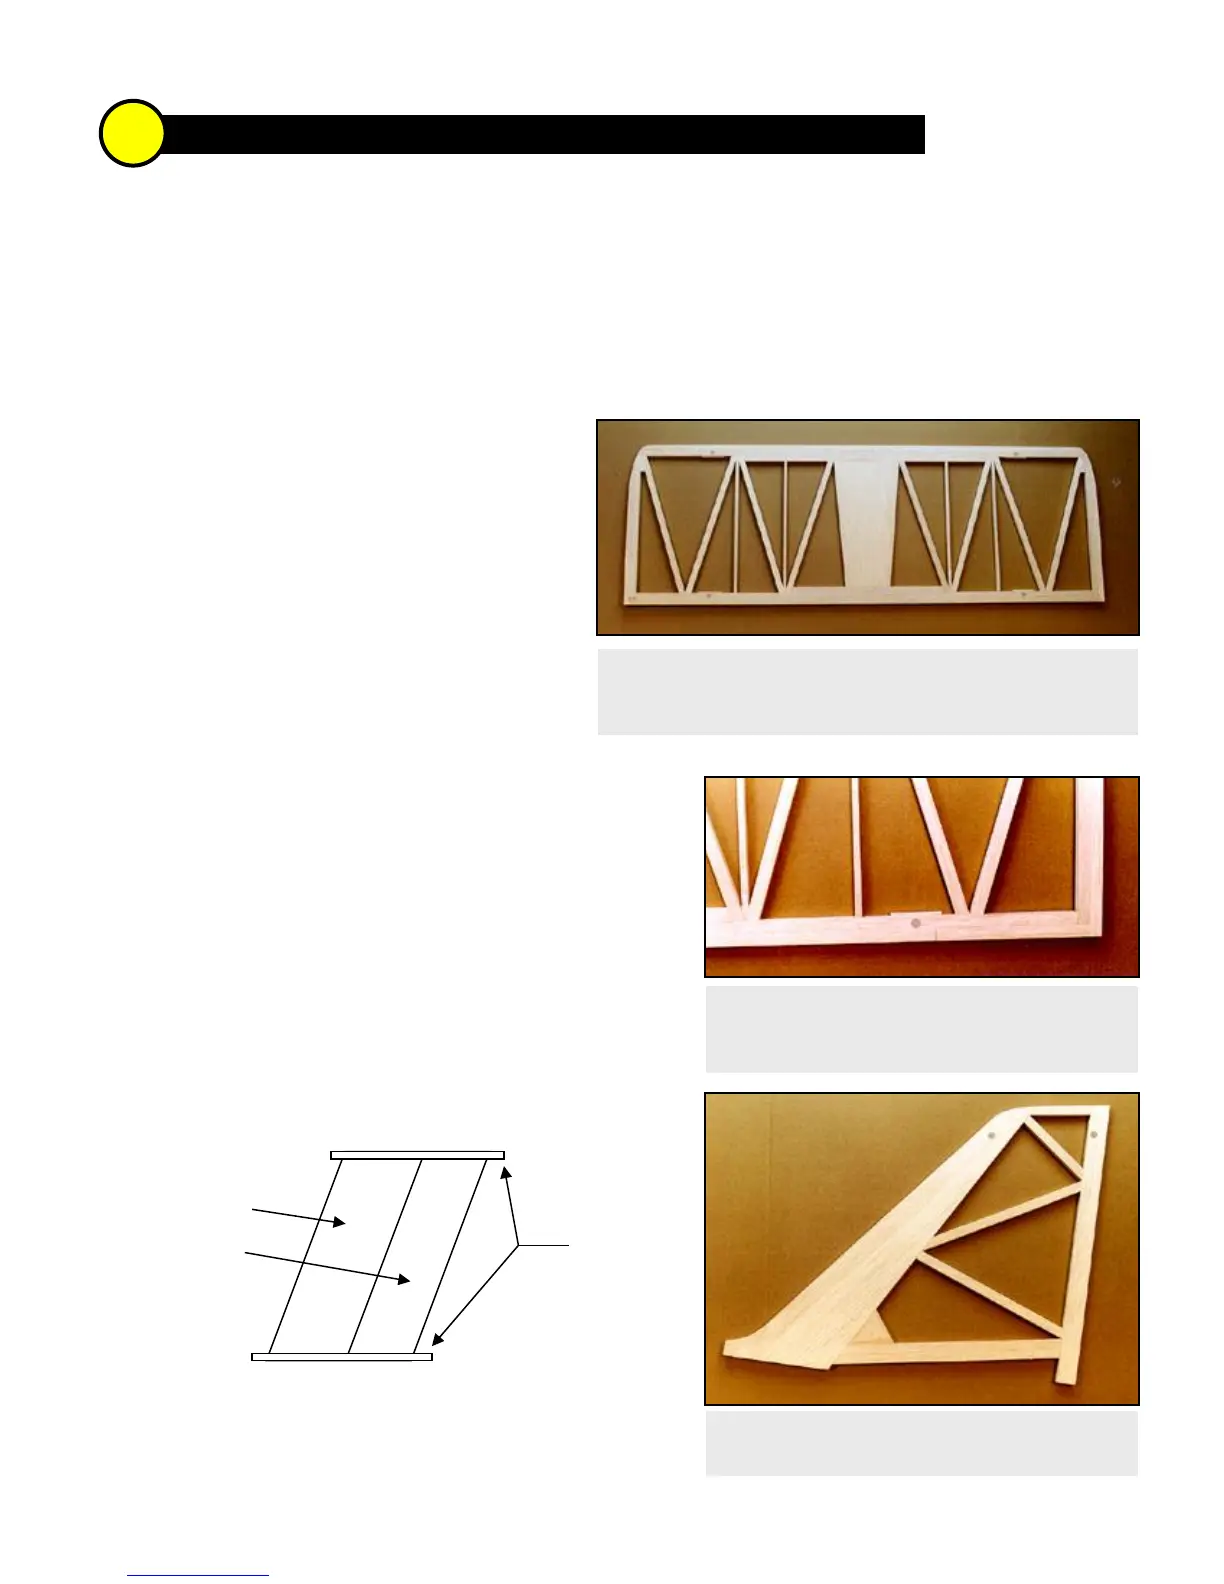
Complete Stabilizer ready for final sanding. The thin vertical
sticks are 1/4" x 1/2" balsa added to help during the covering -
that's where the green stripes overlap the other colors
1 STABILIZER, ELEVATOR, FIN, AND RUDDER >
Decide early if you want the tail unit to be removable from the fuselage for easy transportation. I made mine
removable, but it took extra time and added some weight. It doesn't really change the construction of the
tail, except for adding some hard points in the stabilizer.
Start with the stabilizer. Notice that the outer framework is laminated 1/2" square sticks. I chose to laminate
rather than use 1/2" x 1" balsa for several reasons. The main reason is that two sticks, even if they are slightly
warped, will stay straight when glued together and the glue joint adds to the overall strength of the structure. Take
your time and strive for tight joints with lots of
wood-to-wood contact. I started out trying to use a
miter saw, but ended up marking the sticks as
accurately as possible then cutting them on the
bandsaw. Use thin or medium CA for initial gluing,
then lift the structure from the table and build up a
small fillet of medium CA at every joint.
Drill 3/8" holes for the tail brace hard points as
shown on the plans. Add the dowels and the lite-
ply reinforcements. When dry, use your big sanding
block to sand both sides of the stabilizer flat.
The elevator is supplied in two pieces. You can splice
those together if you plan to use a single servo and pushrod, or
you can go with a split elevator with a servo on each half.
Now you can build the fin over the plan. Laminate 1/2"
square sticks for the fin bottom and TE, just like the stab. Add
the two hard points and sand the sides smooth.
Glue the front and rear rudder pieces together. To make
the rudder stiffer and more warp resistant, add a 1/2" square
stick to the top and bottom edges as shown in the diagram. You
might want to do this to the tips of the elevator as well. I cut
three lightening holes in my rudder only because the balsa was
extra hard and heavy.
This Stabilizer Close-up shows the hard point
and lite-ply reinforcement. Also notice the
staggered joint at the corner of the stab
framework.
Fin ready for final sanding. Note the hard points.
Tail bracing is required on the Super Flyin' King.
Rudder Rear
1/2" Square
Balsa Sticks
Before Trimming
Add hard points to the elevator and rudder in accordance
with the type of control horn you plan to install. I glued in short
lengths of 1/2" dowel for my Sullivan Super Horns. -SFK


 To Next Page
 Loading...