Please read the back of this sheet
TeraNavigator will launch.
・If “What do you want Windows to do?” is displayed or if the AutoPlay
window appears, select ”TeraNavigator for WS-VL”.
・If using Windows 8 or Windows 7 or if TeraNavigator does not start,
double-click TSNavi.exe in the “TeraNavi” folder in the USB device.
・If “Do you want to allow the following program to make changes to this
computer ?” is displayed in Windows 8 or Windows 7, click Yes. If “A
program needs your permission to continue” is displayed in Windows
Vista, click Continue.
・In Mac OS, double-click the disc image “WSVL_SERIES-xxx.dmg” (where
xxx is a three-digit number) in the supplied USB device to mount, then
double-click TeraNavigator in the image.
・Disable your antivirus software and firewall before continuing. You may
not be able to install the TeraStation software if you have any antivirus
software or firewalls enabled. Before continuing onto the next step, be
sure to disable your antivirus and/or firewall.
Connect the supplied USB device to your computer.
Open the USB device, then locate TSNavi.exe and
double-click it to open.
If using Windows 2000 or 2000 Server, make sure that write-protection on
the USB device is disabled before connecting it. To disable write-protection,
slide the switch on the USB device toward the USB connector.
Click Begin Installation.
NAS Navigator2 will start automatically.
If it doesn't, double-click NAS Navigator2 on the desktop (Windows) or click it in
the Dock (Mac).
Follow the instructions below to set up the TeraStation.
Click Finish to complete setup.
* If you had disabled your antivirus software and/or firewall earlier for this
installation, be sure to enable them after you complete setup.
Right-click on your TeraStation’s icon,
then choose Properties - IP Address.
These examples show screens from Windows.
On Mac systems, hold the Control key and click the TeraStation icon, then click
Configure - IP Address.
Follow the steps on the screen to connect the Ethernet cable
and power cable to the TeraStation and turn it on.
・Use LAN port 1 for initial setup. After setup, you may connect a second cable to
LAN port 2.
・Before removing the sticker on the power connector, be sure to read the terms
and conditions of the Microsoft Software License contained in the “ms-licence”
folder in the USB device.
1. Enter the desired settings.
・For most users, checking Use DHCP is
recommended. For Mac OS, click Use DHCP.
2. Click OK.
・Enter the TeraStation's username and password
when asked. By default, these are
“Administrator” and “password”, respectively.
Right-click on the TeraStation
icon in NAS Navigator2, then
choose Open Remote Desktop.
・For Mac OS, hold the Control key, click the TeraStation icon, and click
Open Remote Desktop.
・If the message “The publisher of this remote connection cannot be
identified. Do you want to connect anyway?” is displayed, click Connect.
・If “The identity of the remote computer cannot be verified. Do you want
to connect anyway?” is displayed, click Yes or Continue.
Setup is complete.
Files can be saved to the TeraStation shared folder in the same
way as folders on other hard drives.
Double-click the TeraStation's icon.
The TeraStation's shared folder will open.
With Mac OS, the TeraStation is either mounted as
a drive on the Desktop or in the Finder sidebar.
Opening the TeraStation shared folder from an additional computer
Install NAS Navigator2 on the additional computer from the supplied USB
device. Then open the shared folder as shown in 15 and 16 above.
If using OS X 10.4 or later, download and install "Remote Desktop Connection Client for Mac 2" from
www.microsoft.com. If using OS X 10.3.9, use version 1.0.3 instead.
Never disable the LAN (network device) settings in Windows Storage Server.
Disabling the LAN settings will also disable access to the TeraStation.
Computer
Enter your username and password,
then click OK.
The default settings are:
Username: Administrator
Password: password
Windows Storage Server will open in the Remote
Desktop screen.
Install the Windows Storage Server update program.
1. Click Download and install updates on the “Initial Configuration Tasks”
screen.
The TeraStation must be connected to the Internet.
2. Click Check for updates.
3. When updates are displayed, click Install
updates.
After this, follow the steps on the screen to
install the Windows update program.
Installation of an antivirus software package (available commercially) on
Windows Storage Server is strongly recommended.
Set the date and time.
1. Click Set time zone on the “Initial Configuration Tasks”
screen.
2. Click Date and Time - Change date and time.
3. Select the current date and time, then click OK.
Create a shared folder.
1. Click Start - All Programs - Administrative Tools - Computer Management.
2. Click Shared Folders.
3. Right-click Shares, then click New Share.
4. Click Next.
5. Enter “D:\Share” for the folder path, then click Next.
6. Click Yes.
7. For the share name, enter “Share”, then click Next.
8. Check Customize permissions, then navigate to Custom... - Everyone, then check
Allow for “Change”.
9. Navigate to Security tab - Edit... -Add.
10. Enter “Everyone” under "Enter the object names to select", then click OK.
11. Select Everyone, then check Allow for “Modify”.
12. Click OK - OK - Finish.
13. Navigate to Computer Management - Local Users and Groups.
14. Double-click Users.
15. Double-click Guest.
16. Uncheck Account is disabled under General tab and click OK.
Change the TeraStation's password.
1. Click Start - Control Panel - User Accounts.
2. Click Change your password.
3. Enter "password" as the current password, then enter your desired new
password and confirm the new password.
4. Click Change password.
Computer
Computer
Computer
Computer
1
2
3
4
5
6
7
8
9
10
11
12
13
14
15
Remote Desktop
Remote Desktop
Network
(
Router or Hub
)
PC
Power cable
Power outlet
LAN port 1
Insert the Ethernet cable until it clicks.
Power connector
Ethernet cable
1
2
3
TeraStation
Ethernet cable
Network
(Router or Hub)
PC
TeraStation
Power cable
Power outlet
LAN port 1
Insert the Ethernet cable until it clicks.
Power connector
①
②
③
Network
(Router or Hub)
PC
Power cable
Power outlet
LAN port 1
Insert the Ethernet cable until it clicks.
Ethernet cable
TeraStation
①
②
③
Power connector
Network
(Router or Hub)
PC
LAN port 1
Insert the Ethernet cable until it clicks.
①
②
③
Power connector
Power outlet
TeraStation
Power cable
Computer
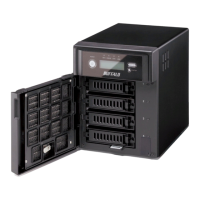
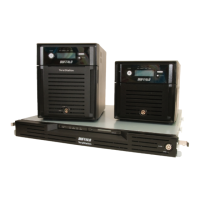
WS-6VL
WS-QVL
WS-WVL
WS-RVL
Data Backup
While using the TeraStation, you may loose your important data due to
sudden accidents, hard disk failure, or accidental misoperation. Back up your
data regularly!
For best results, back up your data to Buffalo drives like the TeraStation,
LinkStation, or DriveStation series.
TeraStation
TM
Pro WSS
Setup Guide
English
35012011-03