Lit.No. 905-012635 V5 rev 4/11/17
Built by Builder’s Best, Inc.
Jacksonville, TX 75766
BuildersBest.com
Fabriquee aux États-unis
Hecho en EE.UU.
Made in the U.S.A.
Lit.No. 905-012635 V5 rev 4/11/17
Built by Builder’s Best, Inc.
Jacksonville, TX 75766
BuildersBest.com
Fabriquee aux États-unis
Hecho en EE.UU.
Made in the U.S.A.
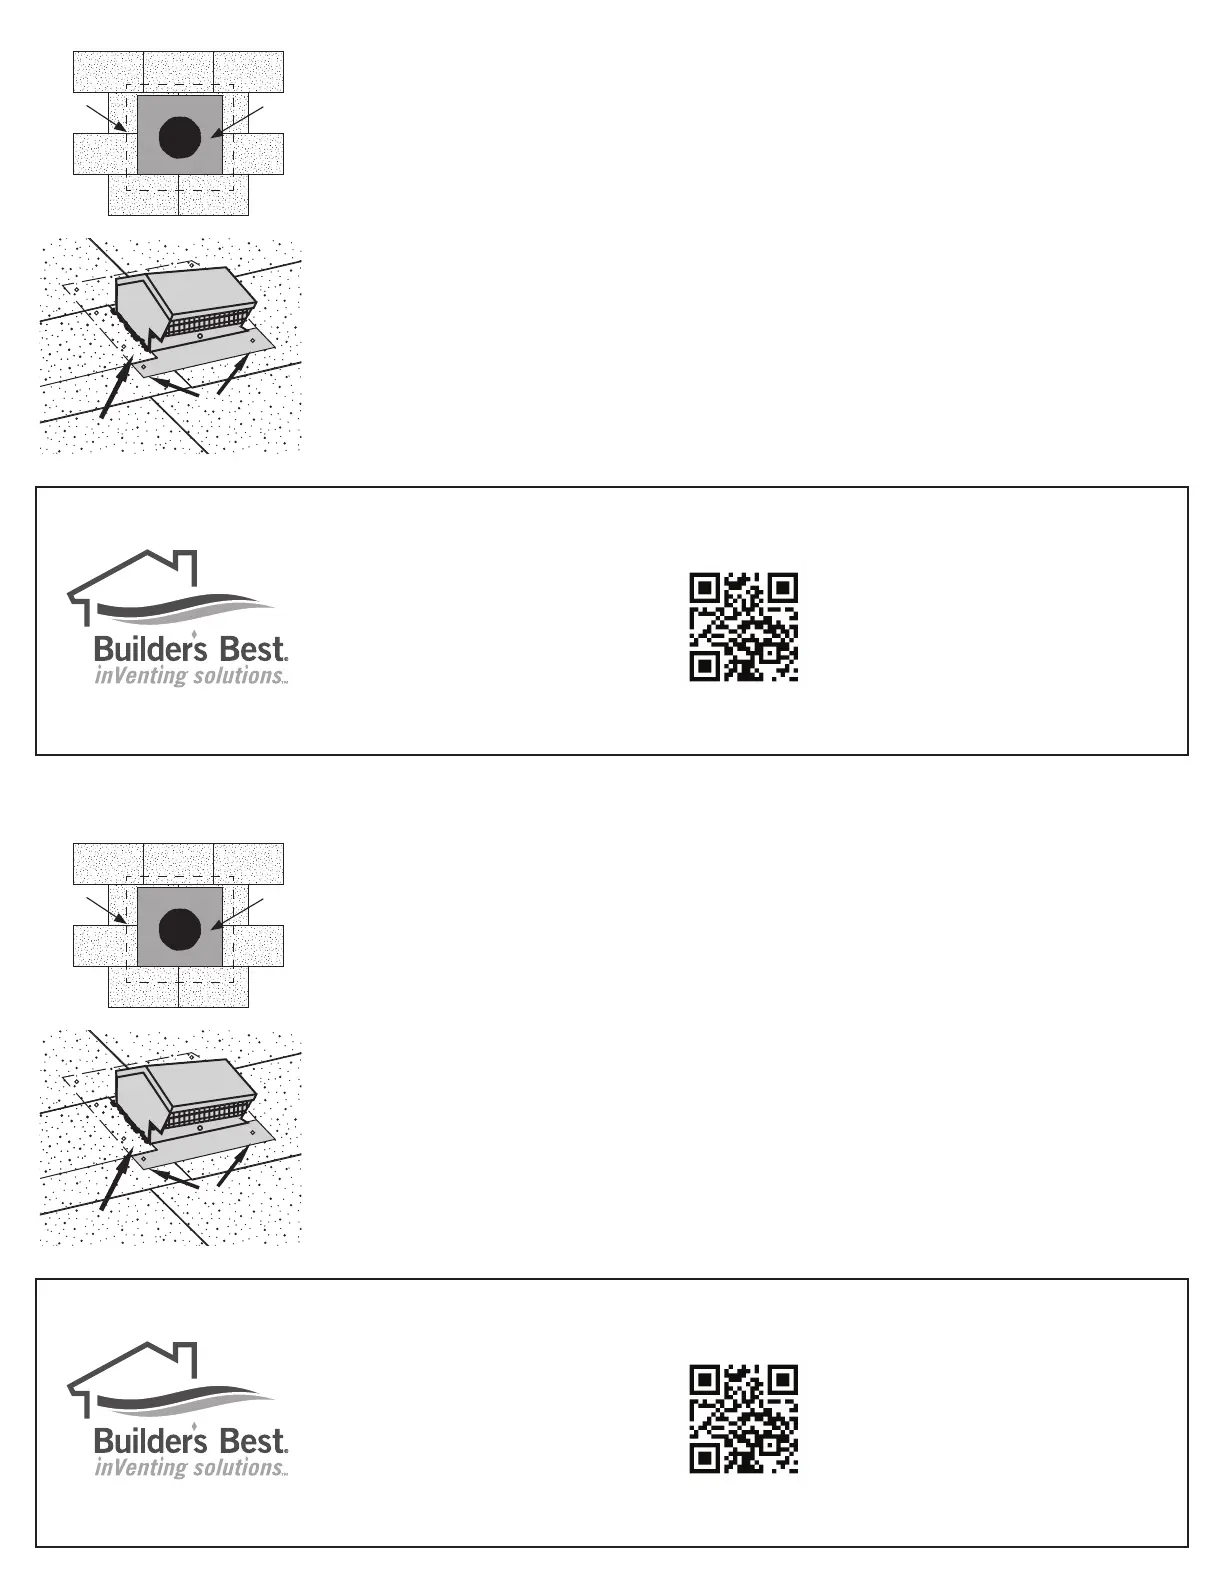
6. For roof caps with no collar, seal all around the protruding duct with roof cement. For roof caps with
collars, apply a bead of roof cement around the underside of the flange approximately 1” from the edge
of the flange.
7. Insert the back flange of the roof cap under the shingles and slide into position. Nail the top and sides
of the roof cap flange to the roof under the shingles. Seal each nail head with roof cement.
8. Nail the exposed bottom flange of the roof cap directly to the roof.
Seal each nail head with roof cement.
9. Secure the loosened shingles to the roof and roof cap flange with roof cement.
Tape all joints with UL® approved duct tape to prevent air and water leaks.
5. Using the tracing as a reference, trim the shingles so that when installed, the shingles fit within ¼” of
the body of the roof cap.
With a crowbar, loosen and remove roofing nails located under the footprint of the roof cap flange.
Note: Roofing nails are always located above the shingle knockout slits.
Gently lift the shingles located under the tracing of the roof cap flashing.
Nails
Roof Cement
Nails
Roof Cement
Traced
outline
of roof
cap
CUT
OUT
remove shingles
remove shingles
Trim
shingles
within ¼"
of roof
cap
Traced
outline
of roof
cap
CUT
OUT
remove shingles
remove shingles
Trim
shingles
within ¼"
of roof
cap
 Loading...