Do you have a question about the Bush Business Furniture A173969D and is the answer not in the manual?
| Brand | Bush Business Furniture |
|---|---|
| Model | A173969D |
| Category | Indoor Furnishing |
| Language | English |
Product usage warnings regarding instability, tip-over, and serious injury from improper loading or movement.
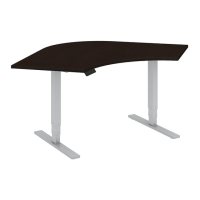
Diagram illustrating the corner desk with labeled parts (A-H) for identification during assembly.
Detailed list of all components with their corresponding part numbers and quantities for various desk models.
Visual and descriptive list of all fasteners used in assembly, including bolts, dowels, and cams.
Identification of hardware components such as adjustable levelers and wire management systems.
List of model-specific parts including grommets and cover caps for different desk configurations.
Illustrates common assembly techniques such as using specific fasteners and panel attachments.
Securing the top panel using KD bolts, marking the initial assembly phase.
Attaching support components and levelers to a desk panel using KD bolts and wood dowels.
Attaching further support components and levelers to another desk panel using KD bolts and dowels.
Connecting desk panels using KD cams and cover caps, preparing for further assembly.
Continuing panel connection with KD cams and cover caps for structural integrity.
Connecting larger desk panels using KD cams and cover caps, forming the main structure.
Completing the main structure assembly by joining panels with KD cams and cover caps.
Attaching levelers to a desk component using KD bolts, ensuring stability.
Connecting desk panels using KD cams and cover caps, forming a structural element.
Joining desk components using screws, with a focus on spacing and alignment.
Installing wire management accessories onto the desk, with optional placement considerations.
Installing grommets for cable management and noting maximum weight capacity.