Installing your gas hob
Bringing it all together
Installing your gas hob
18
If you require any technical guidance or find that your product is not operating as intended, a simple solution can often be found in the Troubleshooting section of these instructions,
I
J
Separator
Separator
F
HOB
B
D
E
T
C2
A
C
C1
H
G
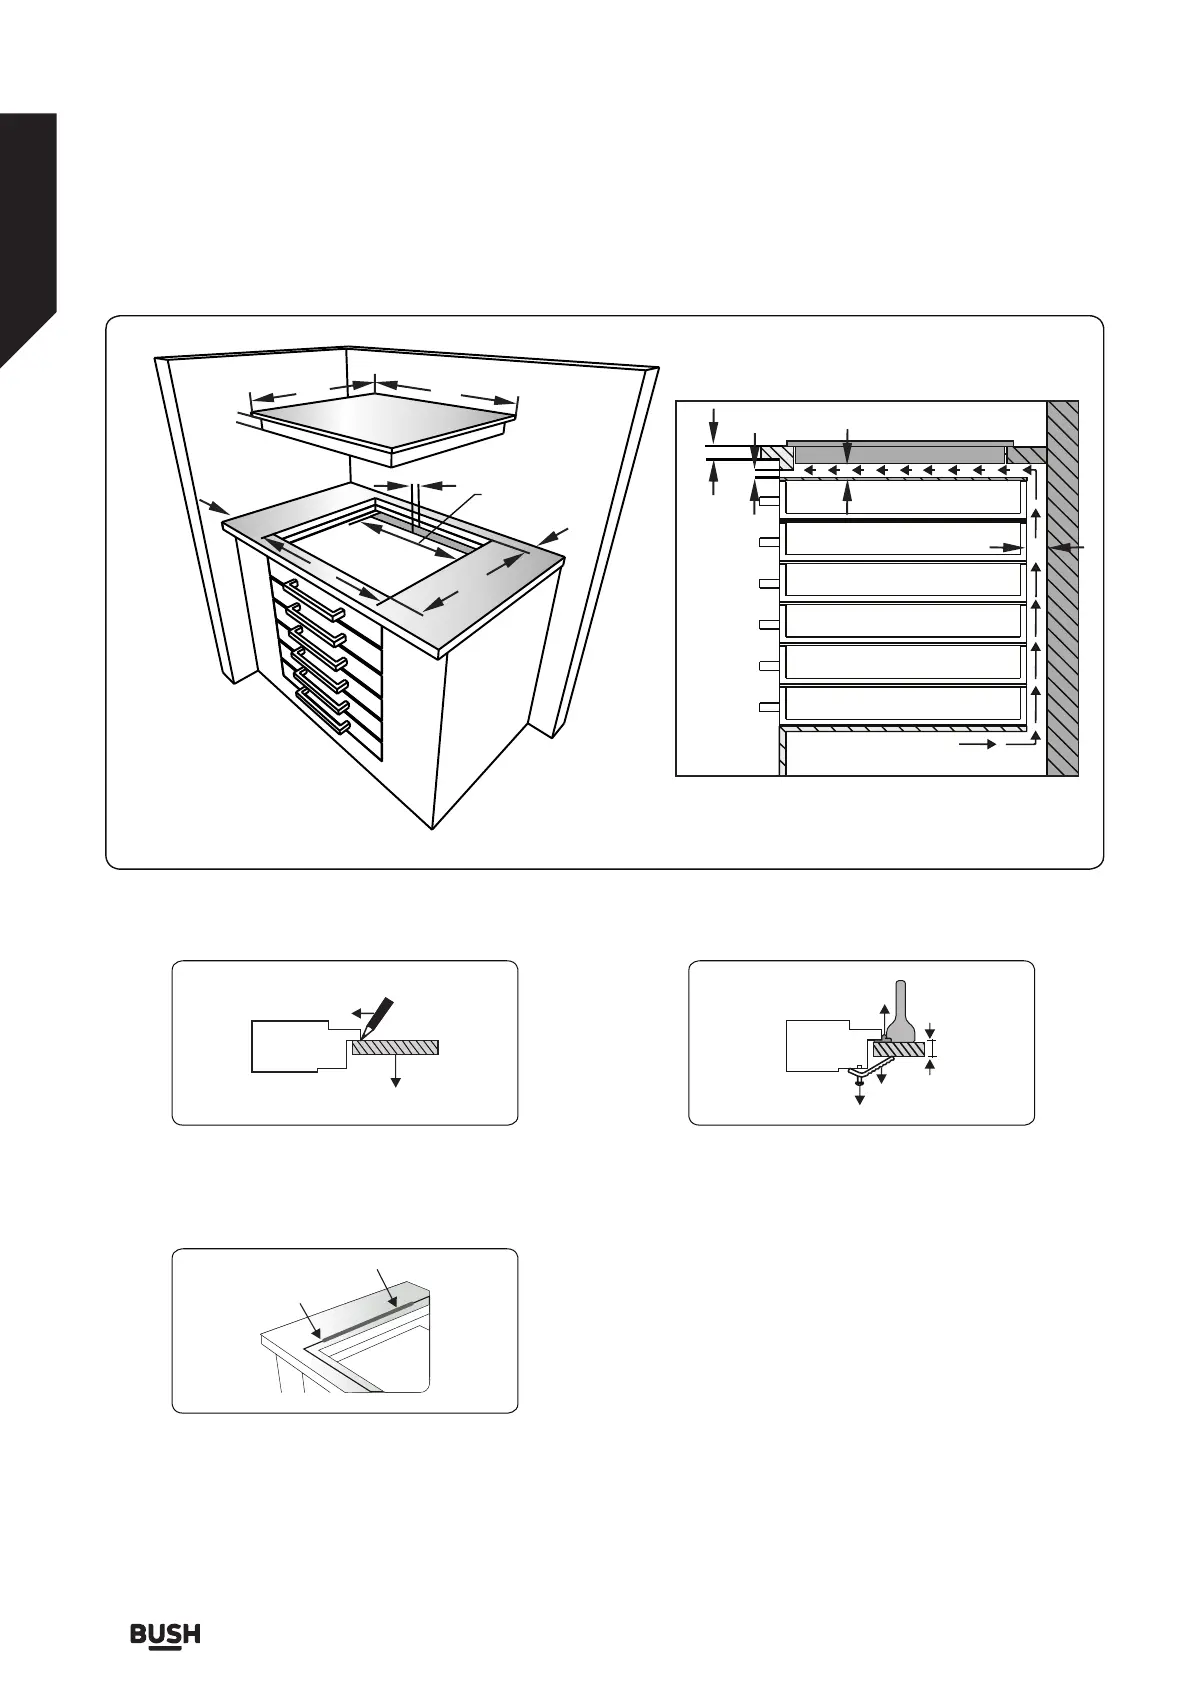
• Place the hob in the cut out. Mark the location of
the hob on the cooktop.
Worktop
Hob
Marker
• Remove the hob. Place the gasket on the line you
marked. Make sure that the line centres the gasket.
Ensure that the junctions overlap at the corners and
no gap is left along the sealing material.
Line you
marked
Gasket
• Insert the appliance into the aperture and fix in
position using the brackets (A) and screws (B). Adjust
the position of the brackets depending on the
thickness of the worktop and tighten the screws
evenly. Carefully trim away any excess sealing
material (C) from around the appliance.
A
C
B
t
t>20
mm
Gas Connection
Assembly of gas supply and leakage check
Connect the appliance in accordance with applicable
local and international standards and regulations. First,
check what type of gas is installed on the cooker.
This information is available on a sticker on the back
of the cooker. You can find the information related to
appropriate gas types and appropriate gas injectors in
the technical data table. Check that the feeding gas
pressure matches the values on the technical data
table, to be able to get the most efficient use and to
ensure the minimum gas consumption. If the pressure
of used gas is different than the values stated or is not
stable in your area, it may be necessary to assemble an