Lighng a Fire
If you are not experienced in making re, you will nd very useful
videos about the subject on YouTube. Basically: To start a re use
birch bark, feather scks, wood shavings, coon pads or similar.
Gradually add thin material unl you get a nice re. Then gradually
add thicker material. The fuel for your stove is provided for free by
Mother Nature – dry spruce twigs for example are great. Never use
wood lying on the ground as it will always be damp (except in arid
regions).
Make sure the holes in the base plate are not clogged up so the
stove can “breathe”!
Usage
The underlying principle of a hobo stove is the chimney eect. The
smaller the stove, the easier it is to destroy the eect by blocking
the air ow. Make sure you never completely cover the upper side –
otherwise the re will die and/or smoke will develop.
Also make sure your stove can “breathe“ from below. For instance if
you use a coon pad to light the EDCBox, it may clog the holes in the
base plate. The stove will then cease to funcon or will smoke. Keep
the holes in the base plate clear and you will always have a nice re.
Finally, it is important to make sure you always have enough fuel
(i.e. wood etc.) available to keep the re burning. Our stoves burn
fast and hot, so the re will die fast if you do not connuously add
new material. Prepare a sucient supply of material before you
start the re or use longer branches which can be fed through the
aperture (be careful when using this method, burning material may
fall out and start a wildre).
Mul-Fuel
The Bushbox can be operated with many fuels – wood, a standard
Trangia burner, esbit/hexamine tablets (use the special base plate
posion or turn the Bushbox upside down), gel fuel cans, wood pel
-
lets, charcoal, dry animal dung etc.
Care/Maintenance
Our stoves are high quality products, designed to accompany you
for a very long me. Although they need almost no care and main
-
tenance, you should keep the stove free from dirt and clean it from
me to me.
Welcome to the Bushbox and the EDCBox
Thank you for purchasing one of our mul-fuel hobo stoves. We hope
you enjoy this high quality product, enrely made in Germany from
stainless steel (or tanium). If it comes with a few scratches from
producon: We do not polish our products to avoid water polluon
and health risks.
To make your stove a lasng experience, there are a few things
to consider:
Tips & Tricks
You will nd a growing number of great videos from users of our
stoves on YouTube and Facebook. Even if these are not in your lan
-
guage, they will give you a few hints about how to use a hobo stove.
You can nd more videos and informaon here:
• www.facebook.com/BushcraEssenals
• www.youtube.com/user/bushcraessenals
We look forward to your videos and feedback!
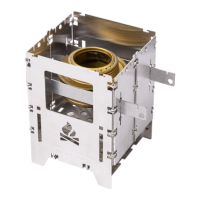
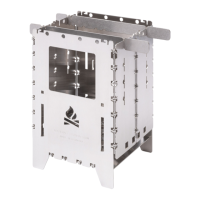
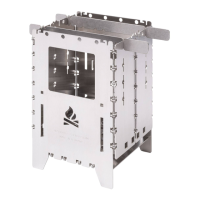
Bushbox Assembly
1. Aach the two longer side plates to the rear plate (small plate
without opening).
2. Slide the base plate and the ash tray into the grooves of the
longer side plates (perforated base plate at the top,
ash tray below).
3. Click the front plate (the one with the aperture) into place.
4. Use trivets if necessary – you can apply them in two dierent
posions: In the rst posion they are even with the
edge of the Bushbox – best posion for the stability
of small cups. If used reverted, the trivets will surmount the
edges – ideal for larger pots or pans (which would otherwise
cover the Bushbox and thus cause smoke).
Bushbox Disassembly
1. Let the Bushbox cool down (otherwise the parts will jam)!
2. Grab the short side plates at the top and push the top gently
outside to overcome the lile hooks which lock the
plates in place.
3. Pull the short side plates upwards.
EDCBox Assembly
1. Connect the three idencal side plates.
2. Insert the base plate with the smaller ear facing forward.
3. Aach the front plate (with aperture) and lock it by pushing
upwards. Slide the base plate forward if necessary to snap
the ear into the front plate.
4. Aach trivets.
 Loading...