EasyManua.ls Logo

Bushnell Pro 1600 - User Manual

Bushnell Pro 1600
12 pages
Print Icon
To Next Page IconTo Next Page
Loading...
A
Model: 205105/205106
Lit. #: 98-1342/12-08
Question and Answer IconNeed help?

Do you have a question about the Bushnell Pro 1600 and is the answer not in the manual?

Summary

INTRODUCTION AND TECHNOLOGY

RANGING ACCURACY

Factors affecting distance measurement precision and range.

HOW OUR DIGITAL TECHNOLOGY WORKS

Explains laser pulse and digital processing for distance calculation.

GETTING STARTED

INSERTING THE BATTERY

Instructions for installing the power source and identifying low battery status.

ADJUSTING THE EYEPIECE

Guide to adjusting the eyepiece for comfortable and clear viewing.

OPERATION AND DISPLAY

OPERATIONAL SUMMARY

Steps for using the rangefinder and understanding its basic functions.

LIQUID CRYSTAL DISPLAY (LCD) INDICATORS

Explains the various symbols and information shown on the LCD.

MODES AND SETTINGS

SELECTIVE TARGETING MODES

Overview of modes to adjust performance for specific situations.

PinSeeker

Mode for accurate flag acquisition, avoiding background targets.

UNIT OF MEASURE OPTIONS

How to switch between yards and meters for distance readings.

SLOPE FUNCTIONALITY

PinSeeker with Slope +;-

Calculates angle compensated range based on slope and distance.

How to use Slope +;-

Step-by-step guide to using the Slope +/- mode for measurement.

OPTICAL DESIGN AND FEATURES

Standard with Automatic SCAN

Setting for ranging up to 1600 yards with continuous updates.

OPTICAL DESIGN

Details on 7x magnification, multi-coated optics, and LCD display.

RainGuard HD

Explanation of water-repellent lens coating for clear vision.

SPECIFICATIONS AND ACCESSORIES

SPECIFICATIONS

Key technical details of the rangefinder, including dimensions and range.

ACCESSORIES

Mentions golf cart mount and monopod accessories.

MAINTENANCE AND WARRANTY

CLEANING

Instructions for cleaning lenses gently and effectively.

TWO-YEAR LIMITED WARRANTY

Details of the two-year warranty terms and conditions.

Overview

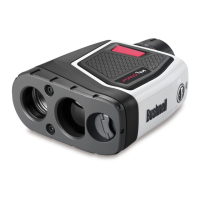
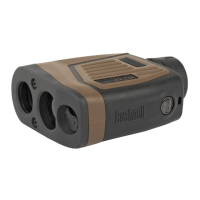
The Bushnell Pro™ 1600 Laser Rangefinder is a premium optical instrument designed for golfers, offering advanced digital technology for accurate distance measurements. It is recognized as a top-of-the-line laser rangefinder, utilized by many golf professionals.

Function Description:

The Pro™ 1600 emits invisible, eye-safe infrared energy pulses to instantaneously calculate distances by measuring the time it takes for each pulse to travel from the rangefinder to the target and back. This allows for precise range readings from 5 to 1600 yards (5 to 1463 meters). The device features Selective Targeting™ Modes, superb optical quality, 100% waterproof construction, and Bushnell's RainGuard® HD coating.

Important Technical Specifications:

  • Dimensions: 1.7 x 5.1 x 3.7 inches
  • Weight: 12 oz.
  • Ranging Accuracy: +/- 1 yard/meter under most circumstances.
  • Range: 5-1600 yards / 5-1463 meters. Maximum range depends on target reflectivity (1000 yards/914 meters for most objects, 1600 yards/1463 meters for highly reflective objects).
  • Magnification: 7x
  • Objective Diameter: 26 mm
  • Optical Coatings: Fully Multi-Coated for optimum brightness, superb resolution, and contrast.
  • Display: Liquid Crystal Display (LCD) with illuminated indicators for unit of measure, active laser, target acquisition, and targeting modes.
  • Power Source: 9-volt alkaline battery (user supplied).
  • Field Of View: 340 ft. @ 1000 yards
  • Extra Long Eye Relief: 19mm
  • Exit Pupil: 3.7 mm
  • Construction: 100% Waterproof, Rubber Armored.
  • Lens Coating: RainGuard® HD.
  • Mounting: Built-In Tripod Mount.
  • Model 205106 (Slope Edition): Features a built-in accelerometer-based inclinometer that digitally displays slope angle from -20 to +20 degrees (accurate to +/- 1.0 degree) and automatically computes angle-compensated range.

Usage Features:

Battery Insertion:

To insert the battery, slide the door outward, then open the hinged door. Insert one 9-volt alkaline battery into the slot, ensuring correct orientation. Close the battery door and slide it until it locks into place. Only high-quality alkaline batteries should be used; heavy-duty or lithium batteries are not recommended. The battery should be replaced at least once every 12 months. A "loB" display or continuously blinking Y (Yards) or M (Meters) indicator signifies a low battery.

Eyepiece Adjustment:

The Pro™ 1600 has a twist-up eyepiece for comfort and to exclude extraneous light. For users without eyeglasses, rotate the eyecup counter-clockwise and pull up until it locks in the "up" position. For users with eyeglasses, ensure the eyecup is in the down position for a full field of view. The eyecup can also be set to intermediate positions. The adjustable eyepiece (+/- 2 Diopter Adjustment) allows focusing the LCD display relative to the image by rotating the diopter setting.

Operational Summary:

  1. Activation: Look through the 7x eyepiece and depress the power button once to activate the LCD.
  2. Targeting: Place the aiming circle (center of the field of view) on a target at least 5 yards away.
  3. Ranging: Depress and hold the power button until the range reading is displayed. Crosshairs around the aiming circle indicate laser transmission. Release the power button once a range is acquired; the crosshairs will disappear.
  4. LCD Display: The LCD remains active for 30 seconds, displaying the last distance measurement. The power button can be pressed again to range a new target.
  5. Laser Transmission Limit: The laser transmits for a maximum of 10 seconds per firing.

LCD Indicators:

The LCD provides illuminated indicators for:

  • Unit of measure (Yards/Meters).
  • Active laser transmission (crosshairs around aiming circle).
  • Target acquisition.
  • Targeting modes.

Unit of Measure Options:

To switch between yards and meters:

  1. Quickly press and release the POWER button to turn on the unit.
  2. Look through the eyepiece.
  3. Depress and hold the "MODE" button (left side of the eyepiece) for approximately 5 seconds. The unit will indicate the change (M for meters, Y for yards) and will default to the last used setting upon subsequent power-ons.

Selective Targeting™ Modes:

The Pro™ 1600 offers different targeting modes tailored for golfers:

  1. PinSeeker (LCD Indicator: Flag icon): This mode facilitates easy acquisition of the flag without inadvertently ranging background targets (e.g., trees) with stronger signal strength. To use:

    • Turn on the unit by pressing the POWER button.
    • Align the aiming circle reticle onto the flag.
    • Press and hold the POWER button, moving the laser slowly over the flag until a circle surrounds the flag indicator.
    • If multiple objects are recognized, the distance to the closer object (flag) will be displayed, and a circle will surround the PinSeeker indicator. If only one object is seen, the distance will be displayed without a surrounding circle.
    • Tip: While holding the POWER button, slowly move the device from object to object to ensure the closest object is displayed.
    • The unit defaults to the last used mode after shutting off.
  2. PinSeeker with Slope +/-™ (LCD Indicator: ▷ - Model 205106 only): This mode incorporates a built-in inclinometer to measure slope angle and compute an angle-compensated range.

    • To use:
      • Press the POWER button to obtain the distance to the flag or other objects.
      • Once the range is displayed, continue to hold the POWER button for approximately 2 seconds while keeping the aiming circle on the flag and the unit steady to allow the inclinometer to measure slope.
      • Release the POWER button. The degree of angle and compensated range ("Play-As" distance) will be displayed beneath the standard distance.
    • This mode also includes the PinSeeker® feature. If slope compensation is not desired, press the MODE button to switch to PinSeeker® or Standard with Automatic SCAN Mode.
  3. Standard with Automatic SCAN: This mode allows ranging targets up to 1600 yards, suitable for moderately reflective targets. The minimum distance is 5 yards.

    • To use the Automatic SCAN feature, hold down the POWER button for approximately 3 seconds and SCAN the rangefinder from object to object. The range and display will continuously update rapidly as multiple objects are targeted.

Tripod Mount:

The unit features a threaded tripod mount on the bottom, allowing attachment to Bushnell Golf Accessories such as the Golf Cart Mount or Push/Pull Cart Monopod for enhanced stability and convenience.

Maintenance Features:

Cleaning:

  • Gently blow away any dust or debris from the lenses, or use a soft lens brush.
  • To remove dirt or fingerprints, use a soft cotton cloth and rub in a circular motion. Avoid coarse cloths or unnecessary rubbing to prevent scratching the lens surface.
  • For thorough cleaning, use photographic lens tissue and photographic-type lens cleaning fluid or isopropyl alcohol. Always apply the fluid to the cleaning cloth, never directly on the lens.

RainGuard® HD Coating:

The outer surfaces of the objective and eyepiece lenses are treated with RainGuard® HD, a permanent, patented, hydrophobic coating. This repels water, causing condensation from rain, sleet, snow, or breath to bead into smaller, uniform droplets. These smaller droplets scatter less light, resulting in a clearer, brighter view in adverse weather conditions.

Bushnell Pro 1600 Specifications

General IconGeneral
BrandBushnell
ModelPro 1600
CategoryMeasuring Instruments
LanguageEnglish

Related product manuals