Vehicle Care 10-71
See Roadside Service (U.S.
and Canada) on page 13‑7 or
Roadside Service (Mexico) on
page 13‑9.
If the tire pressure has not
dropped more than 68 kPa
(10 psi) from the recommended
inflation pressure, inflate the
tire to the recommended
inflation pressure.
19. Wipe off any sealant from the
wheel, tire or vehicle.
20. Dispose of the used tire
sealant canister (B) and
sealant/air hose (G) assembly
at a local dealer or in
accordance with local
regulations and practices.
21. Replace it with a new canister
available from your dealer.
22. After temporarily sealing a tire
using the tire sealant and
compressor kit, take the
vehicle to an authorized dealer
within a 161 km (100 mi) of
driving to have the tire repaired
or replaced.
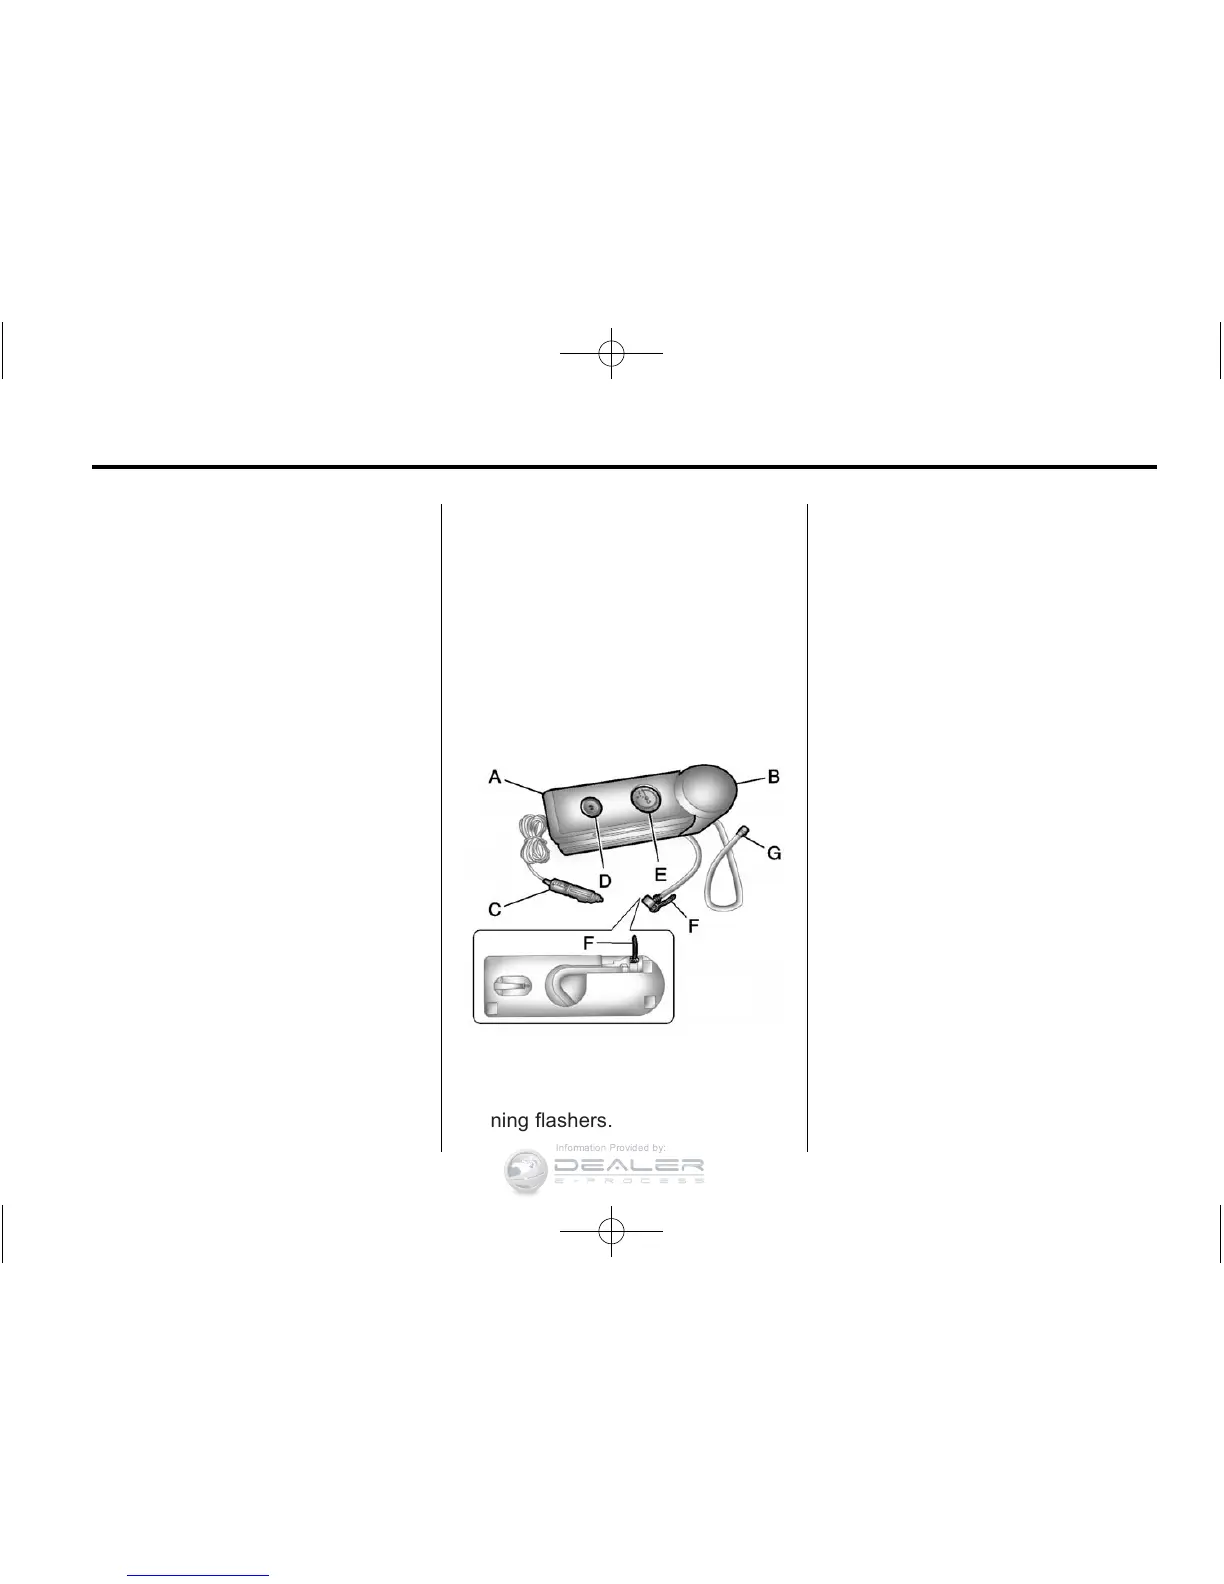
Using the Tire Sealant and
Compressor Kit without
Sealant to Inflate a Tire (Not
Punctured)
To use the air compressor to inflate
a tire with air only and not sealant:
If a tire goes flat, avoid further tire
and wheel damage by driving slowly
to a level place. Turn on the hazard
warning flashers.
See If a Tire Goes Flat on
page 10‑65 for other important
safety warnings.
1. Remove the tire sealant and
compressor kit from its storage
location. See Storing the Tire
Sealant and Compressor Kit on
page 10‑73.
2. Unlock the air only hose (F) from
the tire sealant canister (B) by
pulling up on the lever.
3. Pull the air only hose (F) from
the tire sealant canister (B).
4. Remove the power plug (C) from
the air compressor (A).
5. Place the kit on the ground.
Make sure the tire valve stem is
positioned close to the ground
so the hose will reach it.
6. Remove the tire valve stem cap
by turning it counterclockwise.
7. Attach the air only hose (F) onto
the tire valve stem and press the
lever down to secure it.
 Loading...