EasyManua.ls Logo

CAL Double-Bolt Lock User Manual

CAL Double-Bolt Lock
6 pages
To Next Page IconTo Next Page
Page #1 background imageLoading...
Page #1 background image
*
ATTENTION:
Read
complete
instructions
thoroughly
before
drilling
and
installing
any
parts
of
the
CAL
"
Double
-
Bolt
"
locking
system
The
Latch
for
this
system
is
designed
for
use
in
standard
door
frames
(
Jamb
)
.
"
Checking
the
Latch
"
The
latch
is
the
most
important
component
to
the
CAL
"
Double
-
Bolt
"
system.
Before
you
install
any
part
of
the
system
to
your
door
jamb
or
door,
make
sure
the
latch
correctly
fits
your
door
jam
depth.
The
latch
must
fit
perfectly
in
the
door
jamb
in
relationship
to
the
height
of
the
latch
and
the
depth
of
the
door
jamb.
Check
the
depth
of
door
jamb
by
inserting
latch
into
the
door
jamb.
The
flat
drilled
section
of
the
latch
should
fit
flat
to
the
back
of
the
doorjamb.
The
leading
edge
of
the
latch
must
overlap
the
interior
wall
of
the
doorjamb
frame.
If
the
doorjamb
is
slightly
deeper
than
the
height
of
the
latch,
place
spacers
on
back
of
latch
and
re
-
check
depth.
Question and Answer IconNeed help?

Do you have a question about the CAL Double-Bolt Lock and is the answer not in the manual?

CAL Double-Bolt Lock Specifications

General IconGeneral
BrandCAL
ModelDouble-Bolt Lock
CategoryLocks
LanguageEnglish

Summary

Installing the LATCH

Open Sliding Door

Prepare the sliding door by opening it to its fully opened position.

Position Latch

Determine the optimal height for the latch installation, considering child safety.

Install Latch

Mount the latch into the door jamb, using spacers if necessary for proper fit.

Close Door

Check if the door closes correctly over the installed latch without forcing.

Installing the CAL Double-Bolt Lock Assembly

Close Door

Ensure the door is closed correctly after latch adjustment.

Position the Lock Assembly

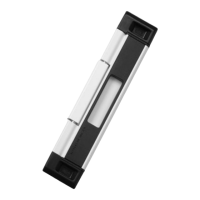
Align the lock assembly with the latch so sliding pins engage correctly.

Close Lock

Engage the top and bottom sliding bolts into the latch mechanism.

Install Lock Assembly

Securely mount the main lock body to the door frame using screws.

Install Cover Plate

Attach the standard cover plate by snapping it into place over the lock body.

Install Handle (optional)

Install the optional inside handle using the provided screws.

Install Exterior Handle (optional)

Mount the optional exterior handle at a convenient height.

Warranty and Service

Troubleshooting

Resolve issues with the original lock not locking correctly by adjusting latch height.

Warranty

Details CAL's five-year warranty against manufacturing defects for the lock system.

Service

Proper cleaning and lubrication instructions for the lock surface and pins.