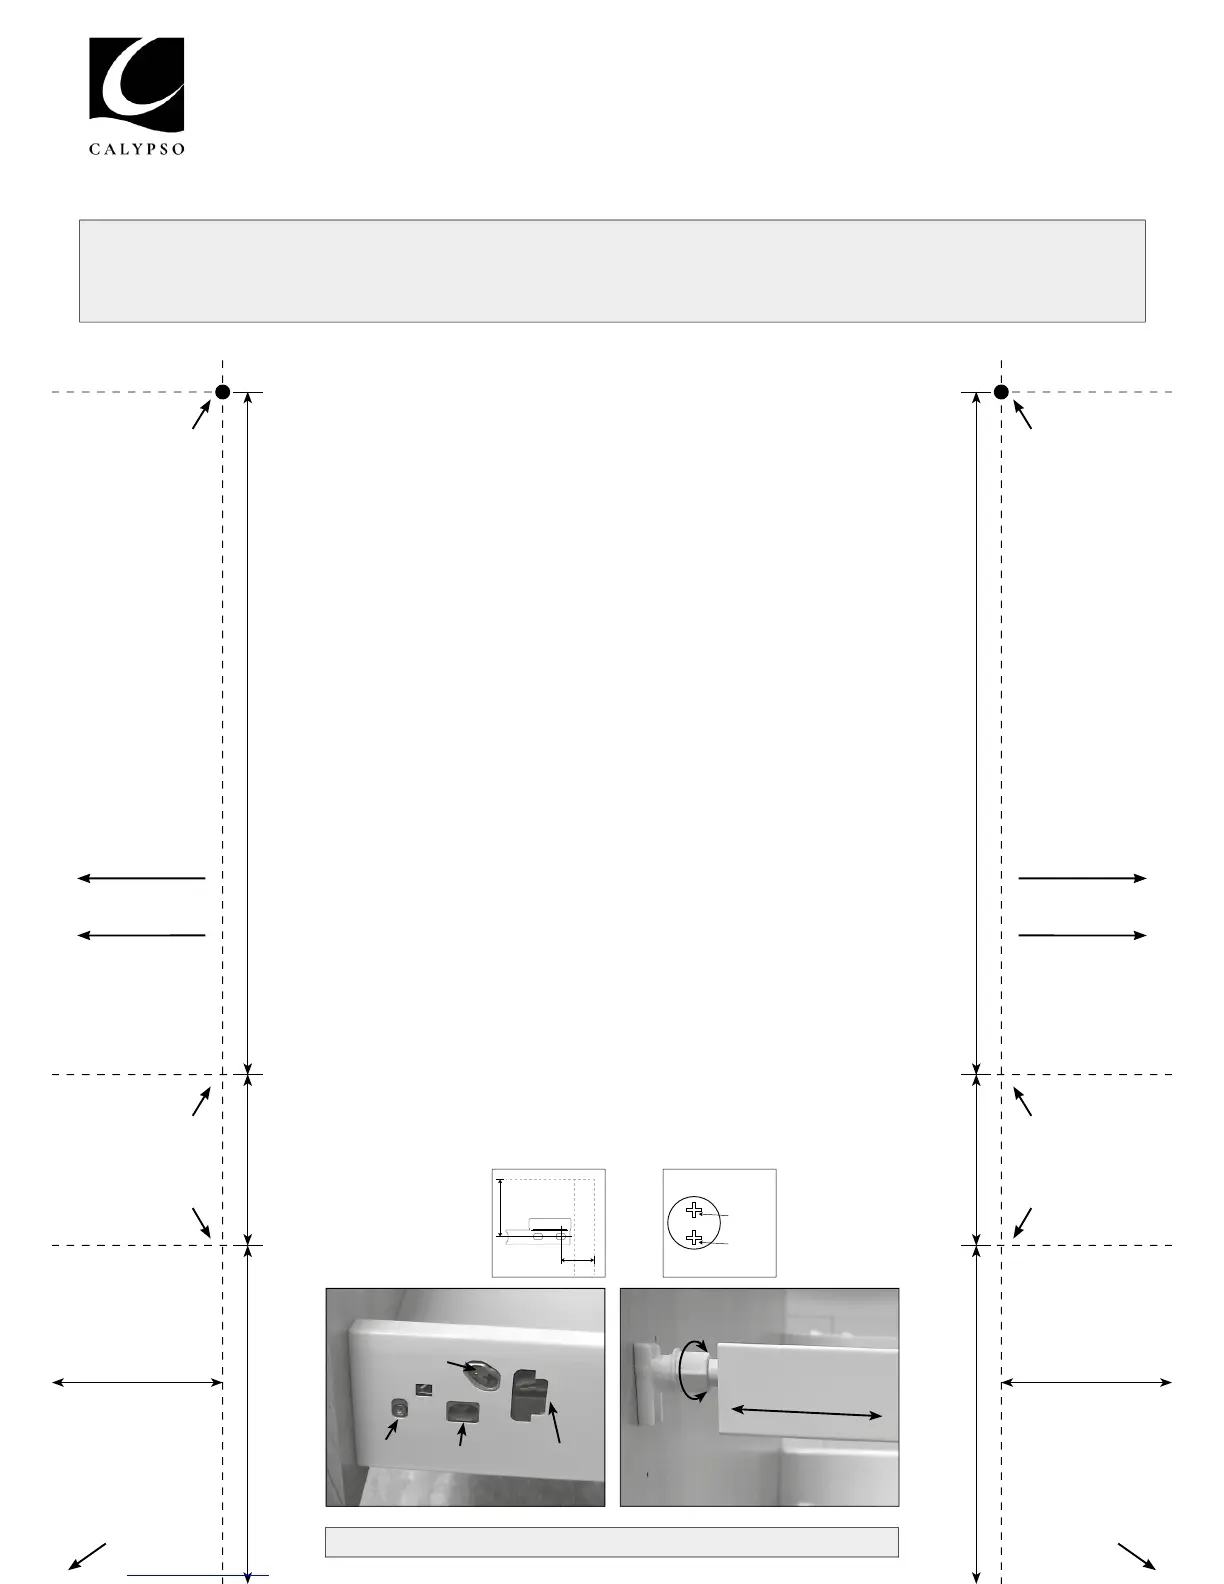
1. Remove drawer from unit by removing ‘CALYPSO’ badge from drawer box sides, lift the
release lever ‘E’ and slide drawer forward to remove.
2. Mark desired position of unit on the wall and mark top of carcass position (NB - The
standard fi xing height is 811mm from fl oor to top of carcass.
3. Fit wall plate to wall using fi xings suitable for wall substrate. FIG1. Brown plugs and 60mm
screws are supplied for use where wall substrate is suitable.
4. Hang unit on wall hangers and adjust for height and level then pull tight to wall - FIG2.
5. Fix basin to carcass side walls with silicone and plumb in tap and waste.
6. Mark and Drill rear of fascia using drill guide provided on these instructions.
NB. DO NOT USE THE PIN PRICK POSITIONS ALREADY ON THE FASCIA.
Place this paper template this side up onto the bottom rear corners of the fascia and drill small
pilot holes through the paper over the ‘x’ marks and a 10mm diameter by 12mm
deep hole at the ‘
•
’ marks.
7. Remove template paper and attach Alloy fascia brackets and Gallery Rail attachment from
drawer system to fascia.
8. Check runners are clear from dust and push drawer back onto the runners.
9. The fascia is adjustable:
• Left/Right - via adjustment ‘A’ (found on the right hand side only)
• Up/Down - via adjustment ‘B’
• In/Out - slide the sleeve ‘C’ back and rotate the adjuster ‘D’ to tilt the fascia.
10. Ensure basin and unit are adequately sealed with silicone to prevent water ingress to carcass material.
NB. To remove drawer fascia from drawer box, unclip the Gallery Rail and turn ‘F’ on both sides.
x
x
Bottom
left rear corner
of fascia
Bottom Right
rear corner of
fascia
Rear left side
of fascia
Rear Right side
of fascia
Drawer fascia
attachment
Drawer fascia
attachment
Gallery Rail
attachment to
fascia 10mm ø x
12mm deep
Gallery Rail
attachment to
fascia 10mm ø x
12mm deep
32mm 32mm
63.5mm
63.5mm
32mm
32mm
128mm
128mm
PLEASE NOTE:
Only use the drilling guide on this fi tting instruction. The pilot holes on the reverse of the fascia are for alternative units.
Do Not Scale
C.
E.
F.
D.
A.
B.
How to fi t
x
x
FIG2.FIG1.
Lock Screw
Up/Down
35mm
Carcass Top
Carcass Side
30mm
FITTING INSTRUCTIONS • MFI
CALYPSO MODENA BATHROOM FURNITURE
 Loading...