Do you have a question about the Candy Alise 081 and is the answer not in the manual?
Lists all included accessories and documentation provided with the appliance.
Instructions to mail the guarantee coupon and keep the sales receipt for service.
Safety precautions to take before cleaning or maintenance work.
Warning about high water temperatures during the wash cycle.
Avoid using adaptors or multiple plugs for electrical connections.
Do not expose the appliance to atmospheric agents like rain or sun.
Do not lift the machine by its knobs or detergent drawer when moving.
Ensure bottom vents are not obstructed by carpets or other objects.
Always lift the appliance with two people.
Turn off, close water, and contact service for malfunctions.
Details on load capacity, water levels, power, energy consumption, spin speed, and voltage.
Position the machine near its final location, removing the packaging base.
Cut the tube-holding straps attached to the machine.
Remove the back panel by unscrewing two screws.
Remove the left, right, and lower brackets by unscrewing screws.
Remount the back panel and secure it with screws.
Cover the six holes with the provided caps.
Keep packaging elements away from children as they pose a risk.
Connect the water inlet hose to the tap.
Do not turn on the water tap yet.
Position the machine near the wall, ensuring the discharge hose is not kinked.
Connect the discharge hose to a fixed drain or outlet.
Apply the adhesive label in the appropriate language to the detergent drawer flap.
Level the machine using the front adjustable feet.
Ensure the ON/OFF button is not pressed before proceeding.
Ensure all knobs are on '0' and the door is closed.
Plug the appliance into the power socket.
Press the ON/OFF button to activate the power indicator light.
The compartment for adding detergent and other cleaning agents.
Button used to open the appliance door.
Button to turn the appliance on or off.
Button to select a reduced water level for smaller loads.
Light indicating the appliance is powered on.
Knob to select and set the drying time for programmes.
Knob used to select the desired wash programme.
Light indicating that the drying cycle is in progress.
A flap, likely related to the detergent drawer or controls.
Safety device prevents immediate door opening at cycle end.
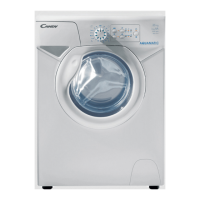
Select reduced water level for small loads; avoid for wool and delicate items.
Light indicating the appliance is powered on.
Knob to set drying time; never turn anti-clockwise; can stop drying.
Knob to select wash programmes; always rotate clockwise; select program before starting.
Light indicating that the drying cycle is in progress.
The detergent drawer has four compartments for different agents.
Use the special container for liquid detergent inside the drawer.
Warning: Use the special container for difficult-to-evacuate detergents.
Only use liquid products in the third and fourth detergent drawer compartments.
Cycle alternates washing/soaking for very delicate fabrics like pure wool.
Check for metal objects, closed zippers, tied belts, and read garment labels.
Do not dry wool, padded items, delicate fabrics; reduce load for 'wash-and-iron' items.
Do not spin heavy items; avoid drying fraying fabrics or those with deep pile.
Wash woolens and lingerie only if labels indicate 'machine washable'.
Programs for heavily soiled cotton, linen, and underwear.
Programs for cotton and linen items, including rapid wash.
Programs for cotton items, including colored and moderately soiled.
Programs for mixed fabrics, synthetics, and cotton blends.
Programs for cotton, mixed fabrics, and synthetics, including universal wash.
Programs for delicate synthetics and mixed delicate fabrics.
Programs for very delicate fabrics like woolens, including special wool wash.
Programs for mixed delicate synthetics and wool, including non-spin options.
Notes on load limits, stopping the machine, and using bleach.
Advice on choosing the right detergent for optimal wash results.
Guide for washing heavily soiled cotton, including stain removal with bleach.
Advised not to wash only terry towelling items due to excessive weight.
Load limits: 5 kg for resistant, 2 kg for delicate, 1 kg for pure new wool.
Refer to the washing program table for specific advice.
Open the appliance door using the designated button.
Load the drum with a maximum of 5 kg of dry laundry.
Close the appliance door securely.
Ensure the ON/OFF button is not pressed when selecting a programme.
Select wash programme by rotating the knob clockwise to the desired number.
Open the detergent drawer to add cleaning agents.
Add approximately 60g of detergent to the pre-wash compartment.
Add approximately 60g of detergent to the main wash compartment.
Add approximately 100cc of bleach to the bleach compartment.
Add approximately 50cc of additive to the additives compartment if needed.
Close the detergent drawer securely.
Ensure the water inlet tap is turned on.
Ensure the discharge tube is correctly positioned.
Ensure the drying control knob is on "0" to avoid unintended drying.
Press the start button; the operating light will illuminate.
The machine will proceed with the selected wash programme.
Press the ON/OFF button at the end of the cycle to turn off the indicator light.
Open the door and remove the washed laundry.
Never dry garments made of foam rubber or flammable materials.
Only dry laundry that has been washed and spin-dried.
General drying indications require practice for best results; set lower times initially.
Avoid drying fraying fabrics or those with deep pile to prevent air duct clogging.
Never open the door during drying; wait for the cooling phase to complete.
Only laundry that has already been spin-dried can be dried.
The machine can perform two types of drying for different fabric categories.
Drying for cotton, terry towelling, linen, and hemp fabrics.
Drying for mixed fabrics (synthetics/cotton) and synthetic fabrics.
Example: Drying cotton sheets, towelling, linen, and hemp fabrics.
Recommendations for loading and selecting drying programs.
Open the appliance door to load laundry for drying.
Load maximum 2.5 kg of dry laundry; reduce load for large or absorbent items.
Close the appliance door securely.
Set the programme control knob (L) to the desired setting.
Set drying knob for 'ready to hang' (7-8) or 'ready to iron' (6-7).
Appliance door has a protective shield against high temperatures.
Warning: Do not touch the door at any time during operation.
Ensure the water tap is open.
Ensure the discharge hose is correctly positioned.
Do not dry wool, padded items, delicate fabrics; reduce load for 'wash-and-iron' items.
Press the start button to begin the drying cycle.
The operating indicator lights (G-N) will illuminate.
The drying knob will rotate automatically to the end of the preset program.
Drying occurs with the program knob stationary, then moves to "STOP".
Press the stop button (C) to end the drying cycle.
The operating indicator lights (G-N) will turn off.
Open the door and remove the dried laundry.
Table listing fabric types and their corresponding drying programs.
Specifies the maximum load capacity in kg for each fabric type.
Indicates the programme knob setting for each fabric type.
Drying knob settings for clothes to be hung directly.
Drying knob settings for clothes that need ironing.
Do not dry wool or padded items; reduce load for drip/dry garments to prevent creasing.
The complete automatic wash/dry cycle can only be run with 2.5 kg of dry laundry.
Refer to wash and dry program lists, prepare laundry, and select programs.
The machine will execute the full program until the control knob turns to "STOP".
Steps to follow after the automatic wash/dry cycle is completed.
Press the stop button (C) to end the automatic cycle.
The operating indicator lights (G-N) will turn off.
Open the door and remove the washed and dried laundry.
Clean the exterior with a damp cloth only; avoid abrasives, spirits, or diluents.
The washing machine requires minimal maintenance.
Instructions for cleaning the detergent and additive compartments.
Instructions for cleaning the drain pump filter.
Procedures for moving the machine or long periods of inactivity.
How to remove and clean the detergent drawer compartments.
Step-by-step guide to cleaning the drain pump filter.
Procedures for draining hoses when moving or for long periods of inactivity.
Troubleshooting for no operation on any program, checking power and plug.
Troubleshooting for no water supply, checking tap, timer, and inlet valve.
Troubleshooting for water not discharging, checking hose, filter, and pump.
Troubleshooting for water leakage around the machine, checking seals and connections.
Troubleshooting for the machine not spinning, checking load balance and settings.
Troubleshooting for strong vibrations during spin, checking leveling and transport brackets.
Notes on environment-friendly detergents and troubleshooting common issues.