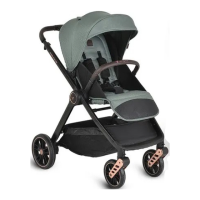
8. ACCESSORIES SECTION – SEE FIGURE 15: Attention! Do not place luggage heavier than 2.5 kg in the accessory
compartment. he cart has an accessory compartment.
9. INSTALLING THE SEAT – SEE FIGURES 16,17,18 AND 19: Take the seat, place it in the centre of the frame and press
until you hear a click (Pictures 16 and 17). Unfold the stroller; lock the safety board until it clicks (Picture 18). To adjust the
seat position, press the button as shown in Picture 19.
10. FIXING THE FRONT WHEELS - SEE FIGURE 20: The front wheels can rotate 360 °. Press the button above the wheels to
lock them in one direction only (Picture 20).
11. REMOVING THE FRONT WHEELS- SEE FIGURE 22: To remove the front wheels, press the buttons on either side of the
front axle, as shown in Picture 22.
12. REMOVING THE REAR WHEELS – SEE FIGURE 23: To remove the rear wheels, press the buttons on either side of the
rear axle, as shown in Picture 23.
13. INSTALLING THE CANOPY - SEE FIGURES 24, 25 AND 26/31 AND 34: Take the canopy and place it parallel to the seat.
The two plastic ends should fit into the points parallel to the seat. To remove the canopy, push the buttons on both sides
of the backrest and lift it (Pictures 24, 25 and 26). Adjust the canopy in the desired position (Pictures 33 and 34).
14. FOOTREST– SEE FIGURE 26: The footrest has 2 levels. To change the level, push the handle under the footrest and
place it in the position you want (Picture 26).
15. INSTALLING THE CAR SEAT– SEE FIGURES 27,28 AND 29: Insert the car seat as shown in Picture 27 until you hear a
click. To remove the seat from inside the stroller, press the two buttons on either side (Pictures 28 and 29).
16. ASSEMBLY THE CARRYCOT - SEE FIGURES 30 AND 31: Put the carrycot on the ground. As shown in Picture 30, there
are two metal stripes that must be secured to the carrycot. Secure the adapter to both sides of the basket (Picture 31).
17. INSTALLING THE CARRYCOT ON THE FRAME – SEE FIGURES 32,33 AND 34:Take the carrycot facing you and place it on
the stroller frame until you hear a click (Pictures 32 and 33). This means that you have fixed it correctly. To remove the
carrycot from the frame, push the two buttons on both sides of the frame and pull it up (Picture 34).
18. ADJUSTING THE CANOPY OF THE CARRYCOT - SEE FIGURES 35 AND 36:Press the two buttons on the inside of the
canopy simultaneously and adjust the canopy to your preferred position (Picture 35). As shown in Picture 36, pull the
additional visor forward.
19. CLOSING THE CARRYCOT – SEE FIGURES 37 AND 38: To close the carrycot, follow the steps in reverse (Picture 37).
Fold the adapter (Picture 38).
20. FOLDING THE STROLLER – SEE FIGURES 39-45: Remove the guard board by pressing the buttons on both ends. Then
press the button on the back of the seat (Pictures 39, 40 and 41). To fold the frame, press the two knobs on the handle
and press down (Pictures 42 and 43). To fully fold the stroller, press the two plastic guards at the same time (Picture 44).
To complete folding, use the locking mechanism for greater security (Picture 45).
18
CLEANING AND MAINTENANCE OF THE PRODUCT
1. Regularly check the locking devices, brakes, safety belts and buckles, connectors and fixing mechanisms in order to be
sure that they are in good working order and are not worn or damaged.
2. If you find loose, broken and damaged parts, they should be repaired by an authorized service or replaced with original
parts. Otherwise the warranty of the stroller will be annulled.
3. Do not make modifications on the construction and do not replace the work parts with ones that are поt suitable and
are not original. This may lead to incorrect functioning of the stroller and to injury of your child. And also to annulment of
your warranty of the stroller.
4. In order to clean the cover, the dirty plastic and metal parts of the product, use soft cotton cloth or sponge, wetted
with water.
5. Never clean with agents containing abrasive particles, ammonia, bleach or alcohol. DO NOT wash in the laundry the
removable and accessories – parts and accessories – canopy, etc., because this may lead to their damage. Otherwise the
warranty will be annulled.
6. Always after cleaning leave the stroller to dry completely and afterwards use it or store it.
7. Store the stroller indoors. The effects of the environment – sea air, roads sprinkled with salt, acid rains, etc., as well as
the storage outdoors lead to the emergence of corrosion.
8. Do not store the stroller in a humid environment. In case you have used the stroller in a humid environment, you
should unfold it, wipe it with a dry cloth and let it dry completely naturally. It is possible for mold to appear, if you store it
while wet.
9. Too much sunlight will affect the aging of the stroller parts and the fabric.
10. Do NOT place other objects inside the stroller – luggage , bags with goods, handbags etc. when you use it or storage it,
because this could damage the stroller and may lead to harm your child inside of it.
Not following this instruction will lead to guarantee cancel.
MADE FOR CANGAROO
Importer: Moni Trade LTD
Address: 1 Dolo str., Trebich,
Sofia, Bulgaria
Tel.:+359 2/ 936 07 90 www.cangaroo-bg.com
 Loading...