3
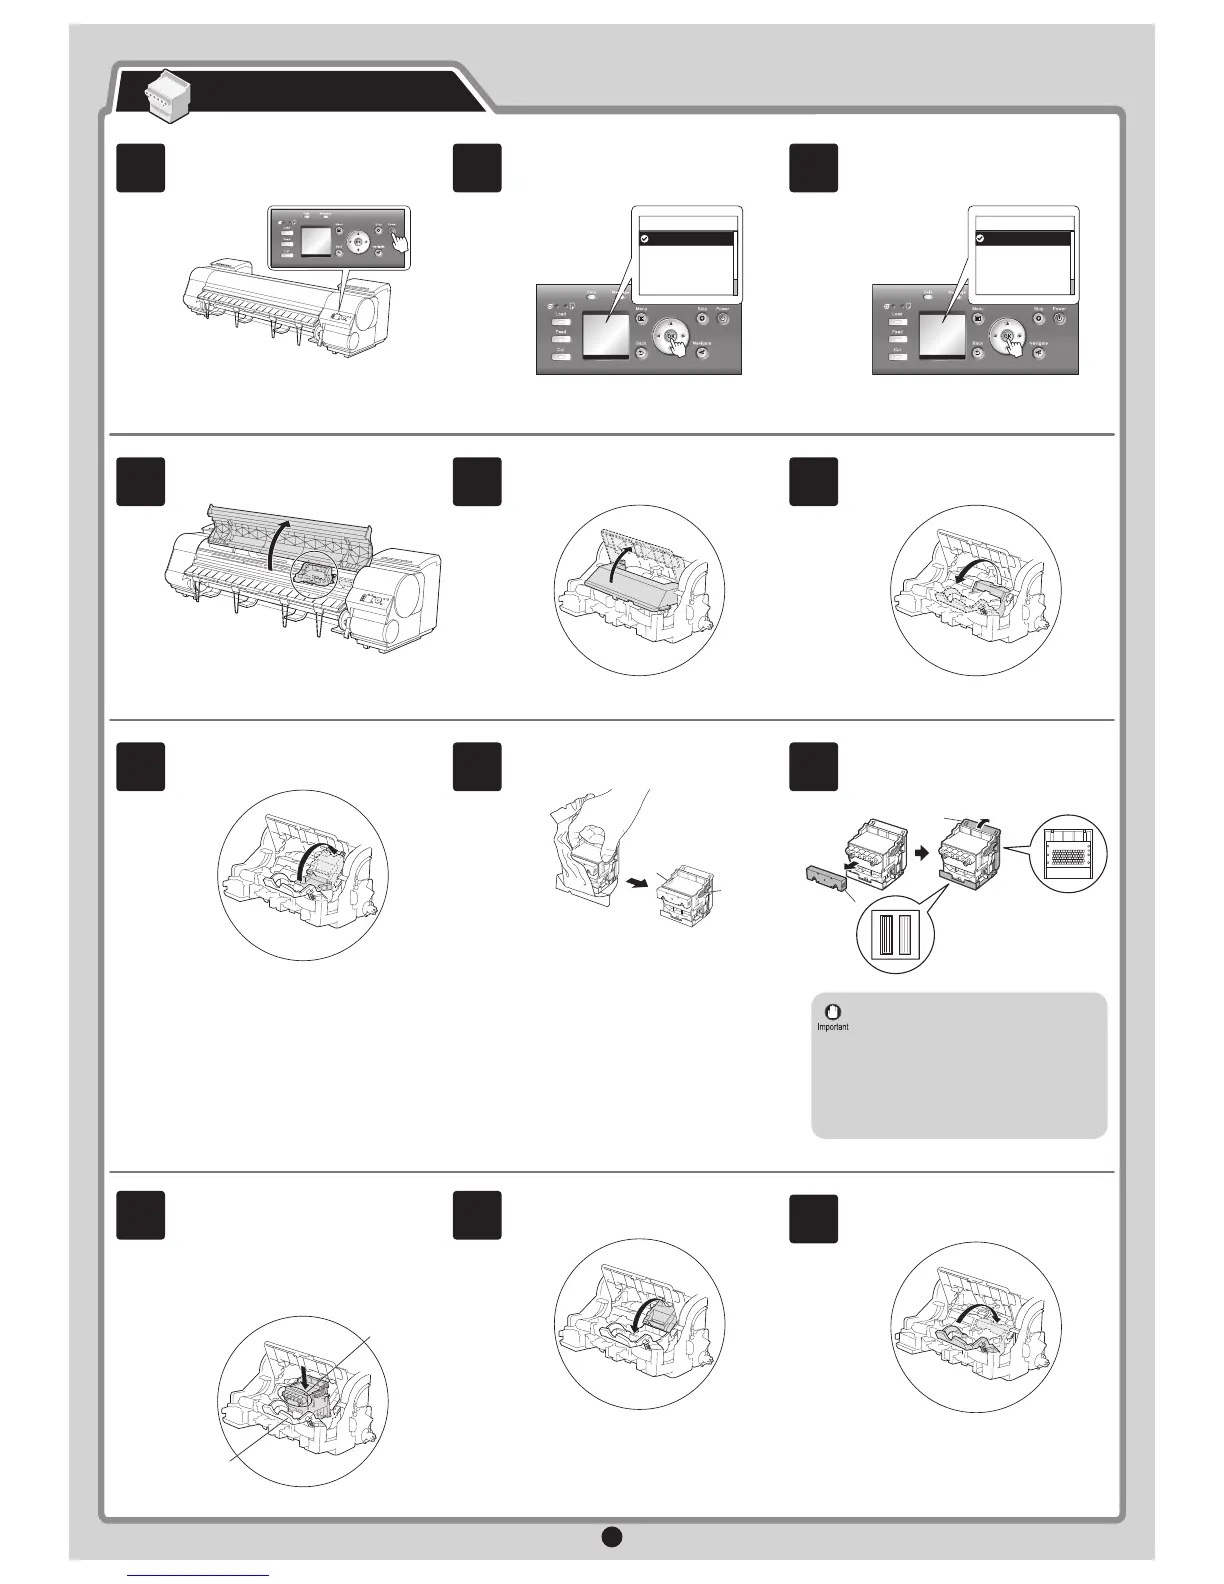
Install both printheads.
Install the Printheads
1
Press the Power button to turn on the
printer.
2
When the following screen appears, use
the ▲ and ▼ keys to select a language
and press OK.
㪈㪆㪉
Language
English
ᣣᧄ⺆
Français
Italiano
Deutsch
3
Select your local time zone and press
OK.
㪈㪆㪌
Time Zone
0:London (GMT)
+1:Paris,Rome
+2:Athens,Cairo
+3:Moscow
+4:Eerevan,Baku
4
When the display screen shows Open
Upper Cover, open the top cover.
Instructions on printhead installation are
shown on the display screen.
5
Lift the carriage cover to open it fully.
6
Pull the printhead fixer lever forward all
the way to open it completely.
7
Lift the printhead fixer cover to open it
fully.
8
Hold the printhead by the grips (a) as you
remove it from the pouch.
.
9
Remove the orange protective part (a).
Remove the other orange protective part
(b) while holding the grip (c).
• Never touch the parts covered by the
protective parts. Doing so may damage
the printhead and affect printing quality.
• The printhead contains ink, so be
careful not to spill it once the protective
parts are removed.
• Do not reattach the protective parts
after removing them. Dispose of these
materials according to local regulations.
10
Insert the printhead into the carriage (b)
with the ink holes (a) up and facing the
front of the printer as shown in the figure.
Carefully push the printhead firmly into
the carriage (b), ensuring that the parts
that were covered by the protective parts
do not touch the carriage (b).
11
Pull the printhead fixer cover down toward
the front to lock the printhead in place.
12
Push the printhead fixer lever all the way
back.
 Loading...