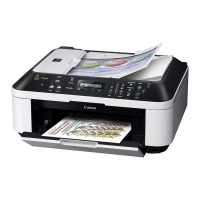
Do you have a question about the Canon MX320 and is the answer not in the manual?
This document outlines the setup and operation of the Canon MX320, a multifunction device designed for home or small office use, focusing specifically on its fax capabilities when connected to a DSL/cable modem and operating in "Tel Priority Mode" without an external answering machine. The MX320 integrates printing, copying, scanning, and faxing functionalities into a single unit, aiming to streamline document management for its users.
The primary function described here is the fax feature, specifically how to configure the device to receive faxes in "Tel Priority Mode." This mode is crucial for environments where a telephone line is shared between voice calls and fax reception, ensuring that the device prioritizes telephone calls while still being able to receive faxes. The setup process is designed to be user-friendly, guiding the user through physical connections and menu-based configurations.
The initial steps involve establishing the physical connections for the phone lines, which is a critical prerequisite for the fax function. The document illustrates a "Before" and "After" scenario for connecting the MX320 into an existing phone line setup that includes a DSL/cable modem and a handset phone.
In the "Before" state, the existing phone cord connects the wall jack to the DSL/cable modem, and another existing phone cord connects the modem to the handset phone. This represents a typical home phone line setup.
The "After" state introduces the MX320 into this setup. The first step is to plug a provided phone cord (included with the Canon printer) into the DSL/cable modem. This cord then connects to the "L" jack located at the rear of the MX320 multifunction device. The "L" jack is specifically designated for the line connection from the modem or wall jack.
Next, a white plug labeled "D" (likely indicating "Data" or "Device") needs to be removed from the upper jack on the MX320. This upper jack is where the second phone cord will be connected. The second phone cord, often referred to as the "telephone" cord, then connects from this upper jack on the MX320 to the handset phone. This configuration ensures that the phone line passes through the MX320, allowing it to monitor for fax signals while still enabling voice calls on the connected handset. The existing phone cord that previously connected the modem directly to the handset is now repurposed to connect the MX320 to the handset. This daisy-chain setup is essential for "Tel Priority Mode" to function correctly, as it allows the MX320 to detect incoming calls and determine whether they are voice or fax calls.
Once the physical connections are established, the next phase involves configuring the MX320's receive mode through its control panel. This is where the "Tel Priority Mode" is specifically selected.
Power On and Select Fax: The user begins by turning on the MX320 by pressing the "ON" button. After the device powers up, the "FAX" button on the control panel is pressed to access the fax functions. This action brings the device into fax standby mode.
Accessing the Menu: The fax standby screen will display basic information. To change the receive mode, the "Menu" button is pressed. This navigates the user into the device's settings.
Navigating to Fax Settings: Within the menu, the user will see "Fax settings" as an option. This is the entry point for configuring various fax-related parameters, including the receive mode. The "OK" button is pressed to select "Fax settings."
Selecting Receive Mode Set: Inside "Fax settings," an option labeled "Receive mode set." will appear. This is the specific setting to adjust how the MX320 handles incoming calls. The "OK" button is pressed to proceed.
Choosing "TEL Priority Mode": The "Receive mode set." screen will then display the available receive modes. The user needs to select "TEL priority mode." This is achieved by using the "LEFT" or "RIGHT" arrow buttons on the control panel to cycle through the options until "TEL priority mode" is highlighted.
Confirming the Selection: Once "TEL priority mode" is displayed, the "OK" button is pressed to confirm the selection. This action saves the chosen receive mode.
Verification: After confirming, the MX320 will return to the fax standby screen. The user can verify that "TEL priority mode" is now active by observing the display, which should indicate "TEL prior" (or a similar abbreviation) as the current fax mode. This confirms that the device is now configured to prioritize telephone calls while still being ready to receive faxes.
With the MX320 properly connected and configured in "Tel Priority Mode," receiving a fax involves a simple interaction from the user.
When an incoming call arrives:
Pick Up the Handset: The user should pick up the handset of the phone connected to the MX320. This action allows the user to answer the call.
Listen for Fax Tones: Upon picking up the handset, the user listens for fax tones. If the call is a voice call, the user can proceed with the conversation. If fax tones are heard, it indicates an incoming fax.
Hang Up the Handset: If fax tones are detected, the user should hang up the handset. The MX320, being in "Tel Priority Mode," will recognize the fax tones after the handset is hung up and automatically switch to fax reception mode.
Fax Reception: The MX320 will then proceed to receive and print the fax document. The device handles the entire fax reception process automatically once the user hangs up after detecting fax tones.
While the document primarily focuses on setup and operation, some aspects indirectly relate to maintenance:
In summary, the Canon MX320, as depicted in this manual, is a robust multifunction device with a well-documented fax setup process, particularly for "Tel Priority Mode" in a DSL/cable modem environment. Its design emphasizes user-friendliness through clear instructions and visual aids, ensuring that users can effectively integrate the device into their existing phone systems and manage their fax communications efficiently.
| Print Technology | Inkjet |
|---|---|
| Functions | Print, Copy, Scan, Fax |
| Print Resolution | 4800 x 1200 dpi |
| Scanner Type | Flatbed |
| Scan Resolution | 1200 x 2400 dpi |
| Fax Transmission Speed | 33.6 Kbps |
| Connectivity | USB 2.0 |
| Print Speed (Black) | Approx. 7.5 ipm |
| Print Speed (Color) | 4.5 ipm |
| Copier Settings | Fit-to-Page |
| Paper Handling | 100 sheets |
| Paper Sizes | Letter, Legal, A4, A5, B5, Envelopes, 4 x 6, 5 x 7, 8 x 10 |
| Ink Cartridges | PG-210 Black, CL-211 Color |
| Display | 1.8" LCD |