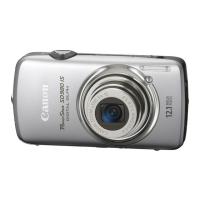
Do you have a question about the Canon PowerShot SD780 IS Digital ELPH and is the answer not in the manual?
Instructions for taking initial test shots to ensure correct recording.
Warning about using recorded images for personal use and copyright laws.
Explains warranty effectiveness based on the country of sale.
Notes on LCD monitor pixel performance, not a malfunction.
Caution about the camera body becoming warm during extended use.
Defines how memory cards are collectively referred to in the guide.
Information regarding perchlorate material in the lithium battery for US customers.
Covers basic shooting, special conditions, and various scene modes.
Details on shooting portraits, nightscapes, kids, pets, and beach scenes.
Guidance on shooting sunsets and foliage.
Instructions for shooting indoors, fireworks, underwater, aquarium, and low light.
How to focus on faces using the camera's features.
Guidance on disabling the flash for specific shooting situations.
How to use the self-timer to include the photographer.
How to embed date and time information into images.
Instructions for macro photography to capture small subjects.
Using digital zoom for macro shots.
Changing image tone to sepia or black and white.
Adjusting image resolution or pixel count.
How to use continuous shooting mode.
Using image stabilization to reduce blur.
Using high ISO for low-light shooting with image stabilization.
Using Servo AF to track moving subjects.
Adjusting brightness for dark subjects with i-Contrast.
Covers viewing, slideshows, searching, and erasing images.
Instructions for shooting and viewing movie clips.
Guidance on printing images directly from the camera.
How to transfer images to a computer.
Miscellaneous settings like sounds and using the camera abroad.
Safety warnings related to the camera body and operation.
Safety instructions for handling batteries and chargers.
Cautionary notes on usage environments, impacts, and handling.
Additional cautionary notes regarding camera operation and handling.
Instructions on attaching the camera strap and proper handling technique.
Step to remove the battery cover before charging.
How to correctly insert the battery into the charger.
Steps to connect the charger and initiate battery charging.
Instructions for safely removing the battery after charging.
Explains how to check and use the memory card's write-protect tab.
Steps to open the camera's compartment cover.
Detailed procedure for inserting the battery correctly.
Detailed procedure for inserting the memory card correctly.
Instructions for closing the camera's compartment cover.
Steps to release and remove the battery.
Steps to eject and remove the memory card.
The initial step to power on the camera.
How to navigate and input date and time values.
Finalizing the date and time settings.
Explains when the date/time screen reappears.
How to adjust for daylight saving time.
The first step to access menu options.
Navigating the menu to find the Date/Time setting.
Performing the actual adjustment.
Information about the backup battery for date/time settings.
Switching to playback mode to access language settings.
Accessing the main settings display.
Selecting the desired language from the list.
Troubleshooting step for an unintended clock display.
Accessing the camera's menu system.
Locating the formatting option within the menus.
Executing the memory card formatting process.
Important caution about data erasure and security.
The action of half-pressing the shutter for focus and settings.
The action of fully pressing the shutter to take the picture.
Explains variations in the shutter sound duration.
The initial step to power on the camera.
Setting the camera to the automatic shooting mode.
How to frame the subject and use the zoom.
The process of the camera achieving focus.
The final step of capturing the image.
Troubleshooting common issues like the screen not turning on or sounds not playing.
Troubleshooting dark images, related to flash range.
Troubleshooting close-subject focus issues.
Explanation of the AF-assist beam.
Explanation of the blinking flash icon during recharge.
Explains the icons the camera displays for different shooting scenes.
Switching the camera to playback mode.
Navigating through captured images.
Toggling between shooting and playback modes.
Accessing playback mode.
Choosing which image to delete.
Confirming and executing the deletion of an image.
Lists the necessary equipment for printing.
Initial power-off step for connection.
Physical connection guide using the interface cable.
Powering up the printer.
Powering on the camera.
Choosing which images to print.
Lists compatible Canon printers.
Setting the camera to movie recording mode.
Framing the scene and using zoom for video.
How the camera achieves focus for video recording.
Starting and managing the video recording process.
How to end a video recording.
Provides estimates of recording duration based on memory card size.
Switching to playback mode.
Choosing a video file from the memory card.
Controlling movie playback.
Lists the minimum hardware and software requirements for PC and Mac.
Lists necessary items like the camera, computer, and software disk.
Step-by-step instructions for installing the bundled software on Windows and Mac.
How to physically link the camera to the computer via USB.
Powering on the camera for transfer.
Launching the Canon software for image transfer.
Details all items included in the camera's original packaging.
Optional accessory for powering the camera.
Optional accessory for underwater photography.
Optional accessory for supplementary flash.
Advice on using official Canon accessories for optimal performance.
Critical safety warning regarding battery replacement.
Details optional power adapters and battery packs.
Lists other optional accessories like HDMI cables and waterproof cases.
Explains the function of the mode switch for selecting shooting modes.
Explains the shooting screen layout and indicators.
How to change the information displayed using the DISP. button.
Explains the information shown on the screen during image playback.
How to cycle through different playback display modes.
Explains the auto-brightening feature for dark shooting environments.
How overexposed areas are indicated during playback.
Explains the function and interpretation of histograms.
Describes the meaning of the camera's indicator lights (color, status, operation).
Setting the primary shooting mode.
Accessing the FUNC. menu.
Navigating within the FUNC. menu.
Choosing a specific setting.
Confirming the selected setting.
Accessing the main menu.
Navigating between different menu categories.
Choosing specific settings within a tab.
Choosing a value for a setting.
Confirming the final setting.
Steps to silence camera operation sounds.
How to control the volume of different camera sounds.
Adjusting brightness via the main menu.
Adjusting brightness using the DISP. button shortcut.
Accessing the camera's menu.
Locating the reset option.
Executing the reset procedure.
Lists settings that are not affected by a factory reset.
Accessing the camera's menu.
Finding the formatting option.
Executing the low-level formatting process.
Explains when and why to use low-level formatting.
How power saving affects shooting mode.
How power saving affects playback mode.
Initial step to set the mode switch.
Choosing a specific scene mode.
Further selection within scene modes.
The action of taking a picture.
Specific advice for portrait photography.
Tips for night photography.
Guidance for capturing dynamic subjects like children and pets.
Tips for achieving natural colors indoors.
How to capture vivid sunset colors.
Tips for shooting fireworks.
Advice for shooting in bright beach conditions.
Instructions for underwater shooting with an optional case.
Tips for shooting underwater subjects.
Guidance for capturing autumn leaves or blossoms.
Tips for shooting in snowy environments.
Using high ISO for low-light shooting without blur.
Initial step to access flash settings.
Navigating to and selecting the flash off option.
Troubleshooting flash and indicator behavior.
Using the zoom lever for magnification.
Further zooming with digital zoom.
Explains image quality impact at different zoom levels.
How to disable digital zoom.
Accessing digital zoom settings.
Confirming the selected digital zoom option.
Details how pixel settings affect image quality with tele-converter.
Accessing the date stamp feature.
Choosing date or date & time format.
Taking the picture with the stamp applied.
Initial step to access self-timer settings.
Choosing the self-timer option.
Executing the self-timer sequence.
Activating the face self-timer feature.
Framing the shot and initiating focus.
Starting the self-timer sequence.
Instructions for subjects during the self-timer sequence.
Handling situations where face detection fails.
Adjusting how many photos the self-timer takes.
Switching the camera to Program AE mode.
Accessing and modifying various settings in P mode.
Taking pictures in Program AE.
Troubleshooting exposure issues in P mode.
Activating the macro shooting mode.
Recommends using the self-timer for stability.
A warning about flash usage in macro mode.
Activating the infinity focus mode.
Activating macro mode.
Framing the close-up subject with zoom.
Explains image quality impact with digital zoom.
Accessing the pixel setting menu.
Choosing the desired image size.
Table showing image sizes, compression, and recordable shots.
Guidelines for image sizes related to printing.
Accessing the exposure compensation setting.
Choosing the continuous shooting mode.
Activating continuous shooting.
The process of taking continuous shots.
Accessing the ISO setting.
Choosing an ISO value.
Table showing ISO values and typical usage conditions.
Explains the effects of changing ISO.
Accessing the white balance settings.
Choosing a white balance preset or custom setting.
How to set a custom white balance based on the scene's lighting.
Accessing the My Colors feature.
Choosing a color effect.
Reverting the My Colors setting.
Accessing custom self-timer options.
Adjusting delay time and shot count.
Notes on self-timer behavior with multiple shots.
Initial focusing step.
Adjusting framing while maintaining focus.
Capturing the recomposed image.
Accessing AF frame options.
Detailed explanation of the Face AiAF system.
Using the center AF frame for specific focusing.
Adjusting the size of the AF frame.
Activating the AF point zoom feature.
Verifying focus using magnification.
Troubleshooting magnification issues.
Engaging the AF lock.
Shooting after locking focus.
Activating the Servo AF mode.
How Servo AF maintains focus.
Accessing metering options.
Choosing a metering mode (Evaluative, Center, Spot).
Engaging the AE lock.
Shooting after locking exposure.
Activating the FE lock.
Engaging FE lock.
Shooting after locking flash exposure.
Accessing the i-Contrast feature.
Choosing an i-Contrast level (Auto).
Saving the adjusted image.
Accessing flash settings.
Turning red-eye correction on or off.
Enabling blink detection.
Taking photos with blink detection active.
Activating the long exposure mode.
Choosing the desired shutter speed.
Checking exposure preview.
Retaining one color while making the rest black and white.
Activating the color accent feature.
Displaying preview of changes.
Selecting the color to retain.
Adjusting the color range.
Activating the color swap feature.
Displaying preview.
Choosing the color for swapping.
Selecting the color to be swapped.
Adjusting the color range for swapping.
Activating the panorama shooting mode.
Capturing the initial image for a panorama.
Taking subsequent overlapping images.
Completing the panorama sequence.
Referencing software for merging.
Accessing movie mode settings.
Choosing a specific movie mode.
Accessing image quality settings.
Choosing a quality setting.
Table detailing quality settings and content.
Estimates of recording time based on quality settings.
Focusing for movie recording.
Engaging AE lock.
Shifting exposure.
Capturing the movie.
Reference to movie playback instructions.
Accessing the movie trimming function.
Choosing the movie to trim.
Defining the start and end points for trimming.
Previewing the trimmed movie.
Saving the trimmed movie as a new file or overwriting.
Activating index display and changing image count.
Navigating within the index display.
Selecting a single image from the index.
Choosing criteria for filtering images.
Specific filters for finding images.
How the filtered images are displayed.
Navigating through filtered images by specific counts.
Troubleshooting filter selection issues.
General notes on filter playback.
Accessing the slideshow feature.
Starting the slideshow.
Customizing slideshow display time, transition effects, and repeat options.
Accessing slideshow settings.
Adjusting slideshow parameters.
Options for filtering playback content (All Images, Date, Category, etc.).
Activating the filter selection.
Choosing and confirming a filter.
Finalizing the filter selection.
Activating the focus check display.
Moving between different focus frames.
Adjusting zoom and position for focus check.
Activating zoom and adjusting magnification.
Navigating zoomed images.
Lists required items (camera, TV, AV cable).
Initial power off step.
Cable connection instructions.
Powering on the camera.
Troubleshooting video output settings.
Initial power off step.
Cable connection instructions using HDMI.
Accessing the erase function.
Choosing how to select images for deletion.
How to select and delete images one by one.
Activating individual image selection.
Marking images for deletion.
Selecting a range of images for deletion.
Activating range selection.
Choosing the first image in the range.
Choosing the last image in the range.
Confirming deletion.
Selecting all images for deletion.
Activating all-image selection.
Confirming deletion of all images.
Erasing images based on their assigned categories.
Choosing the selection criteria.
Selecting specific categories.
Finalizing selection.
Confirming deletion.
Accessing the image protection feature.
Choosing how to select images for protection.
Protecting images one by one.
Activating individual selection.
Marking images for protection.
Protecting a range of images.
Activating range protection.
Confirming protection.
Protecting all images at once.
Activating all-image protection.
Confirming protection.
Protecting images by category.
Choosing selection criteria.
Confirming protection.
Accessing the category assignment feature.
Assigning images to categories.
Activating individual selection.
Activating range selection.
Confirming category assignment.
Accessing the image rotation feature.
Performing the rotation.
Accessing the image resizing feature.
Choosing the image to resize.
Choosing the new resolution.
Saving the resized image.
Viewing the resized image.
Accessing the trimming function.
Choosing the image to trim.
Defining the start and end points for trimming.
Saving the trimmed image.
Accessing the My Colors function.
Choosing the image to modify.
Choosing a color effect.
Saving the modified image.
Accessing the i-Contrast feature.
Choosing the image to adjust.
Choosing an i-Contrast level.
Saving the adjusted image.
Accessing the red-eye correction feature.
Choosing the image to correct.
Applying the red-eye correction.
Saving the corrected image.
Setting print type, date, and file number.
Accessing print settings.
Configuring print options.
Specifying the number of prints for selected images.
Accessing image and quantity selection.
Marking images and setting print counts.
Setting the quantity for each selected image.
Selecting a range of images for printing.
Activating range selection.
Confirming print settings.
Selecting all images for printing in one batch.
Activating all-image selection.
Confirming print settings.
Selecting images for printing based on category.
Choosing selection criteria.
Confirming print settings.
Resetting all print selections.
Activating the clear selection function.
Examples of printing with Canon SELPHY printers.
Disabling the auto power-down feature.
Adjusting the screen timeout duration.
Setting the local time zone.
Setting a destination time zone.
Choosing between home and world time zones.
Accessing file numbering options.
Accessing folder creation.
Creating a new folder.
Setting how quickly the lens retracts after use.
Disabling the AF assist lamp.
Setting which image appears first in playback mode.
Customizing camera startup screen and sounds.
Adjusting camera sound settings.
Selecting a custom startup image.
Using software to transfer custom startup elements.
Connecting the DC coupler.
Connecting the power cord.
Connecting to the power outlet.
Issues related to turning on the camera or battery.
Addressing rapid battery drain.
Troubleshooting lens retraction issues.
Problems with displaying images on a TV.
Problems encountered during the shooting process.
Issues preventing image capture.
Troubleshooting a blank startup screen.
Turning the screen back on.
Issues with screen visibility in low light.
Problems with screen display during shooting.
Troubleshooting screen turning off during focusing.
Troubleshooting AF issues.
Causes and solutions for blurry images.
Troubleshooting focus acquisition failures.
Addressing underexposed subjects.
Addressing overexposed subjects.
Troubleshooting dark images despite flash.
Troubleshooting overly bright flash images.
Explaining white dots from flash reflection.
Addressing image noise or graininess.
Addressing red-eye and its correction.
Explaining potential viewfinder-image differences.
Performance issues with memory cards.
Troubleshooting menu access issues.
Problems related to movie recording.
Issues with movie recording time display or interruption.
Troubleshooting insufficient memory or card issues.
Problems with zoom functionality.
Issues related to playing back images and movies.
Troubleshooting playback failures.
Issues with playback interruptions.
Error message for missing or improperly inserted memory card.
Error message for a write-protected memory card.
Error message when shooting is not possible.
General error related to the memory card.
Error message for insufficient space.
Message indicating low battery.
Message when no images are available for display.
Message indicating an image is protected.
Error for unsupported or corrupted image files.
Errors related to image manipulation limitations.
Error when selection criteria are invalid.
Error for exceeding selection limits.
Error when settings cannot be saved.
Error related to file naming conflicts.
Errors during data transfer.
Error related to lens malfunction.
General camera error codes.
Details the functions available within the shooting menu, cross-referenced by shooting mode.
Precautions for handling the camera body and lens.
Precautions for handling memory cards to prevent corruption or damage.
Technical specifications for the battery pack.
Technical specifications for the battery charger.
Recycling information for batteries.
Licensing information related to MPEG-4.
Canadian regulatory compliance.
Lists registered trademarks.
Legal disclaimers regarding the manual and product usage.
Contact details and support resources for US customers.
Contact details and support resources for Canadian customers.
Information on registering products online in the US.
General remarks or notes related to the warranty.
| Image Processor | DIGIC 4 |
|---|---|
| Display Resolution | 230, 000 dots |
| Image Stabilization | Optical |
| ISO Sensitivity | Auto, 80, 100, 200, 400, 800, 1600 |
| Shutter Speed | 15 - 1/1500 sec |
| Built-in Flash | Yes |
| Digital Zoom | 4x |
| Battery | NB-4L Lithium-Ion |
| Sensor | 1/2.3 inch CCD |
| Display | 2.5 inch TFT color LCD |
| Video Recording | HD 720p at 30 fps |
| Maximum Aperture | f/3.2 - f/5.8 |
| Storage Media | SD/SDHC |
| Lens Focal Length | 6.2-18.6mm (35mm equivalent: 33-100mm) |