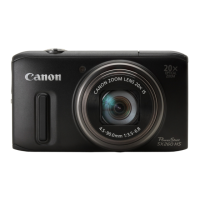
Do you have a question about the Canon POWERSHOT SX500IS and is the answer not in the manual?
Set your preferred shutter speed before shooting in Tv mode.
Set your preferred aperture value before shooting in Av mode.
Set preferred shutter speed and aperture value for desired exposure.
Adjust flash output levels in Manual (M) mode.
Review shots, browse images, play movies, and adjust volume.
Switch display modes, view histograms, and check focus.
Navigate images via index, filter by conditions, and browse.
Magnify images, use slideshows, and enable Smart Shuffle.
Choose how to protect images: individually, by range, or all at once.
Select and protect images one by one.
Protect a continuous selection of images by specifying start and end points.
Apply protection to all images simultaneously.
Choose and erase unwanted images one by one.
Erase all images, a range, or specify all images.
Choose a range of images to erase.
Select all images for simultaneous erasure.
Change the orientation of images and save them.
Turn off the camera's automatic image rotation feature.
Mark images as favorites or assign them to categories.
Categorize images based on shooting conditions or manual selection.
Assign categories to images one by one.
Select a range of images to assign to a category.
Save a copy of an image at a lower resolution.
Specify a portion of an image to save as a new file.
Modify image colors and save the edited version.
Adjust image brightness and contrast automatically.
Correct red-eye effects in images.
Remove unwanted parts from the beginning or end of movies.
Configure sound, volume, hints, brightness, and startup screen.
Format memory cards, including low-level formatting, for optimal performance.
Configure file numbering and date-based folder creation.
Adjust lens retraction timing and power-saving options.
Set World Clock, Date/Time, and units of measurement.
Change display language, view logos, and restore default settings.
Tips for battery and charger use, and long-term storage.
Information on power supplies, flash units, cables, and printers.
View camera shots on a TV, including HD and standard definition.
Connect and use the camera with household power via an AC adapter kit.
Connect to a printer for simple direct printing of shots.
Configure print settings, paper size, layout, and image options.
Set up batch printing and photo development services using print lists.
Set up printing for individual images or a range of images.
Check connection status and configure Eye-Fi transfer settings.
Turn off Eye-Fi transfer functionality if needed.
Resolve common camera issues like power, shooting, and display problems.
Address problems with zooming, playback, sound, and memory card recognition.
Understand and respond to various on-screen error messages.
List of functions and their corresponding page numbers in the Setup Menu.
List of functions and page numbers for Playback and Print Menus.
Important advice for handling, cleaning, and preventing damage to the camera.
Technical details on pixels, lens, LCD, file format, interface, and power.
Shots and recording time estimates based on memory card size and image quality.
Specifications for flash, shooting ranges, continuous speed, shutter speed, and aperture.
Technical specifications for the included battery pack and charger.
| Optical Zoom | 30x |
|---|---|
| Image Processor | DIGIC 4 |
| Display | 3.0-inch LCD |
| Image Stabilization | Optical |
| Type | Compact |
| Digital Zoom | 4x |
| LCD Screen Type | TFT Color LCD |
| Aperture | f/3.4 (W) - f/5.8 (T) |
| Sensor Size | 1/2.3 inch |
| Storage Media | SD/SDHC/SDXC Memory Card |
| Dimensions | 104.0 x 69.5 x 80.2 mm |
| Sensor | 1/2.3-inch CCD |
| Video Recording | 720p HD |
| ISO Sensitivity | ISO 100-1600 |
| Battery | NB-6L |
| Focal Length | 4.3-129mm (35mm equivalent: 24-720mm) |
| Shutter Speed | 15-1/1600 sec. |
| Video Frame Rate | 30 fps |
| Weight | 341 g (including battery and memory card) |
