16
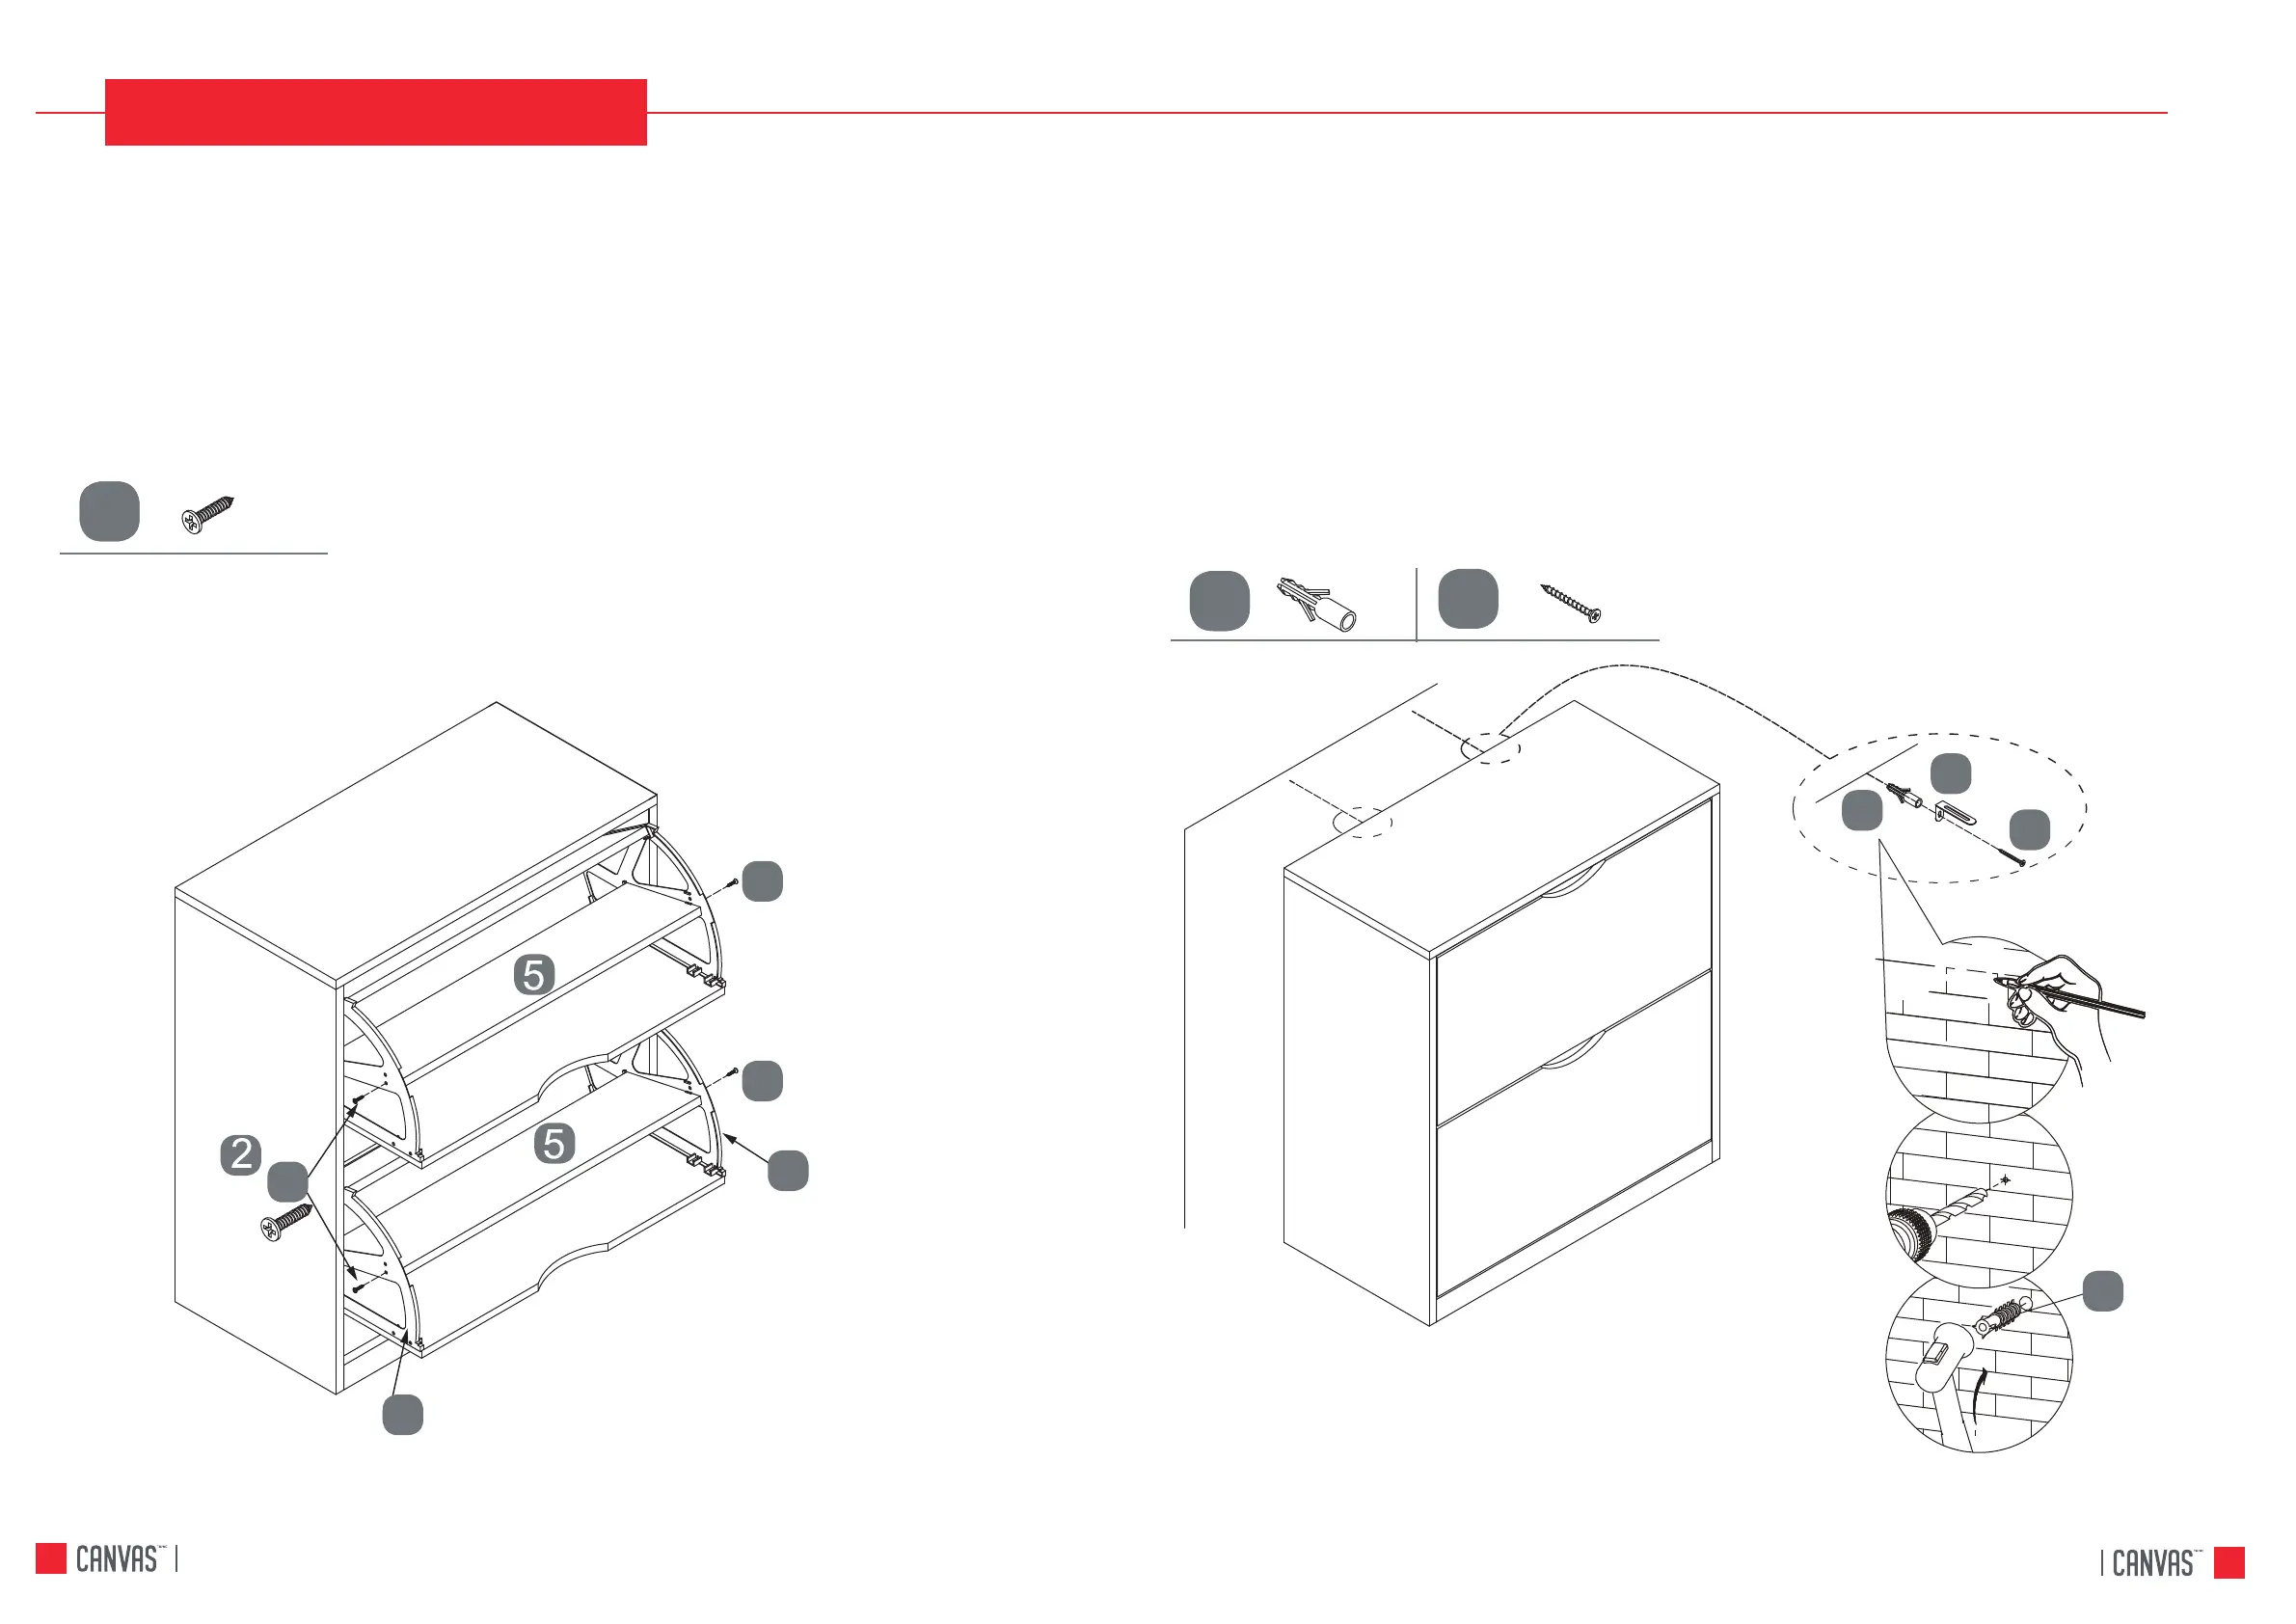
STEP 9
STEP 10
REQUIRES G, K, L
Carefully stand your unit upright and place in its final location.
Using ANTI-TIP HARDWARE as a guide, mark 2 spots on the wall.
Insert two EXPANSION SCREWS (L) into the wall.
Insert two EXPANSION SCREWS (L) into the wall. Hammer EXPANSION SCREWS into the wall.
Fasten ANTI-TIP HARDWARE (K) to the WALL, using two LONG SCREWS (G).
Hand tighten the LONG SCREWS.
This completes assembly.
17HUBBARD 2-TIER SHOE STORAGE CABINET
HUBBARD 2-TIER SHOE STORAGE CABINET
STEP-BY-STEP INS STRUCTION
D
G
L
D
D
J
I
D
L
K
G
L
REQUIRES D, I, J, 5
Fasten DIVIDER FRONT (5) to LEFT FLIP FRAME (I) and RIGHT FLIP FRAME (J),
using four SILVER FLAT HEAD SCREWS (D).
Hand tighten four SILVER FLAT HEAD SCREWS.
Repeat above step for the BOTTOM DRAWER.
 Loading...