Do you have a question about the Carbest 31877 and is the answer not in the manual?
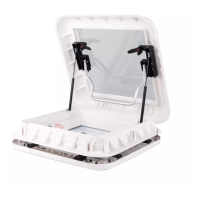
Describes easy operation with gas lift spring and double glazed dome top for the roof hood.
Details the three open levels: slightly 2°, medium 15°, and widely 60° for the roof hood.
Highlights the interior frame with blackout blind, flyscreen, and included LED interior lighting.
Provides overall dimensions, cut-out size, height above roof, and wall thickness for model 31877/318770.
Provides overall dimensions, cut-out size, height above roof, and wall thickness for model 31878/318780.
Instructions for marking the roof opening size for sandwich and non-sandwich panel roofs.
Ensuring roof thickness is 25-60 mm and the 12V cable is wired correctly.
Cleaning the installation surface thoroughly with an appropriate cleaning agent prior to installation.
Applying a generous amount of appropriate adhesive around the edge of the skylight.
Placing the skylight into the cut-out, ensuring hinges face the front of the caravan/RV.
Inserting provided brackets into skylight slots and using screws, warning against overtightening.
Installing the internal blind, removing coverings, and connecting the 12V wiring for LEDs.
Positioning the internal blind, screwing it into place, and refitting coverings.
| Brand | Carbest |
|---|---|
| Model | 31877 |
| Category | Automobile Accessories |
| Language | English |