8200-M698-O1 Rev B 225 Installation and Technical
44
CALIBRATION AND SETUP, CONT.
Your 225 indicator has been thoroughly tested and calibrated before being shipped to you. If
you received the indicator attached to a scale, calibration is not necessary. If the indicator is
being connected to a scale for the first time or recalibration is necessary for other reasons,
proceed as indicated.
Calibration and Setup of the indicator is accomplished entirely by the keypad. However, it may
require changing the position of the calibration inhibit jumper depending on the method of
sealing required by your local metrology laws.
The calibration inhibit jumper (P8) is located on the main printed circuit board and can only be
accessed by removing the rear panel. Refer to Figure No. 15 for the location of jumper P8.
During the calibration and setup process, it is necessary to enter operational parameters and
data using the indicator keypad.
Pressing the ENTER key without entering a new value will retain the current setting and
return the display to the menu display.
To change a setting, enter or select a new value and then press the ENTER key. The
new setting will be saved and the display will return to the menu display.
Note that pressing the /ESC key on YES or NO prompts will “backup” to the
previous selection. Also note that on prompts requiring a value to be entered, pressing
the /ESC key will clear the value.
CAUTION! The membrane keypad is not to be operated with pointed objects
(pencils, pens, fingernails, etc). Damage to keypad resulting from this practice
will NOT be covered under warranty.
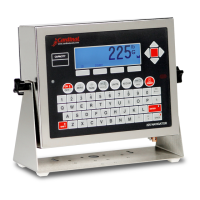
Navigation
Keys
Soft Ke
s
Alphanumeric
Keys
Figure No. 17

 Loading...