20
ENG
“humiSonic ventilation” +0300063EN - rel. 1.3 - 14.05.2021
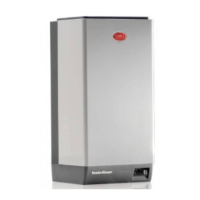
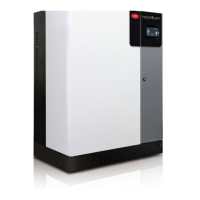
4. STARTING AND USER INTERFACE “SECONDARY” PANEL
Before starting the humidifier check:
• water connections: in the event of water leaks, do not start the
humidifier before having restored the connections;
• electrical connections between the humidifier and the control panel.
4.1 Starting
See chap. “Electrical connections”
1. The humidifier, once powered and enabled for production (remote
on-off/humidistat), is ready for operation.
2. Operation will only stop if the enabling signal is no longer present.
4.2 Shutdown / Standby
1. To switch the humidifier off, press the ON/OFF button.
2. The humidifier goes into standby when:
• the remote on/off contact is open;
• the on/off contact is open and serial enabling is set to 1 (see
chapter “Humidifier control via network“).
When the humidifier is in standby, the tank is emptied automatically
4.3 Autotest
When the humidifier is first started (from off ), if enabled and humidity
production is required, a test cycle is run. A complete fill and drain cycle
is performed, during which the level sensor is monitored; if the test is
successful, regular atomised water production will start. If the test fails,
production is disabled (see the alarm table).
4.4 Signal lights on the “Secondary” panel
Blue light
Steady Humidity production
Slow flash* Standby
Fast flash** Autotest or wash
* Slow flash: 1 s ON and 1 s OFF
** Fast flash: 0.2 s ON and 0.2 s OFF
The red LED means an alarm is active. See the chapter on Alarms for the
alarm table.
4.5 Disabling
The humidifier can be disabled in three different ways:
• Opening the COM-ONOFF contact (enabling signal);
• Active alarms;
• Via network.
4.6 Reset tank hour counter
The humidifier is fitted with an hour counter that records operation.
After a set number of hours (5,000), a signal is activated to indicate
maintenance should be performed on the tank and operation of the
piezoelectric elements checked (see the chapter on Maintenance). To
reset the hour counter at any time, proceed as follows:
• switch the humidifier off;
• close the water supply tap and wait for the tank to empty completely;
• remove the front panel from the humidifier to access the control board;
• unplug the Lumberg connector on the control board;
• open the On/Off contact;
• switch the humidifier on (with the Lumberg connector disconnected
from the control board). Both lights will flash;
• close the On/Off contact. The yellow LED will remain on steady;
• switch the humidifier off;
• plug the Lumberg connector (A) onto the board, making sure it is
inserted in the correct direction;
• switch the humidifier on.
A
Fig. 4.a
4.7 Automatic washing
The humidifier performs an automatic washing cycle periodically (default
every 60 minutes), during which the production of sprayed water is
interrupted. The washing cycle involves a complete drain cycle, a phase
in which fill and drain are activated together (default 1 minute) to flush
out any residues in the tank, a complete fill cycle and finally another
complete drain cycle. During this operation, atomised water production
is stopped.
4.8 Washing due to inactivity
If the humidifier remains inactive (on but in standby) for an extended
period (24 hours) a washing cycle is performed, as described in the
previous paragraph. This cleans the tank of any residues (e.g. dust) that
may have accumulated during the period of inactivity. The washing
cycle is run after default 24 hours (continuous) of no operation, i.e. the
humidifier is in standby.
PRE-HEATING NTC PROBE OPTION: “Main” electrical panel terminal board
• It allows modulation of the nebulized flow rate if the preheating
upstream of the humidifier in the air handling unit is lower than the
design conditions.
• Connect the NTC probe to the PREH and COM terminals
• Enable the probe to the Fa12 mask
FINAL CHECKS
The following conditions represent correct electrical connection:
• mains power to the humidifier corresponds to the rated voltage;
• a mains disconnect switch has been installed so as to be able to
disconnect power to the humidifier;
• terminals COM – ONOFF on the humidifier terminal block are jumpered
or connected to a contact to enable operation;
• if the humidifier is controlled by an external controller, the signal earth
is electrically connected to the controller earth.
 Loading...