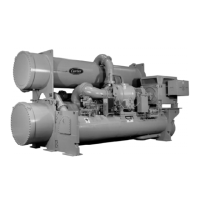
Table 18 — Hermetic Compressor Fits and Clearances
ITEM* DESCRIPTION
CLEARANCE†
TYPE OF
MEASURE
in. mm
Minimum Maximum Minimum Maximum
1 1st Stage Impeller to Diaphragm
See Tabulation
Axial
2 2nd Stage Impeller to Discharge Wall Axial
3 1st Stage Labyrinth .0160 .0200 .4060 .5080 Diametral
4 Interstage Labyrinth .0120 .0160 .3050 .4060 Diametral
5 2nd Stage Labyrinth .0080 .0120 .2030 .3050 Diametral
6 Balancing Piston Labyrinth .0080 .0120 .2030 .3050 Diametral
7 Impeller Shaft Journal Bearing .0030 .0045 .0762 .1143 Diametral
8 Thrust-end Float .0100 .0150 .2540 .3810 Axial
9 Counterthrust Bearing Seal Ring .0020 .0040 .0510 .1020 Diametral
10 Gear Bearing to Gear .0050 .0065 .1270 .1651 Diametral
11 Gear Bearing to Gear .0100 .0185 .2540 .4699 Axial
12 Gear Bearing to Bearing Housing .0005 .0025 .0127 .0635 Diametral
13 Pinion Bearing to Pinion .0040 .0055 .1016 .1397 Diametral
14 Pinion Bearing to Bearing Housing .0005 .0025 .1270 .0635 Diametral
15 Transmission Labyrinth .0060 .0100 .1520 .2540 Diametral
16 Motor-End Labyrinth .0050 .0080 .1270 .0635 Diametral
17 Motor-End Bearing to Shaft .0040 .0054 .1016 .1372 Diametral
18 Motor-End Bearing to Bearing Housing .0005 .0020 .0127 .0508 Diametral
*See Fig. 56 for item callouts.
†Clearances represent factory tolerances for new components.
Tabulation — Impeller Clearances (Hermetic Compressors)
19EX
SHROUD
CODE
FA
SHROUD
CODE
IMPELLER
CODE
IMPELLER DIAMETER
DIMENSION*
Item 1 Item 2
in. mm in. mm in. mm
5 3
1 12.00 304.8 0.837 21.26 0.638 16.21
3 12.38 314.5 0.797 20.24 0.609 15.47
5 12.75 323.8 0.757 19.23 0.579 14.71
7 13.25 336.6 0.717 18.21 0.541 13.74
9 13.75 349.2 0.690 17.53 0.541 13.74
6 4
1 12.00 304.8 0.977 24.82 0.760 19.30
3 12.38 314.5 0.937 23.80 0.726 18.44
5 12.75 323.8 0.897 22.78 0.688 17.48
7 13.25 336.6 0.837 23.62 0.639 16.23
9 13.75 349.2 0.810 20.57 0.632 16.05
7 5
1 12.00 304.8 1.177 29.90 0.895 25.02
3 12.38 314.5 1.137 28.88 0.852 21.64
5 12.75 323.8 1.077 27.36 0.809 20.55
7 13.25 336.6 1.017 25.83 0.750 19.05
9 13.75 349.2 0.970 24.64 0.731 18.57
8 6
1 12.00 304.8 1.297 32.94 0.972 24.69
3 12.38 314.5 1.237 31.42 0.928 23.57
5 12.75 323.8 1.177 29.90 0.880 22.35
7 13.25 336.6 1.007 27.86 0.817 20.75
9 13.75 349.2 1.050 26.67 0.796 20.22
— 8 1-9
13.75† 349.2†
4.425 112.39 .876 22.25
13.50** 342.9**
— 9 1-9
13.75† 349.2†
4.425 112.39 1.055 26.80
13.50** 342.9**
*Measured with shaft in thrust position (towards suction end); tolerance = ± .005 in. (± .127 mm).
†First-stage diameter.
**Second-stage diameter.
105

 Loading...