6
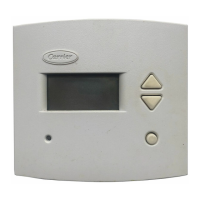
Override Button — If the thermostat is connected to a
dry contact and is in Unoccupied mode, a press of the Override
button will force the thermostat into the mode it was in before
Unoccupied began. For example, if the thermostat was in the
Cool mode before the dry contacts forced the thermostat into
Unoccupied mode, a press of the Override button will tempo-
rarily return the thermostat to the Cool mode for 30 minutes.
Each subsequent push of the Override button will add 30 addi-
tional minutes to the Override time, up to 4 hours. If the timer
displays 4:00 hours, the next press of the Override button
will zero out the Override timer, returning the thermostat to
Unoccupied mode.
When in Override mode, the Override icon and the mode
icon (Off, Heat, Cool, or Auto) appear on the display along
with the time remaining in Override mode.
During Override mode, the set points are adjustable provid-
ed the keypad is not locked.
NOTE: The Override button can only be used if the dry con-
tact is used to control an Occupied and Unoccupied schedule.
Electric Heat — When the Electric Heat option in the
Advanced Setup is set to ON, the thermostat will turn on the
fan immediately any time there is a heat demand. This feature
should only be used on first stage electric heating applications.
Do not use with gas heat.
Two-Stage Operation — The second stage of heat or
cool is turned on when the first stage has been on for a mini-
mum of 2 minutes and the temperature differential from the set
point is equal to or greater than the set point plus the deadband
plus 2 degrees.
Emergency Heat — Emergency heat is available for
heat pump applications. To turn on emergency heat, press the
Emergency Heat button. An “EH” will be displayed. During
emergency heat, the fan will operate and the second stage of
heat will be energized (locking out the first stage compressor).
To exit emergency heat, press the Emergency Heat button.
During emergency heat, only OFF and HEAT modes are
available.
Remote Temperature Sensor — A remote tempera-
ture sensor is available to read the temperature from a space. If
a remote temperature sensor is connected, the thermostat will
ignore the reading of its internal sensor. When the thermostat is
using a reading from a remote sensor, the degree symbol above
the temperature reading will blink.
NOTE: Sensors can only be averaged when using a wireless
remote sensor (33CSRFS-RC/RE).
Keypad Lock — To prevent unauthorized use of the ther-
mostat, the front panel buttons can be disabled. To disable or
lock the keypad, press and hold the Mode button. While hold-
ing down the Mode button, press the UP and DOWN
ARROW buttons simultaneously. The “Locked” icon will
appear on the display.
The thermostat is unlocked by performing the same proce-
dure. Press and hold the Mode button. While holding down the
Mode button, press the UP and DOWN ARROW buttons
simultaneously. The “Locked” icon will be removed from the
display.
Dry Contact Switch/External Control — A dry con-
tact switch is provided to allow an external device to force the
thermostat into or out of Unoccupied mode. The external de-
vice is wired to contacts CK1 and CK2. See Fig. 5.
NOTE: Twenty-four volt power is not required for CK1 and
CK2.
When using the auxiliary input or controlling multiple
HVAC units with a single thermostat, it is possible to encounter
transformer phasing problems that will interfere with thermo-
stat operation.
Connecting transformers that are not phased correctly may
result in a direct short, which could damage transformers and/
or the thermostat. Phasing problems are likely if the units share
a common ground with secondary grounded transformers.
To avoid this problem, if possible, phase all HVAC units to-
gether. If phasing is impractical, isolation relays may be used to
isolate the transformers. To isolate the auxiliary input, use a
separate transformer for the auxiliary control device (usually a
timeclock). Connect the device to an isolation relay coil. Con-
nect one set of isolated contacts to each thermostat at CK1 and
CK2.
To prevent phasing problems when controlling multiple
HVAC units with one thermostat, phase the HVAC units or use
isolation relays to isolate the unit transformers. One unit will be
connected directly to the thermostat and the unit will power the
thermostat. All other units will require one set of isolated con-
tacts for each of the following: Heat, Cool, Fan, and Reversing
Valve (if required).
Units that are phased will have the high voltage legs to the
24 VAC power transformer in common. This requires identify-
ing which terminals from the high voltage input lugs are pro-
viding power to the transformer. Do not assume that the same
terminals will always provide power to the transformer. For
each unit, check the unit wiring diagram. See Fig. 6.
SOFT START — When multiple thermostats are controlled
by the same external device, a Soft Start option can be used to
stagger the turn on times of the HVAC equipment. This feature
may cause a delay in operation after entering Unoccupied
mode.
10-Watt Resistor — A 10-watt, 270-ohm resistor is pro-
vided with the thermostat. This resistor should only be used in
applications where it is necessary to use 4 wires in a power-
stealing mode when the common wire (C) is not available. It is
recommended that a common wire be used whenever possible.
Refer to the Troubleshooting section for more information on
resistor use and wiring.
Determining proper phasing can be difficult without the
help of an electrician (especially across different building
transformers). Damage to equipment can result if phasing
is improperly done. The use of isolation relays is recom-
mended before attempting phasing.
Do not attempt to rewire equipment internally to phase
units. Damage to unit components may occur.
105
→
→
→

 Loading...