Table I -- Physical Data
UNIT 40UV, UH
NOMINAL AIRFLOW (Cfm)
FANS
Quantity
Diameter (In.)
Width (in.)
RLTERS
Nominal Size (In.) (1 in. thick)
Nominal Size (In.) 12 in. thick)
Quantity
4OUV SHIPPING WEIGHT**
(Approx Ib)
16% in. Deep Unit
217Is in. Deep Unit
40UH SHIPPING WEIGHT**
(Approx Ib)
30112in. Deep Unit
36 in. Deep Unit
40 in, Deep Unit
44 In. Deep Unit
40UV INSTALLED WEIGHT**
(Approx Ib)
16518in. Deep Unit
2171aIn. Deep Unit
40UH INSTALLED WEIGHT**
(Approx Ib)
301/2 In. Deep Unit
36 in. Deep Unit
40 In, Deep Unit
44 In, Deep Unit
COIL WATER WEIGHT
{Approx Ib per row of coil)
COIL CONNECTIONS (In. OD)
Water Coils with 1 to 5 Rows
Steam Coils (All Units)
050*
500
1
832
8
93/+ x 24+/4
9 x 241/4
1
330
340
315
325
1.0
075
750
2
8.32
8
93/,=x 361/+
9 x 36+/,=
1
400
410
420
50O
530
380
390
405
485
515
100 125
1000 1250
3 4
8.32 8.32
8 8
9_/4x481/4 93/4x601/+
9 x48114 9 x60114
1 1
480 590
490 605
500 620
600 740
640 790
460 570
470 595
480 600
580 720
620 770
2.0 2.4
150
1500
5
8.32
8
93/4 x 721/+
9 x 721/4
1
66O
675
690
83O
88O
640
655
670
810
860
1.5 2.7
Return7/s Su_sply
% 11/.
Suction Liquid
DX Coils 7/s 3/s
LEGEND *40UV only.
DX -- Direct Expansion I'40UH 40 and 44 in. deep units only.
200t
2000
5
9.5
6
93_ x 721_
9 x 721/4
1
1020
1050
m
1000
1030
2.7
**Weight based on damper-controlled unit with 5-row coil and factory-
installed controls.
INSTALLATION
Units must be installed level and plumb. Failure to do so
may result in excessive vibration and/or premature failure.
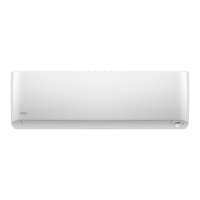
Placing Vertical Units in Position
1. Select the unit location; ensure that service clearance is
provided. Allow enough grille clearance to maintain
un-restricted airflow. See submittal drawings and Fig. I
and 2 for dimensions.
2. Make sure wall behind unit is smooth and plumb; if
necessary, install furring strips on walls with irregular
surfaces or mullions. Furring sttips must be positioned
behind mounting holes in unit. Fasteners, furring strips,
and other seals (ff reqnired) must be field supplied.
3. Remove all wall and floor moldings from behind the uniL
4. Move unit into position. Unit must be snug against wall
and furring strips.
5. Adjust unit leveling legs so unit is level. Unit must be
level for proper operation and condensate drainage.
6. Using field-supplied fasteners, reach into unit and attach
unit to the wall using the 3/4 in. mounting holes in the
back panel.
7. Protect the unit from jobsita debris. Do not allow foreign
material to fall into drain pan. Prevent dust and debris
from being deposited on motor or fan.
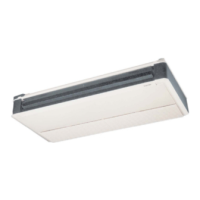
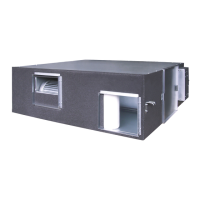
Placing Horizontal Units in Position
1. Select the unit location; ensure that service clearance is
provided. Allow enough grille clearance to maintain unre-
stticted airflow. Make sure that ceiling is able to support
the weight of the unit. See Fig. 3-5 for nominal unit weight.
See submittal drawings and Fig. 3-5 for dimensions.
NOTE: See page 23 for additional requirements regard-
ing units ducted to multiple openings.
2. Ensure that bottom panels have been removed from unit.
When unit is lifted, access to the 3/4in. mounting holes is
through the bottom of the uniL Hanger rods and fasteners
and other required hardware must be field supplied.
3. Using a forklift or other mechanical lifting device, raise
the unit to the mounting position. If forklift or other
lifting device is likely to contact a painted wall surface,
protect the surface as necessary.
4. Use rods and fasteners to suspend the unit at the
mounting holes on the top of the uniL The unit must be
suspended at the 3/+in. mounting holes; do not use any
other locations.
5. If desirod" install field-supplied vibrati°n is°lators" Adjust
isolators so unit is uniformly suspended and pitched.
6. To ensure proper drainage and operation, ensure unit is
level and tighten all fasteners. DO NOT mount the unit
on a slope. Pitch of horizontal suspended units can
change afar coil is filled; recheck after frilling ceil.
7. Protect the unit from jobsite debris. Do not allow foreign
material to fall into drain pan. Prevent dust and debris
from being deposited on motor or fan.

 Loading...