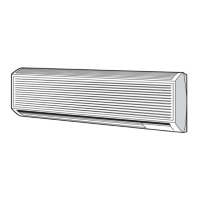
42 HWS
GB - 6
Mod. 07 - 09 - 12
Mod. 18 - 24
IMPORTANT NOTE:
This unit has no refrigerant expansion device.
Establish the direction of refrigerant tubing.
Refrigerant tubes can run in directions indicated by 햲, 햳, 햴, 햵, 햶.
For directions 햳, 햴 and 햵, break the knockout in the side panel.
Direction 햶 is recommended for sizes 18 and 24 only.
Mod. 07 - 09 - 12
Mod.18 - 24
Installation of the wall mounting plate.
Refer to "Minimum clearance" between unit, side walls and ceiling.
Place mounting plate against the wall, then level with a plumb line
or spirit level and mark the position of the mounting holes to be
drilled.
Wall mounting plate centre line of size 18 and 24 does not coincide
with the installed unit centre line, which is indicated with a vertical
line on the mounting plate.
Drill holes and install the plate using the 4 screw anchors and
screws provided.
Check that no vibrations can occur by movement of the plate.
Installation
20
380
270
110
130
70
C
B
227
A
23
223
20
243
314
243
223
20
800
140 mm
D mm
120 mm
140 mm
D mm
120 mm
108,5
30
270 mm - Ø 70
270 mm - Ø 70
Making the hole in the external wall for interconnecting tubes to
the outdoor unit.
Drill a 70 or 80 mm dia. hole (depending on unit size) in the
external wall using the plate or the template provided with the unit
(see " Table II, Ref.7).
The hole should have a 5-10 mm slope toward the outside. Insert
the plastic conduit provided.
Pass the electric connecting wires through the conduit (see
electrical connections).
햲 Indoors
햳 Outdoors
07
09 - 12
290 40 44 60
337 87 60 90
Plate
Mod. A B C D
Ø 70 / 80 mm
햲
햳
5-10 mm
 Loading...