19
Outdoor Air Temperature (OAT) Sensor — The OAT is
fact ory--mounted in the EconoMi$er2 (FIOP or
accessory). It is a nominal 10k ohm thermistor attached to
an eyelet mounting ring.
EconoMi$er2 — The PremierLink control is used with
EconoMi$er2 (option or accessory) for outdoor air
management. The damper position is controlled directly
by the PremierLink control; EconoMi$er2 has no internal
logic device.
Outdoor air manage ment functi ons can be enhanced with
field--installation of these accessory control devices:
Enthalpy control ( outdoor air or differential sensors)
Space CO
2
sensor
Outdoor air CO
2
sensor
Refer to Table 3 for accessory part numbers.
Field connections — Field connections for accessory
sensor and input de vices are made at the 16--pole terminal
block (TB1) located on the control box bot tom shelf in
front of the PremierLink control (See Fig. 30). Some input
devices also require a 24--vac signal source; connect at
CTB terminal R at “THERMOSTAT” connection strip for
this signal source. See connections figures on following
pages for field connection locations (and for continued
connec tions at the Premie rLink board i nputs).
Table 4 provide s a summary of field connections for units
equipped with Space Sensor. Table 5 provides a summary
of field connections for units e quipped with Space
Thermostat.
Space Sensors -- The PremierLink controller is
factory--shipped configured for Space Sensor Mode. A
Carrie r T--55 or T--56 space sensor must be used. T--55
space temperature sensor provides a signal of space
temperature to the PremierLink control. T--56 provides
same space temperature signal plus it a llows for
adjustment of space temperature setpoints from the face of
the sensor by the oc cupants.
2
3
45
61
SW1
SEN
BRN (GND)
BLU (SPT)
RED(+)
WHT(GND)
BLK(-)
CCN COM
SENSOR WIRING
C08201
Fig. 31 -- T--55 Space Temperature Sensor Wiring
Connect T--55 -- See Fig. 31 for typical T--55 internal
connec tions. Connect the T--55 SEN terminals to TB1
terminals 1 and 3 (see Fig. 32).
SEN J6-7
J6-6
1
3
TB1 PL
SEN
C08212
Fig. 32 -- PremierLink T--55 Sensor
Connect T--56 -- See Fig. 33 for T--56 internal
connec tions. Install a jumper between SEN and SET
terminals as illustrated. Connect T--56 terminals to TB1
terminals 1, 3 and 5 (see Fig. 34).
2
3
45
61
SW1
SEN
SET
Cool Warm
BRN (GND)
BLU (SPT)
RED(+)
WHT(GND)
BLK(-)
CCN COM
SENSOR WIRING
JUMPER
TERMINALS
AS SHOWN
BLK
(T56)
C08202
Fig. 33 -- T--56 Internal Connections
SEN J6-7
J6-6
1
3
TB1 PL
SEN
SET
Jumper
TB1
PL
J6-5
5
SET
C08213
Fig. 34 -- PremierLink T--56 Sensor
Connect Thermostat — A 7--wire thermostat connec tion
requires a 24--v power source and a common connection.
Use the R and C terminals on the CTB’s THERMOSTAT
connec tion strip for the se. Connect the thermostat’s Y1,
Y2, W 1, W2 and G terminals to PremierLink TB1 as
shown in Fig. 35.
If the 50TCQ unit is equipped with factory--installed
smoke detector(s), disconnect the factory BLU lead at
TB1--6 (Y2) before connecting the thermostat. Ide ntify the
BLU lead originating at CTB--DDC--1; disconnect at
TB1--6 and tape off. Confirm that the second BLU lead at
TB1--6 remains connected to PremierLink J4--8.
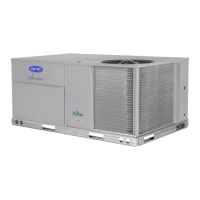
50TCQA
 Loading...