50
NOTES FOR FIG. 30
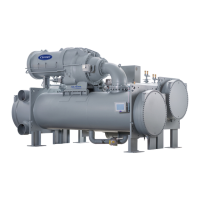
19XR with Unit-Mounted Starter
I. GENERAL
1.0 Starters shall be designed and manufactured in accordance
with Carrier Engineering Requirement Z-415.
1.1 All field-supplied conductors, devices, and the field-
installation wiring, and termination of conductors and
devices, must be in compliance with all applicable codes
and job specifications.
1.2 The routing of field-installed conduit and conductors and
the location of field-installed devices must not interfere with
equipment access or the reading, adjusting, or servicing of
any component.
1.3 Equipment installation and all starting and control devices,
must comply with details in equipment submittal drawings
and literature.
1.4 Contacts and switches are shown in the position they would
assume with the circuit de-energized and the chiller shut
down.
1.5 WARNING — Do not use aluminum conductors.
1.6 Installer is responsible for any damage caused by improper
wiring between starter and machine.
II.
POWER WIRING TO STARTER
2.0 Provide a means of disconnecting power to starter.
2.1 Power conductor rating must meet minimum unit nameplate
voltage and compressor motor FLA (minimum circuit
ampacity).
2.2 Lug adapters may be required if installation conditions dic-
tate that conductors be sized beyond the minimum ampac-
ity required. Breaker lugs will accommodate the quantity (#)
and size (MCM) cables (per phase) as indicated in tables
below.
2.3 Power conductors to starter must enter through top of
enclosure. Flexible conduit should be used for the last few
feet to the enclosure to provide unit vibration isolation.
2.4 Compressor motor and controls must be grounded by using
equipment grounding lugs provided inside unit-mounted
starter enclosure.
2.5 Starters with “Rated Load Amps” (RLA) greater than 740
require the assembly and the installation of a “Top Hat”
(located inside enclosure) to provide the required wire
bending space for incoming power leads.
2.6 Metering current transformers (CTs), if present, have an
inner diameter of 2
3
/
4
inches. Caution should be taken
when selecting power wiring so that all power cables can
pass through the CTs.
III.
CONTROL WIRING
3.0 Field-supplied control conductors to be at least 18 AWG or
larger.
3.1 Ice build start/terminate device contacts, remote start/stop
device contacts and spare safety device contacts (devices
not supplied by Carrier), must have 24 VAC rating. MAX
current is 60 mA, nominal current is 10 mA. Switches with
gold plated bifurcated contacts are recommended.
3.2 Remove jumper wire between J2-1 and J2-2 before con-
necting auxiliary safeties between these terminals.
3.3 Each integrated contact output can control loads (VA) for
evaporator pump, condenser pump, tower fan low, tower fan
high, and alarm annunciator devices rated 5 amps at 115
VAC and up to 3 amps at 277 VAC.
Do not use control transformers in the control center as the
power source for external or field-supplied contactor coils,
actuator motors or any other loads.
3.4 If one single speed fan is used, connect fan control leads
J9-13 and -14, jumper ISM J9-13 to -11, and jumper J9-14
to -12. This will allow the fan to be actuated by closure of
either “low fan” or “high fan” ISM channel contact.
3.5 Do not route control wiring carrying 30 v or less within a
conduit which has wires carrying 50 v or higher or along
side wires carrying 50 v or higher.
3.6 Control wiring between starter and power panel must be sepa-
rate shielded cables with minimum rating of 600 v, 80 C.
Ground shield at starter.
3.7 Spare 4-20 mA output signal is designed for controllers with a
non-grounded 4-20 mA input signal and a maximum input
impedance of 500 ohms.
3.8 Flow devices to confirm evaporator or condenser pump flow
are not required. However; if flow devices are used, wire as
shown in diagram below. Remove jumper installed at these
terminals and wire in a 4.3 K resistor in its place. The flow
device and resistor must be installed in parallel at these termi-
nals such that the resistor provides a signal when the flow
device is open.
CAUTION
To prevent damage to machine, do NOT punch holes or drill into
the top surface of the starter enclosure for field wiring. Knock-
outs are provided on the side of the starter enclosure for field
wiring connections.
ALLEN BRADLEY (WYE-DELTA)
STARTER
RLA
LUG CAPACITY (PER PHASE)
#
CONDUCTORS
CONDUCTOR RANGE
186-207A 1 3 AWG — 350 MCM
208-296A 2 2/0 AWG — 250 MCM
297-444A 2 250 — 350 MCM
445-606A 2 1 AWG — 500 MCM
607-888A 4 4/0 AWG — 500 MCM
889-1316A 4 500 — 1000 MCM
BENSHAW (SOLID-STATE)
STARTER
RLA
LUG CAPACITY (PER PHASE)
#
CONDUCTORS
CONDUCTOR RANGE
FRAME
SIZE
95-200A 1 6 AWG — 350 MCM 2, 3
201-480A 2 3/0 AWG — 500 MCM 2, 3
481-640A 3 1/0 AWG — 500 MCM 2, 3
641-739A 4 250 — 500 MCM 2, 3
740-979A 5 6 AWG — 350 MCM 4, 5
980-1390A 2 3/0 AWG — 500 MCM 4, 5
BENSHAW (WYE-DELTA)
STARTER
RLA
LUG CAPACITY (PER PHASE)
CIRCUIT BREAKER OR TERMINAL BLOCK
(OPTION)
#
CONDUCTORS
CONDUCTOR RANGE
FRAME
SIZE
112-185A 1 6 AWG — 350 MCM 2, 3
186-474A 2 3/0 AWG — 500 MCM 2, 3
475-606A 3 1/0 AWG — 500 MCM 2, 3
607-775A 4 250 — 500 MCM 4
776-804A 4 250 — 500 MCM 4, 5
805-1138A 5 300 — 600 MCM 4, 5
1139-1151 5 300 — 600 MCM 4, 5
CUTLER-HAMMER (WYE-DELTA)
STARTER
RLA
LUG CAPACITY (PER PHASE)
#
CONDUCTORS
CONDUCTOR RANGE
112-185A 1 4 AWG — 350 MCM
186-296A 2 2/0 AWG — 250 MCM
297-444A 2 250 — 350 MCM
445-606A 2 1 AWG — 500 MCM
607-888A 4 4/0 AWG — 500 MCM
889-1316A 4 500 — 1000 MCM
CAUTION
Control wiring for Carrier to start pumps and tower fan motors
and establish flows must be provided to assure machine protec-
tion. If primary pump, tower fan, and flow control is by other
means, also provide parallel means for control by Carrier. Fail-
ure to do so could result in machine freeze-up or overpressure.
 Loading...
