108
Step 3 — Make Refrigerant, Cooler Fluid and
Drain Piping Connections
See Fig. 32A-51 for piping applications.
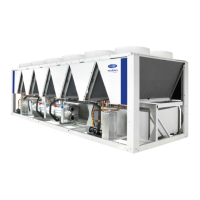
30XA501 UNIT ASSEMBLY
The 30XA501 units are shipped as two separate pieces referred to
as the 501A module (section including cooler and compressors)
and the 501B module. These two pieces must be field combined
prior to installing cooler piping and electrical connections. Below
are the steps for installing the 30XA501 unit assembly.
Brazing the 501A and 501B Sections
If the assembly process is executed by an outside company (that
is, not a Carrier-certified service technician), the following proce-
dures must be followed in order to maintain the factory warranty
on the equipment:
• The final component assembly required as part of the instal-
lation of this unit requires Carrier supervision.
• A vacuum-rise test is required to ensure that the brazing was
done correctly, there is no risk of leaking, and the machine
is dehydrated properly. If this test is performed by an out-
side company, supervision by a Carrier Service technician is
required.
• A Carrier Service technician must approve the work exe-
cuted by the outside company. Without Carrier technician
supervision and approval, the equipment warranty will not
be honored for any refrigerant-related matter.
Step A: Position Unit
Position 501A and 501B units adjacent to each other as shown on
the dimensional drawing (Fig. 27). Frames must be in close con-
tact for installation of connecting piping.
Step B: Connect Discharge and Liquid Line Piping
The discharge and liquid line piping for pieces 501A and 501B are
sealed from the factory with brazed caps, and must be joined in the
field using the parts included in the box marked “Tubing Installa-
tion Kit” attached to the frame of 501B.
Use Fig. 32A-32C as a guide for discharge line piping installation.
Locate the brazed caps on the 501A and 501B discharge line pip-
ing segments. Make sure the ball valves on either side of the
brazed caps are in closed position. Both the 501A and 501B units
are shipped with refrigerant charge, and the ball valves must re-
main closed until the connecting tubing is installed. Before per-
forming any cutting or brazing work, check the capped piping af-
ter the ball valve for pressure and reclaim any refrigerant in the
line. To remove the brazed caps, cut the tubing along the score
lines directly above the caps. Use proper cutting tools to ensure the
cut is perpendicular to the tube surface and free of debris. To con-
nect the piping, braze tube parts labeled 00PSN500494000A and
00PSN500525700A to the unit piping. All work should be done
by a certified brazer following all best practice preparation and
brazing techniques. Be sure to cover valves on adjacent piping
with a wet rag before brazing to avoid internal damage.
For the liquid line piping, follow the above procedure using
Fig. 33A-33C as a guide. To connect the piping, braze tube parts
labeled 00PSN500494400A and 00PSN500525900A to the unit
piping.
CAUTION
Remove the chilled water flow switch, entering and leaving
water thermistors before welding connecting piping. Reinstall
flow switch and thermistors after welding is complete. Failure
to remove these devices may cause unit damage.
CAUTION
Make sure all the ball valves on the discharge and liquid lines
of both the modules (501A and 501B) are closed before join-
ing the two units together. Do not open the ball valves until in-
dicated in Step C below. Both the 501A and 501B units are
shipped with refrigerant charge, and the ball valves must re-
main closed until the connecting tubing is installed. Failure to
follow the below steps closely could result in air inside the re-
frigerant system, lowering the unit performance or charge
leakage. Work should be performed by a skilled HVAC techni-
cian.
Fig. 32A — 30XA501 Discharge Line Piping Connection Location (Power Box Side Shown)
A30-5637
NOTE: See Fig. 32B and 32C for detailed view
of circled area.
 Loading...