11
NOTES:
1. Dimensions in () are in millimeters.
2. Hook rigging shackles through holes in base rail, as shown in detail “A.” Holes in base rails are centered around the unit’s center of gravity. Use
wooden top to prevent rigging straps from damaging unit.
Fig. 8 — Rigging Details
Keep unit upright and do not drop. Spreader bars are not re-
quired if top crating is left on unit. Rollers may be used to
move unit across a roof. Level by using unit frame as a refer-
ence. See Table 5 and Fig. 8 for additional information.
Lifting holes are provided in base rails as shown in Fig. 8. Re-
fer to rigging instructions on unit.
Rigging materials under unit (cardboard or wood) must be re-
moved PRIOR to placing the unit on the roof curb.
When using the standard side drain connection, ensure the red
plug in the alternate bottom connection is tight. Do this before
setting the unit in place. The red drain pan plug can be tight-
ened with a
1
/
2
-in. square socket drive extension. For further
details, see “Step 10 — Install External Condensate Trap and
Line” on page 13.
Before setting the unit onto the curb, recheck gasketing on
curb.
POSITIONING ON CURB
Position unit on roof curb so that the following clearances are
maintained:
1
/
4
-in. (6.4 mm) clearance between the roof curb
and the base rail inside the front and rear, 0.0-in. clearance be-
tween the roof curb and the base rail inside on the duct end of
the unit. This will result in the distance between the roof curb
and the base rail inside on the condenser end of the unit being
approximately
1
/
4
-in. (6.4 mm).
Although unit is weatherproof, guard against water from higher
level runoff and overhangs.
After unit is in position, remove all shipping materials and top
skid. Recycle or dispose of all shipping materials.
Step 7 — Convert to Horizontal and Connect
Ductwork (when required)
Unit is shipped in the vertical duct configuration. Unit without
factory-installed economizer or return-air smoke detector op-
tion may be field-converted to horizontal ducted configuration.
To convert to horizontal configuration, remove screws from
side duct opening covers (see Fig. 9) and remove covers. Use
the screws to install the covers on vertical duct openings with
the insulation-side down. The panels must be inserted into the
notches on the basepan to properly seal. The notches are cov-
ered by the tape used to secure the insulation to the basepan
and are not easily seen. See Fig. 10 for position of the notches
in the basepan. Seals around duct openings must be tight. Se-
cure with screws as shown in Fig. 11. Cover seams with foil
duct tape.
Field-supplied flanges should be attached to horizontal duct
openings and all ductwork should be secured to the flanges. In-
sulate and weatherproof all external ductwork, joints, and roof
or building openings with counter flashing and mastic in accor-
dance with applicable codes.
Do not cover or obscure visibility to the unit’s informative data
plate when insulating horizontal ductwork.
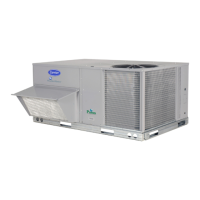
Fig. 9 — Horizontal Conversion Panels
UNIT
MAX WEIGHT
DIMENSIONS
ABC
LB KG IN. MM IN. MM IN. MM
50TCQA07 880 399 74.38 1889 37.25 946 41.38 1051
REMOVABLE HORIZONTAL
SUPPLY DUCT OPENING COVER
REMOVABLE HORIZONTAL
RETURN DUCT OPENING COVER
 Loading...