(1.) Auxiliary Heat Lockout (System is configured as a
heat pump and configuration Option No. 8 is active).
(2.) Dual Fuel Setup (DIP switch No. 8 OFF. System is
configured as a heat pump with dual fuel).
(3.) Cooling Lockout Below 55°F (DIP switch No. 7 OFF.
System is configured to disable cooling when outdoor
temperature is below value selected by Option 6).
(4.) Automatic Humidify Feature (User Interface is setup
for auto-humidify in heating mode).
(5.) Comfort Heat Feature (System is configured with
Comfort Heat configuration Option 16 ON).
4. E4—NONVOLATILE MEMORY FAILURE. An E4 will be
displayed if the configuration and program schedules cannot
be read. This is usually the result of a microprocessor failure.
If cycling power does not reset this error, the User Interface
must be replaced.
5. E5—HUMIDITY SENSOR FAILURE. If the humidity sensor
has failed, an E5 error message will be displayed.
6. E6—DEFROST LOCKED. An E6 will be displayed if the
defrost cycle is in process longer than 10 minutes. The mode
will automatically change to the EHEAT mode. Cycling
power will reset error, however, outdoor unit should be
checked to determine if defrost is operating properly.
7. FF—DAMPER FUSE BLOWN. An FF will be displayed if
the fuse is open or missing. Remove plastic cover on Equip-
ment Controller to locate and replace fuse.
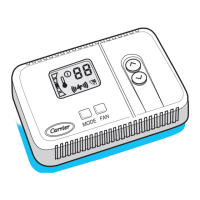
8. "--" (2 dashes)—TEMPERATURE SENSOR FAILURE. Two
dashes "--" will be displayed if a zone temperature sensor has
failed or is out of range. The User Interface and Remote Room
Sensors are considered failed if the temperature reading is
outside the -40°F to 140°F range. A Smart Sensor is consid-
ered failed if the temperature is outside the 32°F to 140°F
range. See Table 5 to determine the temperature/ohm relation-
ship for a Remote Sensor. Do not confuse dashes in the
display ("--") for a zone that is set to OUT or ALL ZONE.
Other Helpful Hints
Read and understand "System Startup and Checkout" to review
Installer Test Setup Mode and check the equipment operation. This
is a good place to start in evaluating any problems associated with
the zoning system or the system equipment.
Temperature/Ohm Relationship
Table 5 shows a temperature/ohm relationship to help aid in
troubleshooting the Comfort Zone II -B System. This table will
evaluate the Remote Sensor, LAT, and HPT sensor operation. Use
a digital multimeter to perform the following:
To verify if a sensor is good, disconnect both leads from I/O board
and measure resistance through the sensor. Match ohm reading to
the table and compare temperature reading on table to ambient
temperature surrounding sensor (accuracy should be within a few
percent).
e.g. If 10.72k ohms are measured, this equals approximately 74°F.
To verify if equipment controller is functioning normally, reattach
sensor to equipment controller and set meter to 5vdc. Measure
voltage across terminal connections with sensor attached. A typical
voltage of approximately 2.5vdc will indicate equipment controller
is functioning correctly.
Table 5—Temperature/Ohm Relationship
TEMP F° OHMS
30 34,480
32 32,630
34 30,760
36 29,220
38 27,470
40 26,020
42 24,680
44 23,320
46 22,070
48 20,910
50 19,830
52 18,820
54 17,870
56 16,920
58 16,160
60 15,260
62 14,530
64 13,790
66 13,090
68 12,480
70 11,860
72 11,270
74 10,750
76 10,250
78 9,750
80 9,300
82 8,840
84 8,432
86 8,042
88 7,668
90 7,310
92 6,993
94 6,661
96 6,368
98 6,085
100 5,811
102 5,571
104 5,313
106 5,088
108 4,869
110 4,660
112 4,450
114 4,268
116 4,019
118 3,918
120 3,750
20