4.
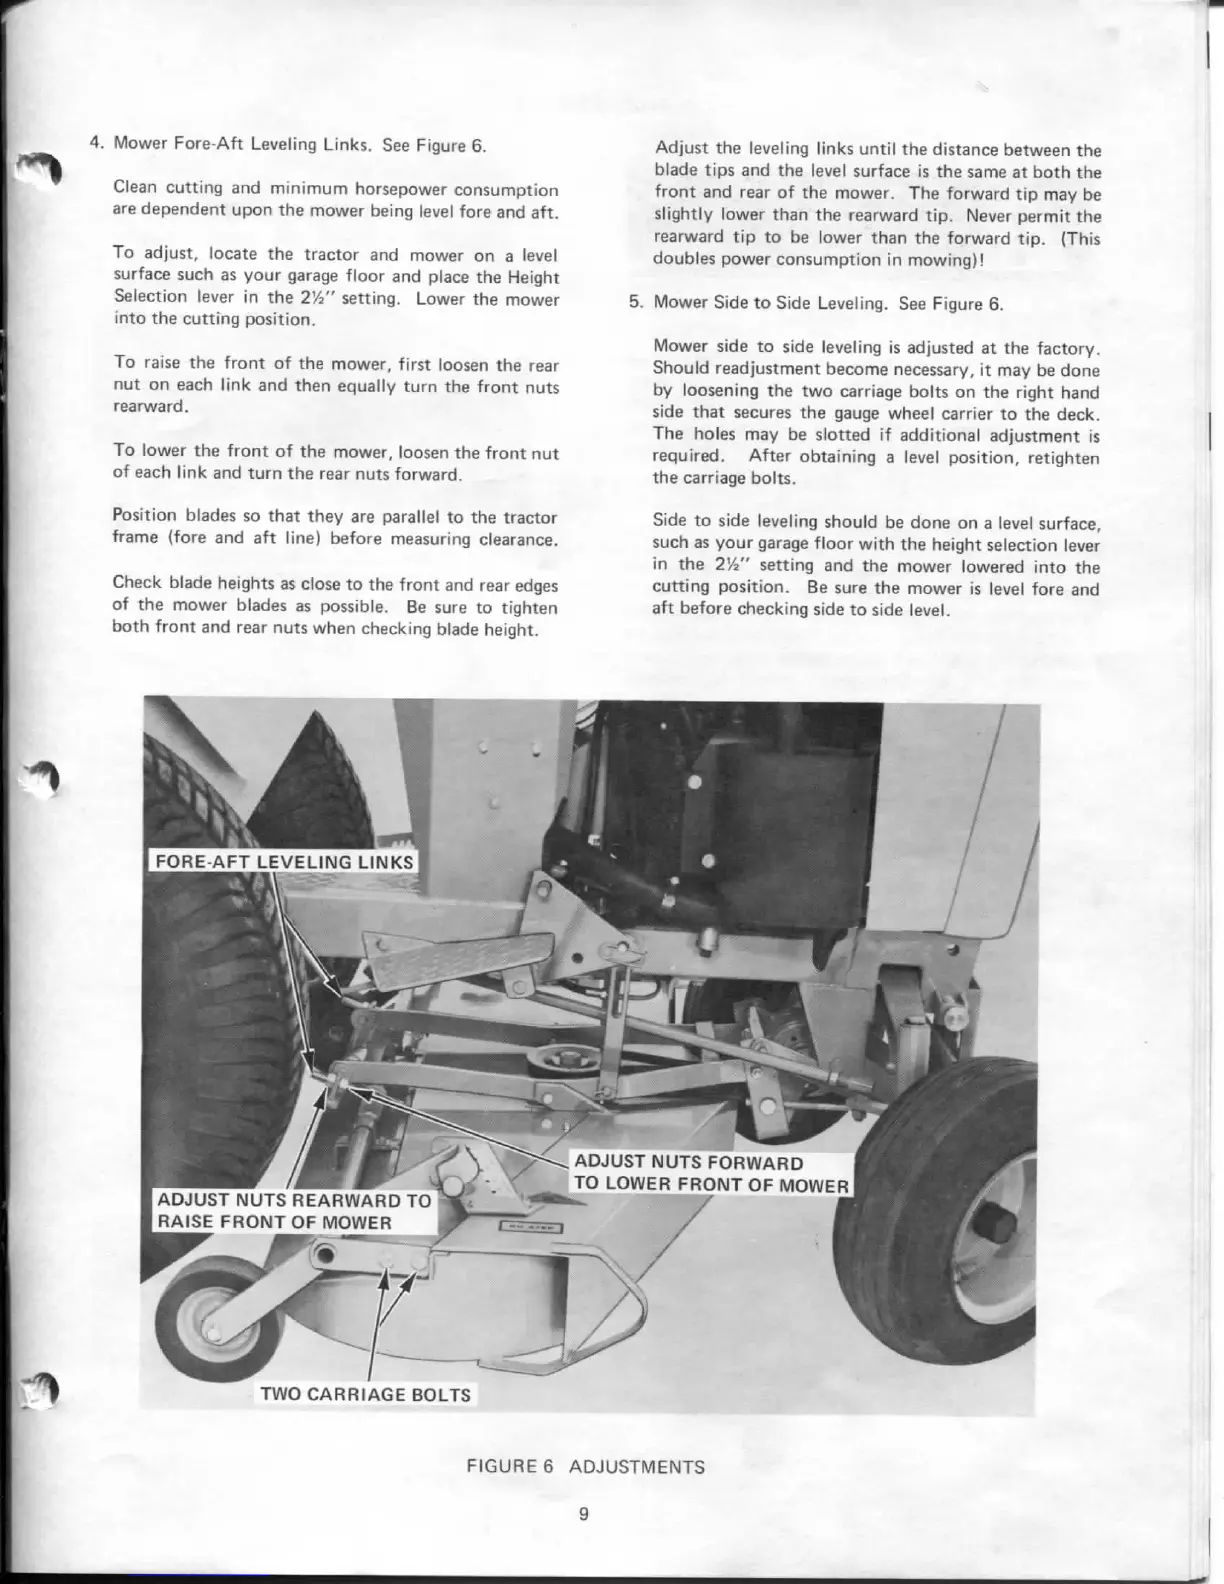
Mower Fore-Aft Leveling Links. See Figure 6.
Clean cutting and minimum horsepower consumption
are dependent upon the mower being level fore and aft.
To adjust, locate the tractor and mower on a level
surface such as your garage floor and place the Height
Selection lever in the 272" setting. Lower the mower
into the cutting position.
To raise the front of the mower, first loosen the rear
nut on each link and then equally turn the front nuts
rearward.
To lower the front of the mower, loosen the front nut
of each link and turn the rear nuts forward.
Position blades so that they are parallel to the tractor
frame (fore and aft line) before measuring clearance.
Check blade heights as close to the front and rear edges
of the mower blades as possible. Be sure to tighten
both front and rear nuts when checking blade height.
Adjust the leveling links until the distance between the
blade tips and the level surface is the same at both the
front and rear of the mower. The forward tip may be
slightly lower than the rearward tip. Never permit the
rearward tip to be lower than the forward tip. {This
doubles power consumption in mowing)!
5. Mower Side to Side Leveling. See Figure 6.
Mower side to side leveling is adjusted at the factory.
Should readjustment become necessary, it may be done
by loosening the two carriage bolts on the right hand
side that secures the gauge wheel carrier to the deck.
The holes may be slotted if additional adjustment is
required.
After obtaining a level position, retighten
the carriage bolts.
Side to side leveling should be done on a level surface,
such as your garage floor with the height selection lever
in the 2^^" setting and the mower lowered into the
cutting position. Be sure the mower is level fore and
aft before checking side to side level.
TWO CARRIAGE BOLTS
FIGURE 6 ADJUSTMENTS
9
casecoltingersoll.com
 Loading...