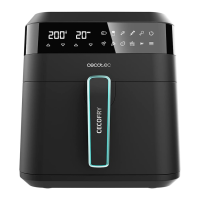
BAKE&FRY 3000 TOUCH/WHITE
43
ENGLISH
Vegetables 230 ºC 30 min 90-230 ºC Up to 2:00 h. Baking tray
or air fryer
3
Toasting Level 1 – 4 min
Level 2 – 5 min
Level 3 – 6 min
- - Grill 2
Baking 175 ºC 35 min 90-230 ºC Up to 2:00 h. Baking tray
or grid
3
Bagel 230 ºC 13 min 90-230 ºC Up to 2:00 h. Baking tray
or air fryer
2
Grill 230ºC 10 min 90-230 ºC Up to 2:00 h. Baking tray
or grid
2
Roasting 200 ºC 1 hr 90-230 ºC Up to 2:00 h. Baking tray
or rotisserie
Rotisserie
position
Dehydrate 50 ºC 4 hrs 30-80 ºC Up to 12:00 h. Air fryer tray 2
Ferment 34ºC 45 min 30-40 ºC Up to 8:00 h. Baking tray 3
Defrost 50ºC 20 min 30-80 ºC Up to 2:00 h. Baking tray 2
Reheat 95ºC 5 min 90-230ºC Up to 2:00 h. Grill 3
Keep warm 50ºC 4 hrs 30-120 ºC Up to 8:00 h. Baking tray 2
Note
- The default information in the table above is for reference only, you can adjust the
temperature and cooking time to your liking.
- The data may vary depending on the different characteristics of the food to be cooked.
- When cooking greasy foods (e.g., chicken wings) in the rack or basket of the air fryer, place
the baking tray in the slot at the bottom to prevent oil from dripping onto the stainless
steel.
Tip
It is recommended to use the pizza stone for cooking pizza. For a perfect result, preheat the
stone at the same time as you preheat the oven and then insert the pizza on top of the stone.
Time/Temperature icon (14)
- Click on this icon to modify the time and temperature of the programmes.
- Press once and the time will start ashing, press the plus and minus icons (18) to adjust
it. Press twice and the temperature will start ashing, press the plus and minus icons (18)
to adjust it.
Note
For the Toasting programme, only the time can be changed, you will be able to choose among
3 different time options. To change the time, press the Plus icon.
Menu (15)
Press this icon to select the desired menu. To select the desired menu, you can press this icon
continuously or you can scroll through the programmes with the plus and minus icons (18).
On/off (16)
Press this icon to turn the device on and off.
Start/pause (17)
Press this icon to start or pause the selected programme. If the door is opened during cooking,
cooking will be paused and when the door is closed, the start icon must be pressed again.
Preheating (18)
After selecting the desired programme and having set the temperature and time, press the
'Preheat' icon to preheat the appliance.
Note
It is not necessary to press the Start/Pause icon for preheating to begin. During preheating,
dashed lines will be shown on the display. Fig.3.
Once the device has preheated, it will beep and ''Add Food'' will appear on the display (Fig. 4.).
At this point, open the oven door, insert the food, close the door and press the Start icon.
Plus/Minus (19)
Use these icons to set the time and temperature. In addition, you can also use them to select
the desired programme.
Fan (20)
This icon is not functional, it will only light up and ash when the selected programme uses
the fan.
Rotisserie (21)
Press this icon once the desired programme has been selected and the time and temperature
have been set if desired. This function is ideal for cooking a roasted chicken.
Light (22)
Press this icon to turn the light on and press it again to turn it off.