6. LRGB (checkbox) – This is disabled for B/W processing so only becomes available
when you process in color. LRGB allows you to have less color-artifacts during processing.
7. Processing Area (setting) – This is the size of the area of an image (width & height)
that will automatically be processed during later stages. RegiStax is designed to handle
very large images but wavelet-processing them completely is often not recommended.
So during wavelet-processing a part of the image will only be processed. The rest of the
image can be processed on demand by the user. A large setting will demand a lot more
memory to be directly available to the program but little extra calculation to process the
full image. A small setting will cost little memory but will cost more time to process a full
image (this applies to images larger than 1024x1024 mainly).
8. Alignment box (setting) – This box sets the area that is used during alignment.
Normally this setting should lead to a box of the given dimensions that is surrounding the
topic you intend to process. For planets this is most of the time the full planet but for lunar
images a larger crater is often chosen.
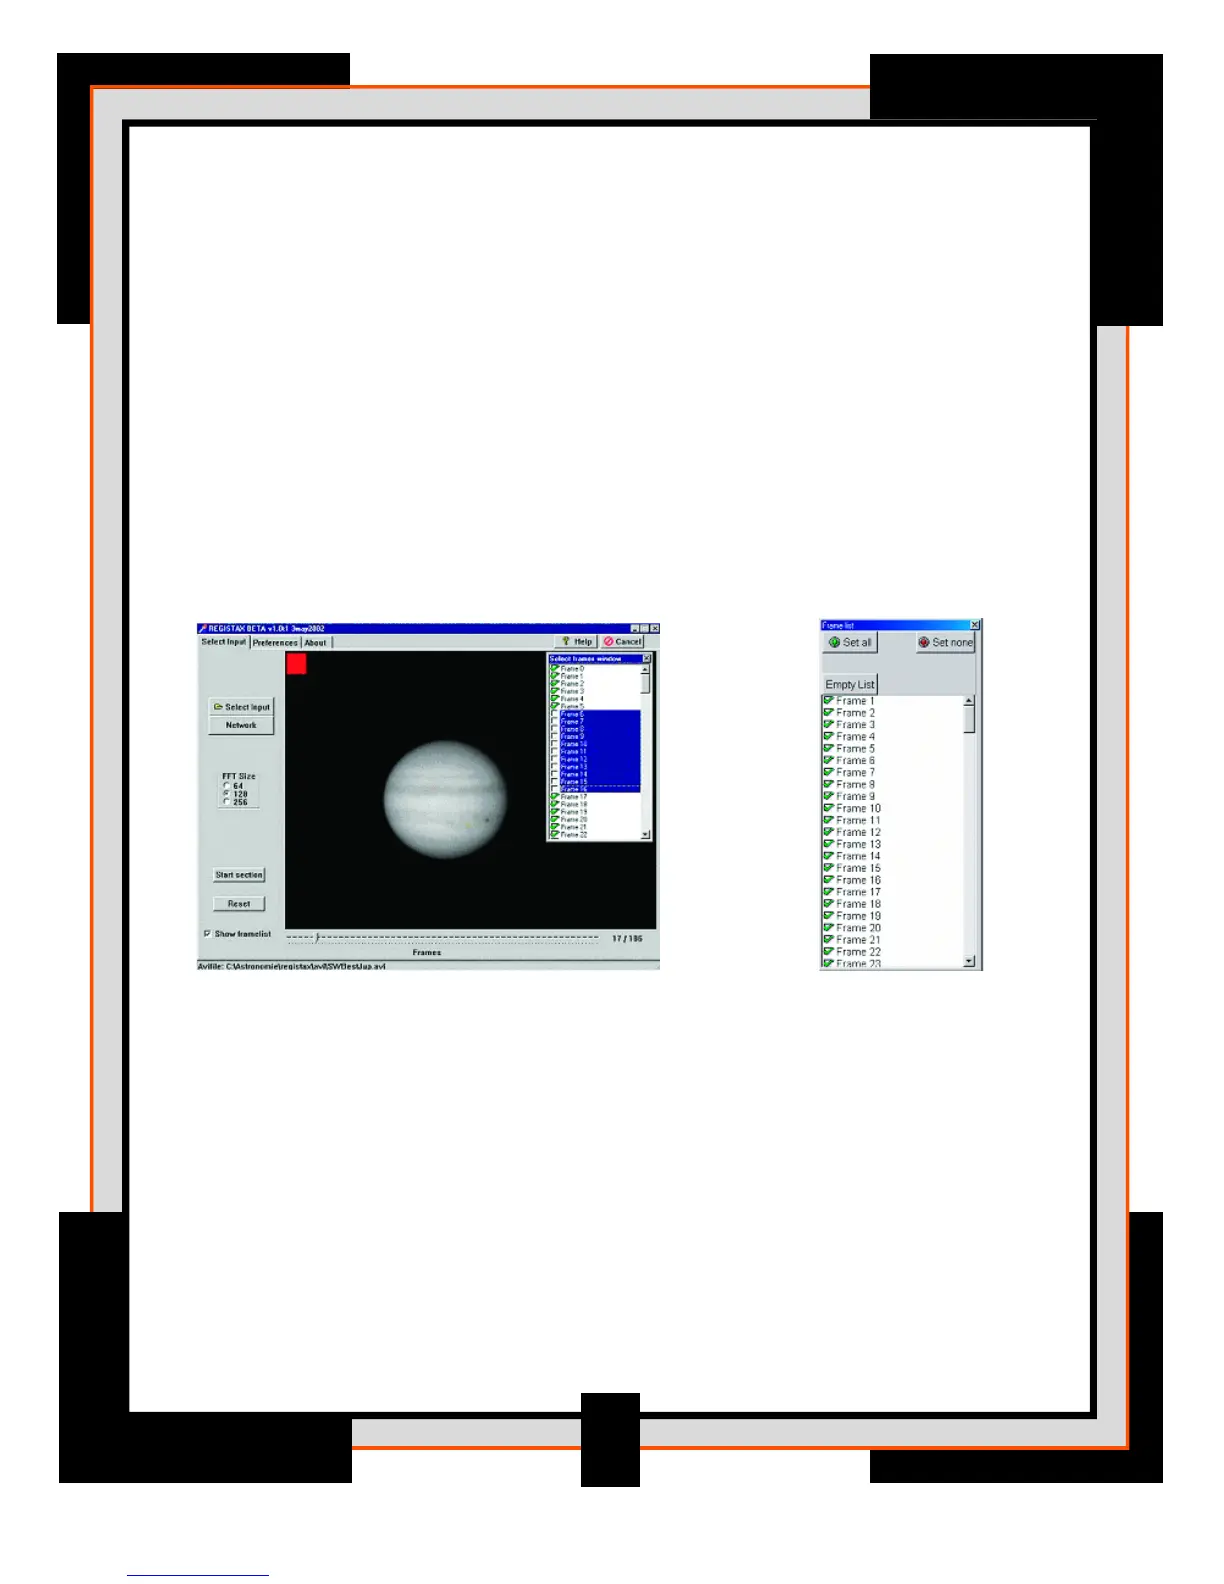
9. Show Frame list (checkbox) – The user will have the chance so select/deselect
frames in a particular AVI-file or set of bitmaps. This can be done by clicking the Show
Framelist checkbox (left of the slider). Than a scrollable list of frames will be shown with
a checkmark (default) in front of every frame. That means at startup all the images are
selected (up to a maximum of 5000 frames). The user can now select/deselect images by
stepping through them in the list. The image window (#3) will automatically display the
frame selected from the framelist. To change their status press the spacebar or click the
checkbox. You can change the status of a whole sequence of frames by selecting the first
frame of a set, then while holding the shift-key down, select the last frame you want to
change. The last frame will be marked by a dotted edge around the frame number.
Double-click that frame number (within the dotted area) and the whole range will
change status. The green and red box represent the status of the current active image
(green= selected, red= deselected, gray = dropped frame).
15