BIO X6 User Manual v. 1.0 168
12.1.2 Printhead overview
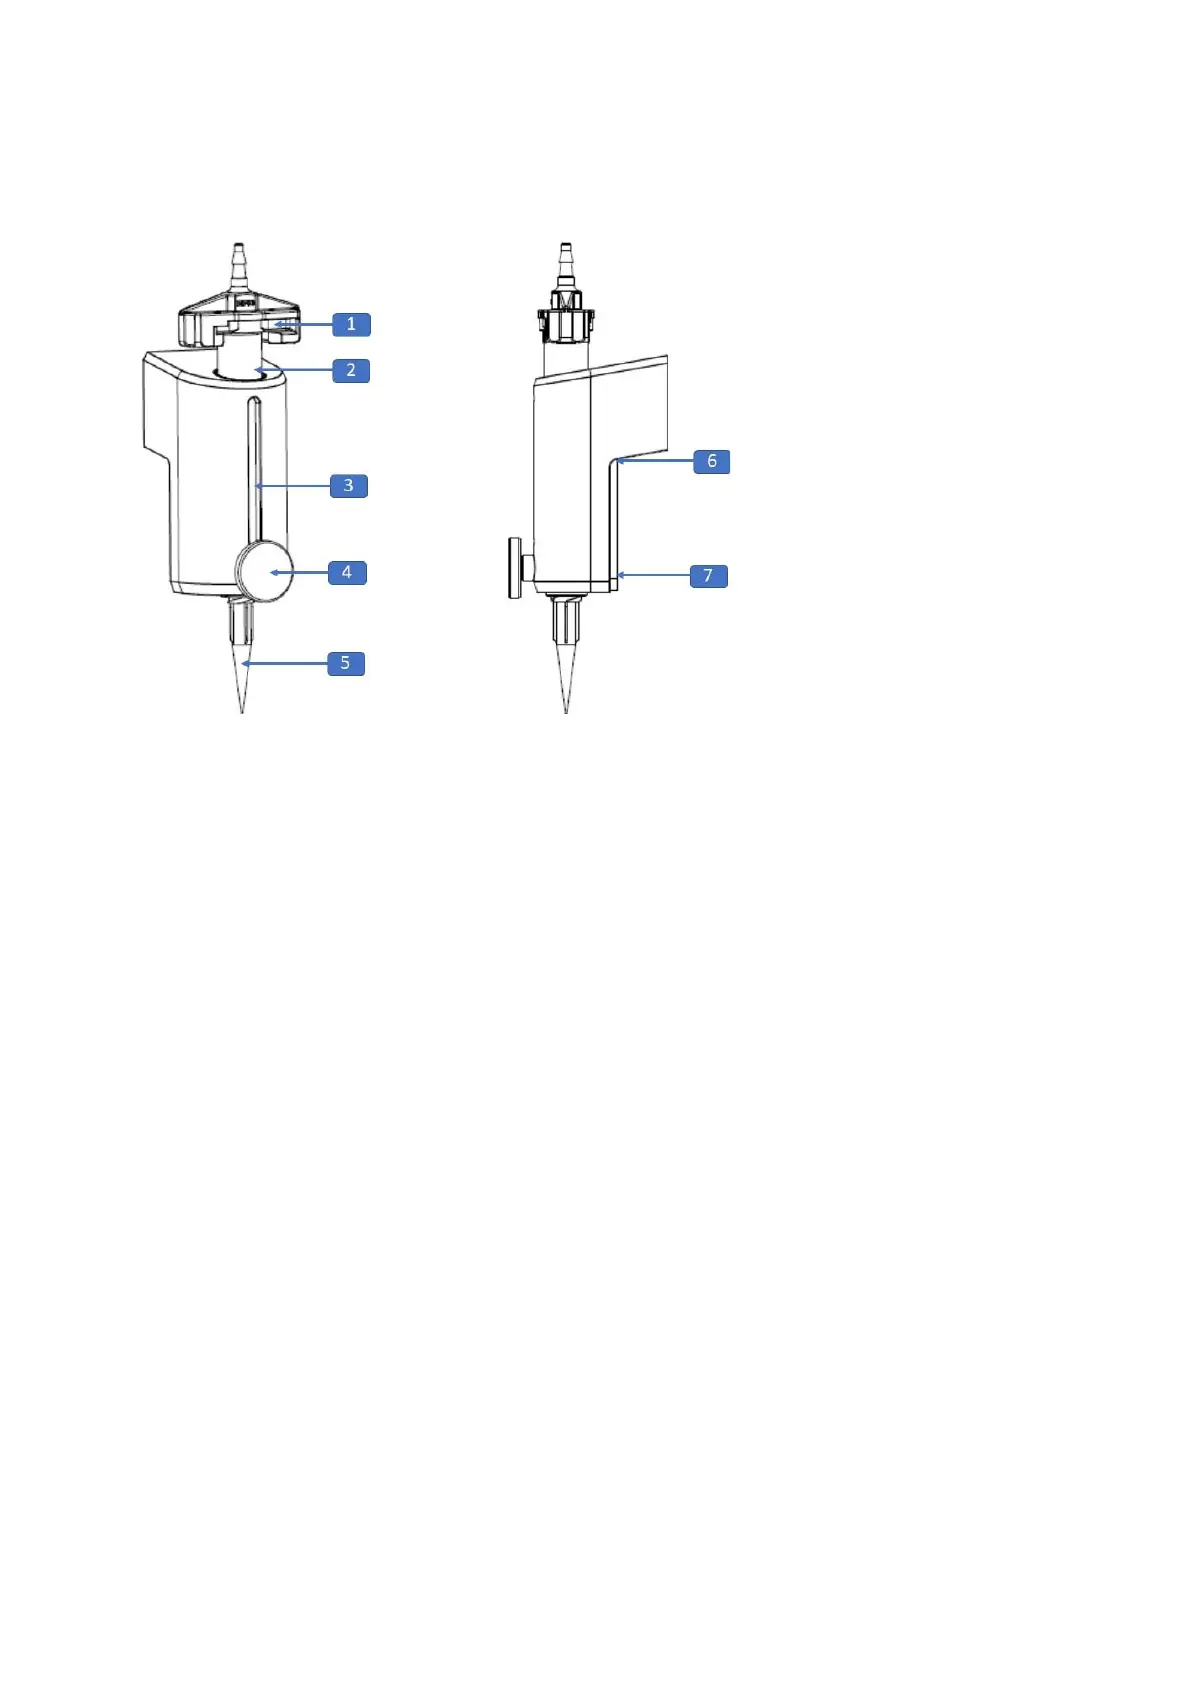
Figure 107 Overview of the Standard Pneumatic Printhead
1. Cartridge
2. Heat indicator: The LED changes color depending on the printhead temperature: red
is hot, yellow is normal, and blue is cool
3. Opening for cartridge overview: View the volume of bioink left in the cartridge
4. Cartridge fastening screw: Securely fastens the cartridge to the printhead
5. Nozzle or needle
6. Printhead contact: The connector between the BIO X6 and the intelligent printhead
7. Magnet: The magnet securely fastens the printhead on the printhead holder
 Loading...