BIO X6 User Manual v. 1.0 47
4.4.1 Print surface
The BIO X6 can bioprint on a variety of surfaces, including Petri dishes, well plates and glass
slides. Select the surface you wish to bioprint on.
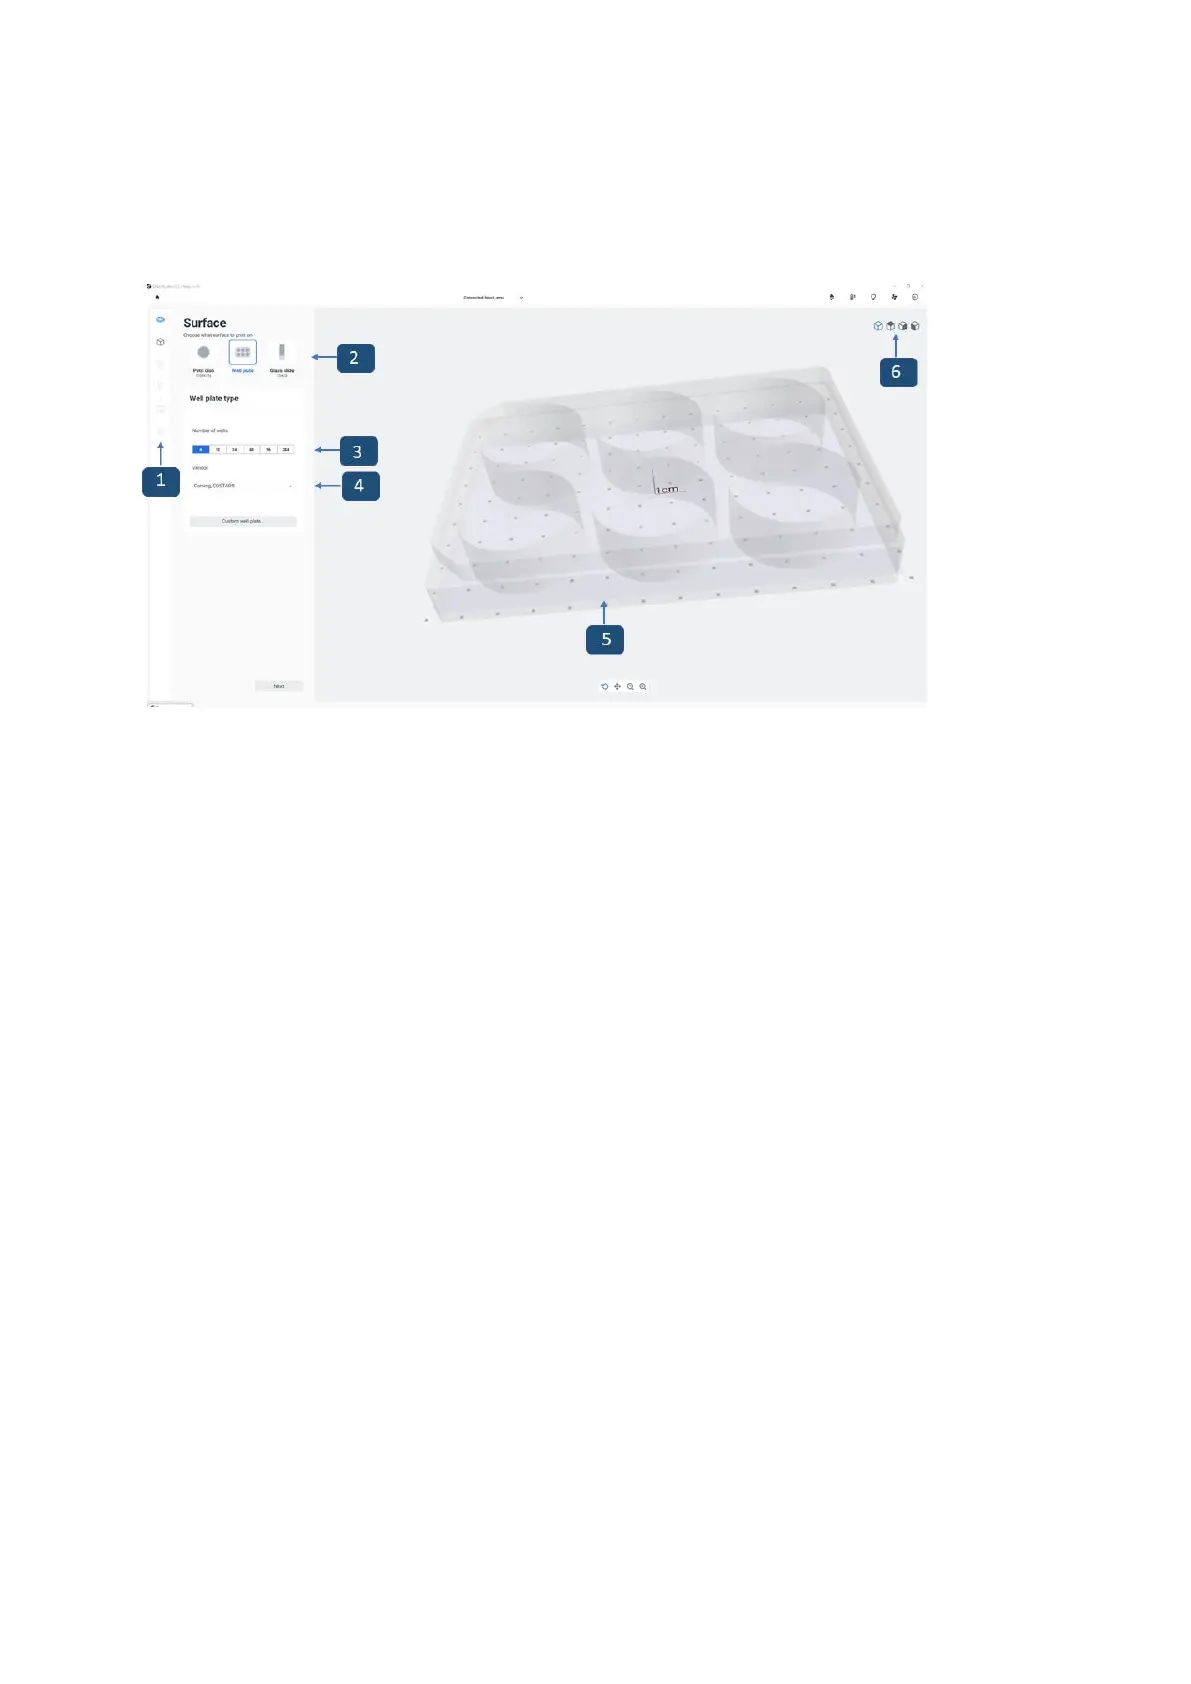
Figure 21 Overview of the Surface step
1. Printing process bar: This bar displays the steps of the overall printing process and
indicates in blue the step you are currently in.
2. Print surface: Select the surface you wish to bioprint on (Petri dish, well plate or
glass slide).
3. Select a number to choose a well plate to print in.
4. Select a vendor for the well plate you are using. This feature enables the BIO X6 to
know the precise dimensions of the well plate, which may vary slightly depending on
the vendor (1. Corning Costar, 2. Corning Falcon, 3. Thermo Fisher and 4. VWR).
5. Preview: The printing surface currently selected is displayed here.
6. Isometric views: Tap to choose between different options: perspective, top view,
side view. This helps you visualize with more detail the models to print and check for
issues on the model.
7. Tap Custom well plate to choose your own settings: well plate dimensions (number
of rows and columns), well offset (offset X, offset Y), and well spacing (center to
center rows X, center to center columns Y) (see separate screenshot below)
 Loading...