BIO X6 User Manual v. 1.0 56
4.4.4 Printhead settings
The BIO X6 can use up to six different printheads in a single bioprinting process.
Depending on the printhead you are using, different settings are required for configuration.
For general information about the printheads, see Printhead manuals. Further details are
outlined in the separate printhead manuals.
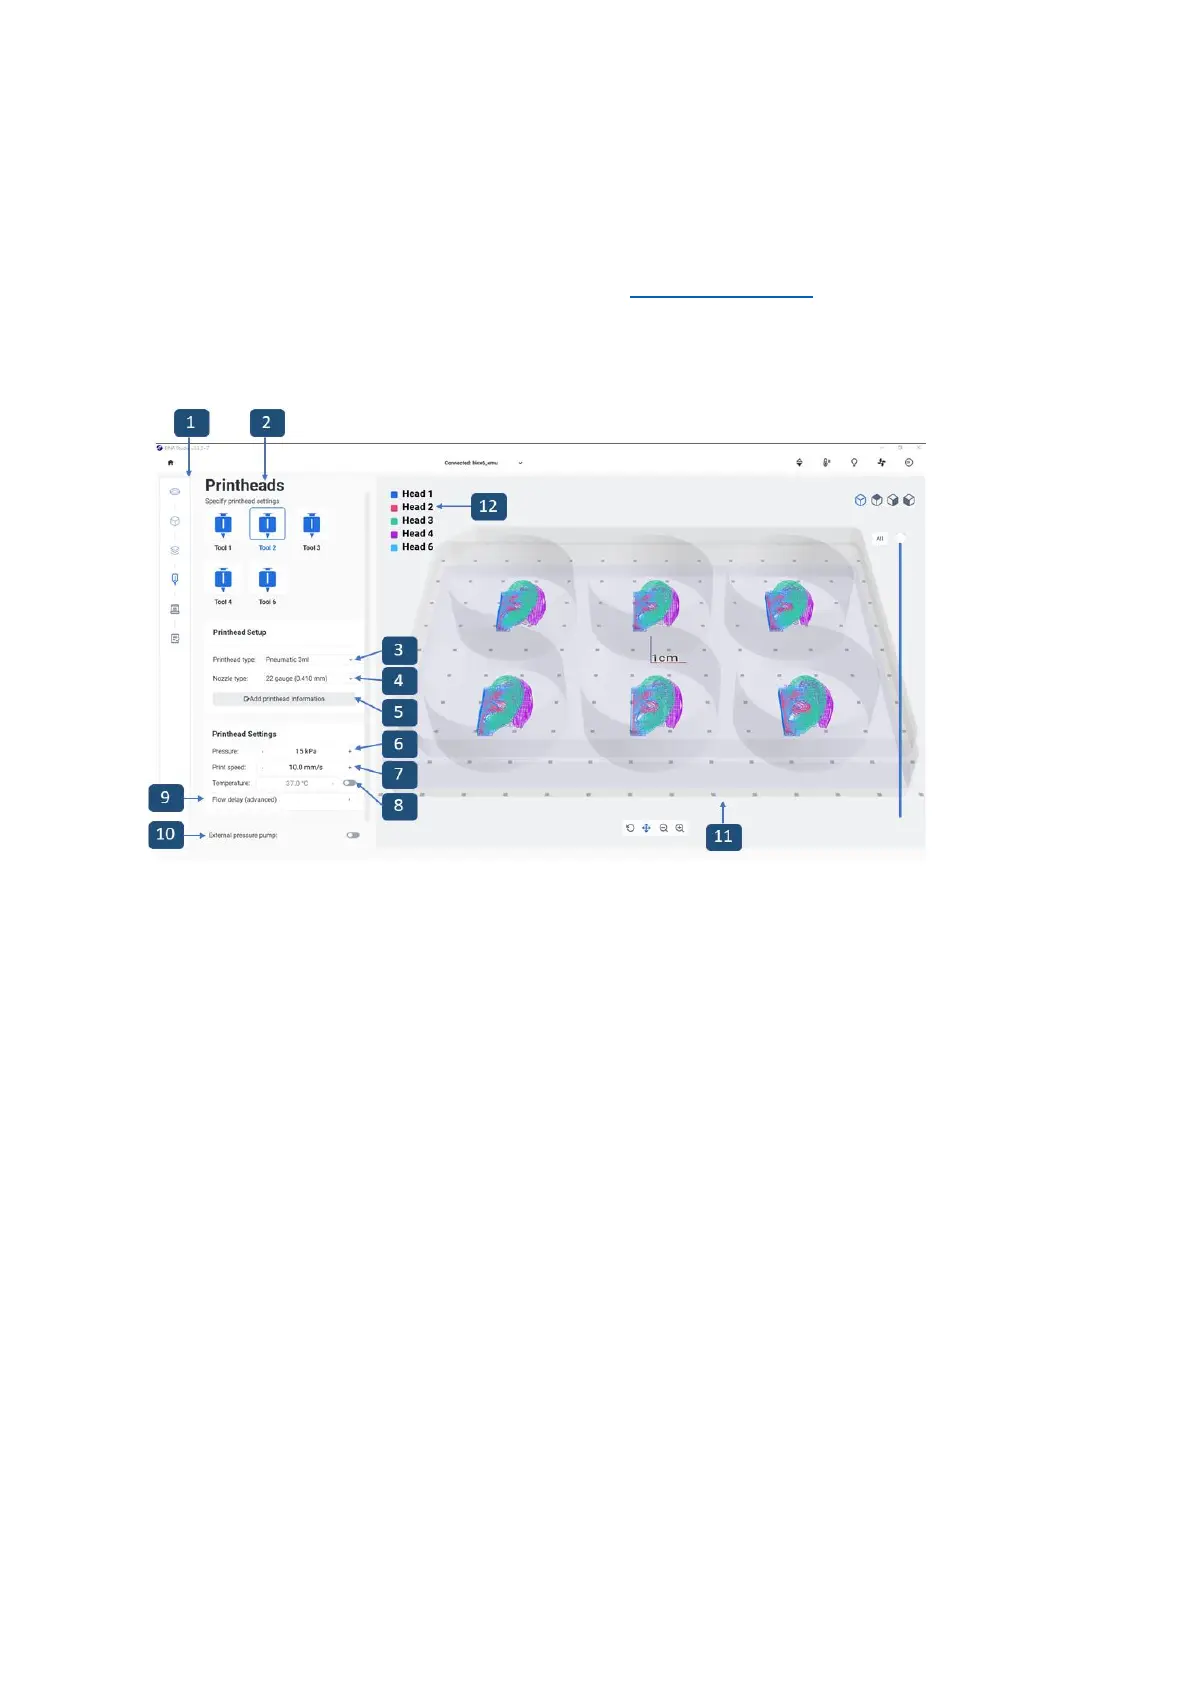
Figure 29 Overview of the Printheads step
1. Printing process bar: This bar displays the steps of the overall printing process and
indicates in blue the step you are currently in.
2. Tool bar: Indicates the printheads previously selected for the printing process. Tap
on each printhead to set it up with the information in the two boxes below (39).
3. Printhead type: Tap to select the type of printhead you are using. Different settings
appear below, depending on what type of printhead you select. The BIO X6 comes
4. Nozzle type: Tap to select the nozzle or needle type you are using.
5. Add printhead information: Tap to add printhead information that will be saved in
the print log. With this feature you can add information regarding the nozzle brand,
shape, and length, as well as information about the bioink, such as the batch number
and cell concentration. All information saved in the print log can be accessed later
and can be useful for your lab records or for planning future experiments (see
screenshot below).
 Loading...