BIO X6 User Manual v. 1.0 82
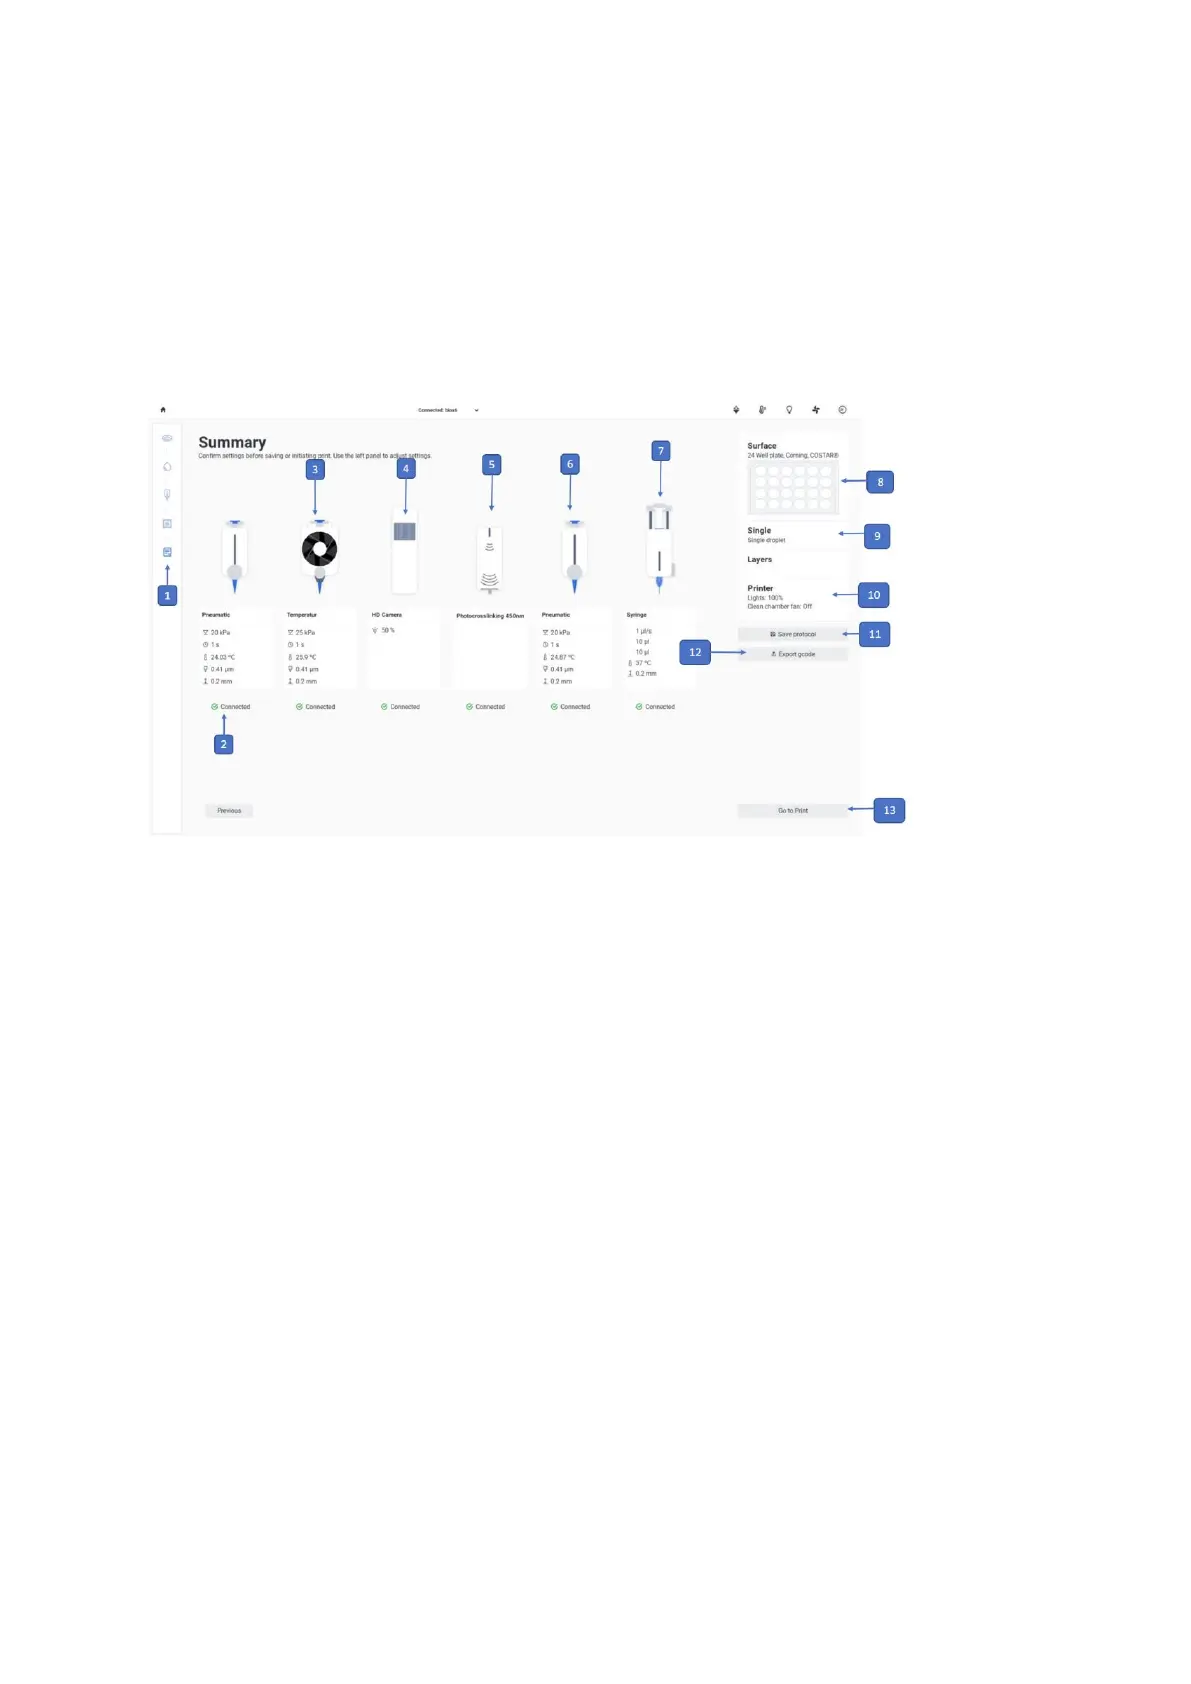
4.5.5 Summary
Review all your selected settings. If a setting or value is incorrect, use the boxes at the right
side of the interface or the navigation bar at the left to edit any settings. To proceed with the
bioprinting process, tap Go to Print and continue with the calibration settings.
1. Printing process navigation bar: This bar displays the steps of the overall
bioprinting process and highlights in blue the step you are currently in.
2. Tool 1: Displays an illustration of the tool 1 and shows its settings.
3. Tool 2: Displays an illustration of the tool 2 and shows its settings.
4. Tool 3: Displays an illustration of the tool 3 and shows its settings.
5. Tool 4: Displays an illustration of the tool 4 and shows its settings.
6. Tool 5: Displays an illustration of the tool 5 and shows its settings.
7. Tool 6: Displays an illustration of the tool 6 and shows its settings.
8. Surface: Displays a summary of the selected settings for the print surface.
9. Droplet: Displays the selected droplet mode.