Do you have a question about the Central Pneumatic 47868 and is the answer not in the manual?
Maintain a tidy workspace to prevent injuries and facilitate safe operation.
Operate in well-lit, dry conditions, avoiding flammable gases and liquids.
Ensure children are not present or handling tools, cords, or hoses.
Store tools in a dry, locked location out of reach of children when not in use.
Employ the tool only for its intended purpose and applications.
Wear appropriate clothing, non-conductive attire, and steel toe shoes.
Always wear safety goggles, ear protection, and a face shield when needed.
Maintain balance and avoid reaching across running equipment or hoses.
Keep tools clean, lubricated, and inspect cords/hoses for damage.
Always disconnect the air hose when the tool is not in use.
Ensure the trigger is not depressed when carrying the air hammer.
Remain attentive, use common sense, and avoid operating when fatigued.
Inspect for damage, alignment, or binding before use; repair as needed.
Avoid contact with grounded surfaces like pipes or radiators.
Use only identical replacement parts and intended accessories.
Do not use if judgment or reflexes are impaired by substances.
Ensure extension cords for compressors are correctly sized to prevent overheating.
Ensure maintenance is performed regularly by a qualified technician.
Use only compressed air; never combustible gases as a power source.
Follow 10 measures to reduce crystalline silica exposure and prevent silicosis.
Be aware of potential harm to hands and arms from vibration.
Ensure gloves do not interfere with trigger operation.
Maintain a firm grip with both hands and proper positioning at the workpiece.
Know what is underneath the work area; avoid shallow cables or pipes.
Keep body clear of the tool; ensure the area is clear of people/animals.
Spectators require eye and ear protection; beware of flying debris.
Keep finger away from the trigger until ready to work.
Connect air connector with tape, attach hose, and add oil if not using an oiler.
Set compressor pressure to 90 PSI; do not exceed.
Check air connections for leaks and disconnect before loading bits.
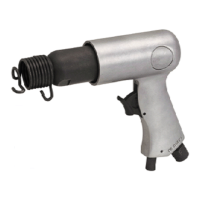
Install chisel bit by pressing spring, inserting shank, and ensuring lock.
Wear safety goggles, face mask, ear protection, and steel toe shoes.
Grip firmly, move slowly, and let the tool do the work; check bit if ineffective.
Turn off air, bleed remaining air, and disconnect hose when finished.
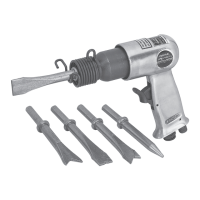
Lists the 9 types of chisel bits included with the air hammer.
Wipe down the air chisel with a lint-free cloth after each use.
Ensure no chips or debris are in the spring mechanism.
Add pneumatic oil to the air inlet for lubrication before storage.
Examine chisels for dullness or cracks before use; replace if necessary.
| Brand | Central Pneumatic |
|---|---|
| Model | 47868 |
| Category | Tools |
| Language | English |