11
Mounting to a wall
▪ Insert a screw or nail into a wall with the
head projecting.
▪ Hang the wall and floor base via the
hanging hook on the bottom of the wall
and floor base. Alternatively, the wall and
floor base can be secured into a wall via
the two mounting holes and secured with
two small nails.
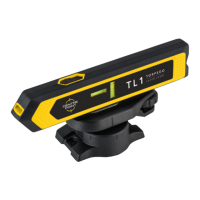
▪ Place the instrument on the wall and
floor base. The instrument can be placed
either with the power switch facing up or
sideways. The magnets will secure the
instrument in place.
▪ If the bubble vial is not centred, rotate
the thumbscrew until the bubble vial is
centred.
Mounting to a camera tripod
▪ Select a place as close as practical to
the work site. Ensure the location is clear
of traffic.
▪ Attach the wall and floor base 1/4”
thread.
▪ Place the instrument on the wall and
floor base. The instrument can be placed
either with the power switch facing up or
sideways. The magnets will secure the
instrument in place.
▪ If the bubble vial is not centred, rotate
the thumbscrew until the bubble vial is
centred.
The camera tripod is an optional
accessory.
i