Installation & Maintenance Instruction
CET Group Co., Ltd. www.cetgroupco.com
Unsnap the PCR saddles from the housing on the PCR assembly, carefully prying them
from the bottom using a small flat bit screwdriver
Remove the PCR and the PCR cleaning roller, then remove the saddles
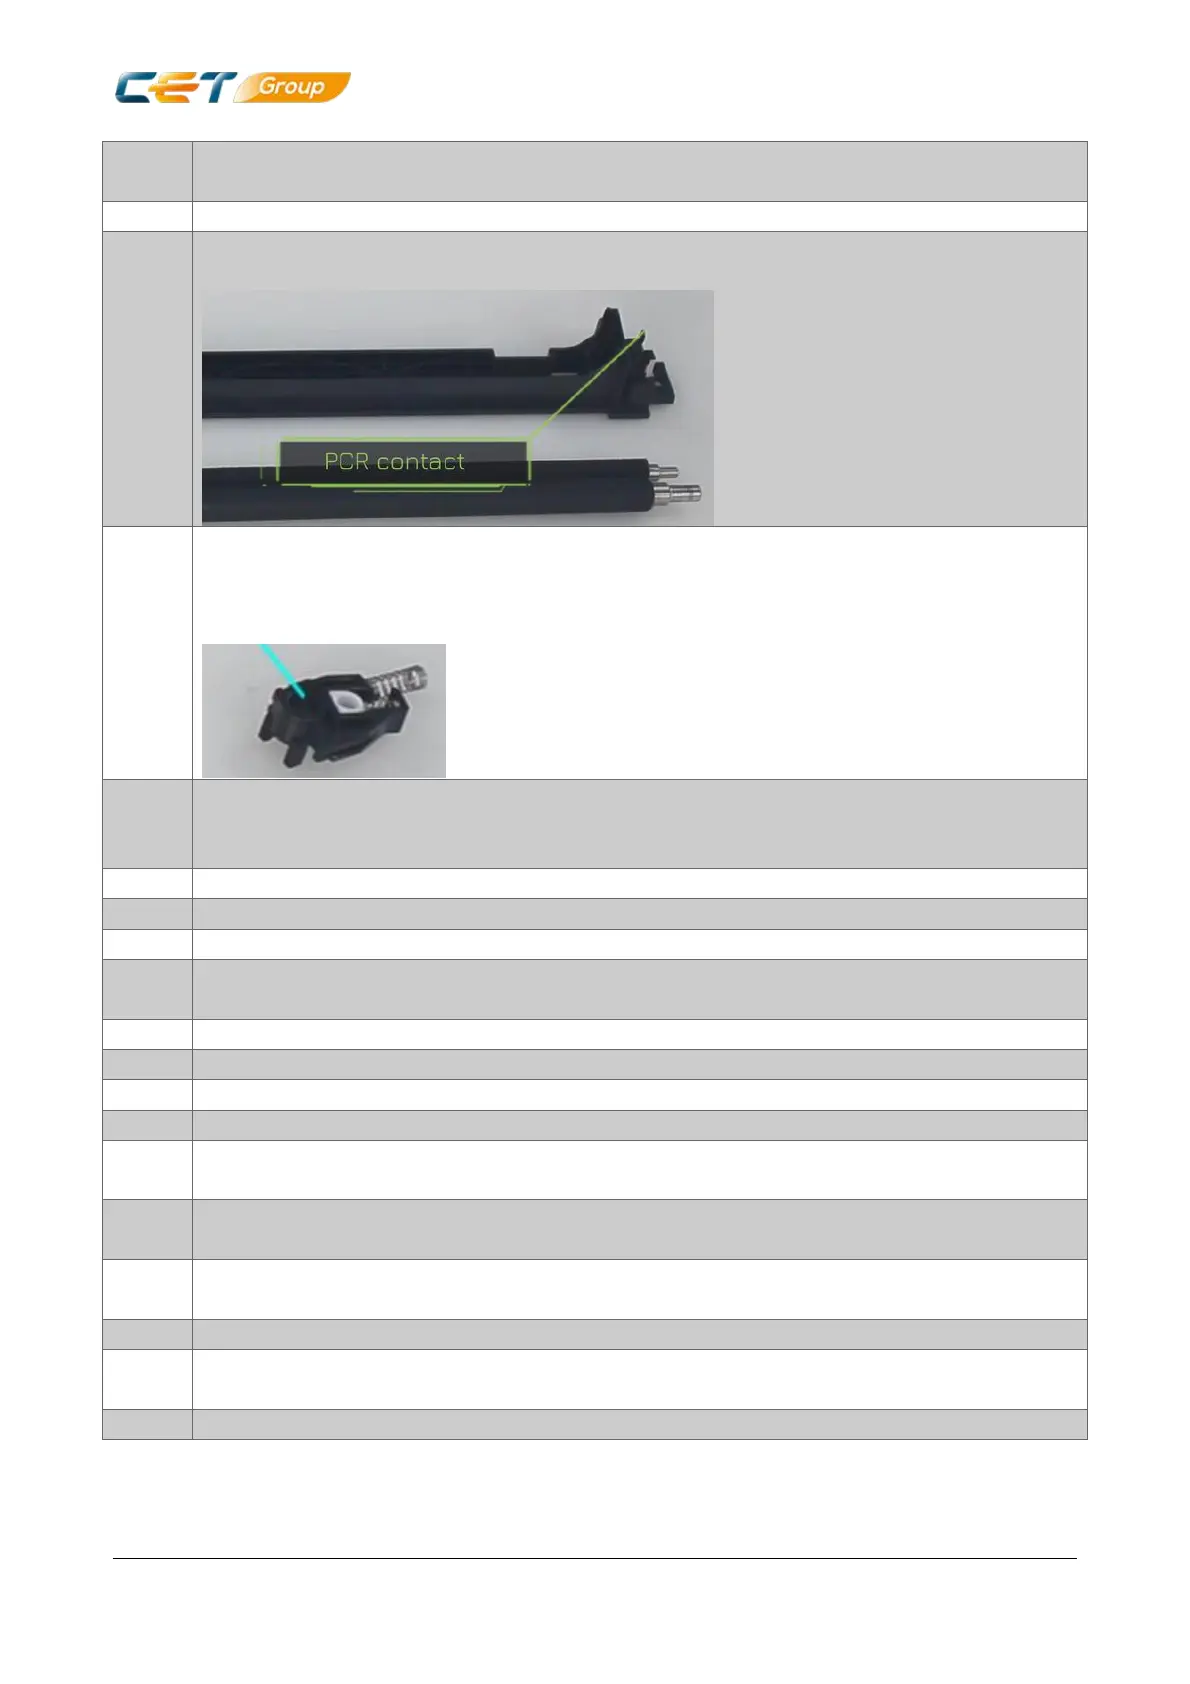
Clean the PCR contact with a cotton swab, then apply a small amount of conductive
grease on it
Clean the black conductive saddle with a cotton swab, then apply a small amount of
conductive grease into it.
Apply conductive grease
here
Take out the new CET PCR and PCR cleaning roller and remove the protective sleeve from
the PCR.
Wear clean disposable gloves or do not touch the PCR working surface with bare hands
Reinstall the saddles and the gear onto the PCR and the PCR cleaning roller
Reinstall the PCR and the PCR cleaning roller into the PCR assembly holder
Make sure the PCR is moveable and spring loaded
Reinstall the PCR assembly into the drum unit and secure it with 2 screws using a PH#2
screwdriver
Take out the new CET OPC drum
Remove the protective wrap, then place the OPC drum into the drum unit
Align the notches on the drum unit with the corresponding tabs on the developer unit
Carefully connect the drum unit and the developer unit sections together
Reinstall the front OPC drum support hub and secure it with two screws using a PH#2
screwdriver
Arrange the toner sensor cable in the drum unit section plastic housing, then connect the
connector
Reinstall the rear OPC drum support hub and secure it with three screws using a PH#2
screwdriver
Reinstall the rear PCDU cover and secure it with one screw using a PH#2 screwdriver
For correct operation of the rebuilt drum unit, reset the corresponding PM counters by
SP3-701 or by selecting [PM Counter / New Unit Set] from the menu
To find the components used in this video please visit our web site www.cetgroupco.com
 Loading...