PERIODIC MAINTENANCE 2-51
Rear Master Cylinder Disassembly
NOTE
O Do not remove the push rod clevis for master cylinder
disassembly since removal reguires brake position ad-
justment.
Remove the rear master cylinder (see Rear Master Cyl-
inder Removal in the Brakes chapter).
Slide the dust cover on the push rod out of place, and
remove the circlip.
Special Tool - Inside Circlip Pliers
Pull out the push rod with the piston stop.
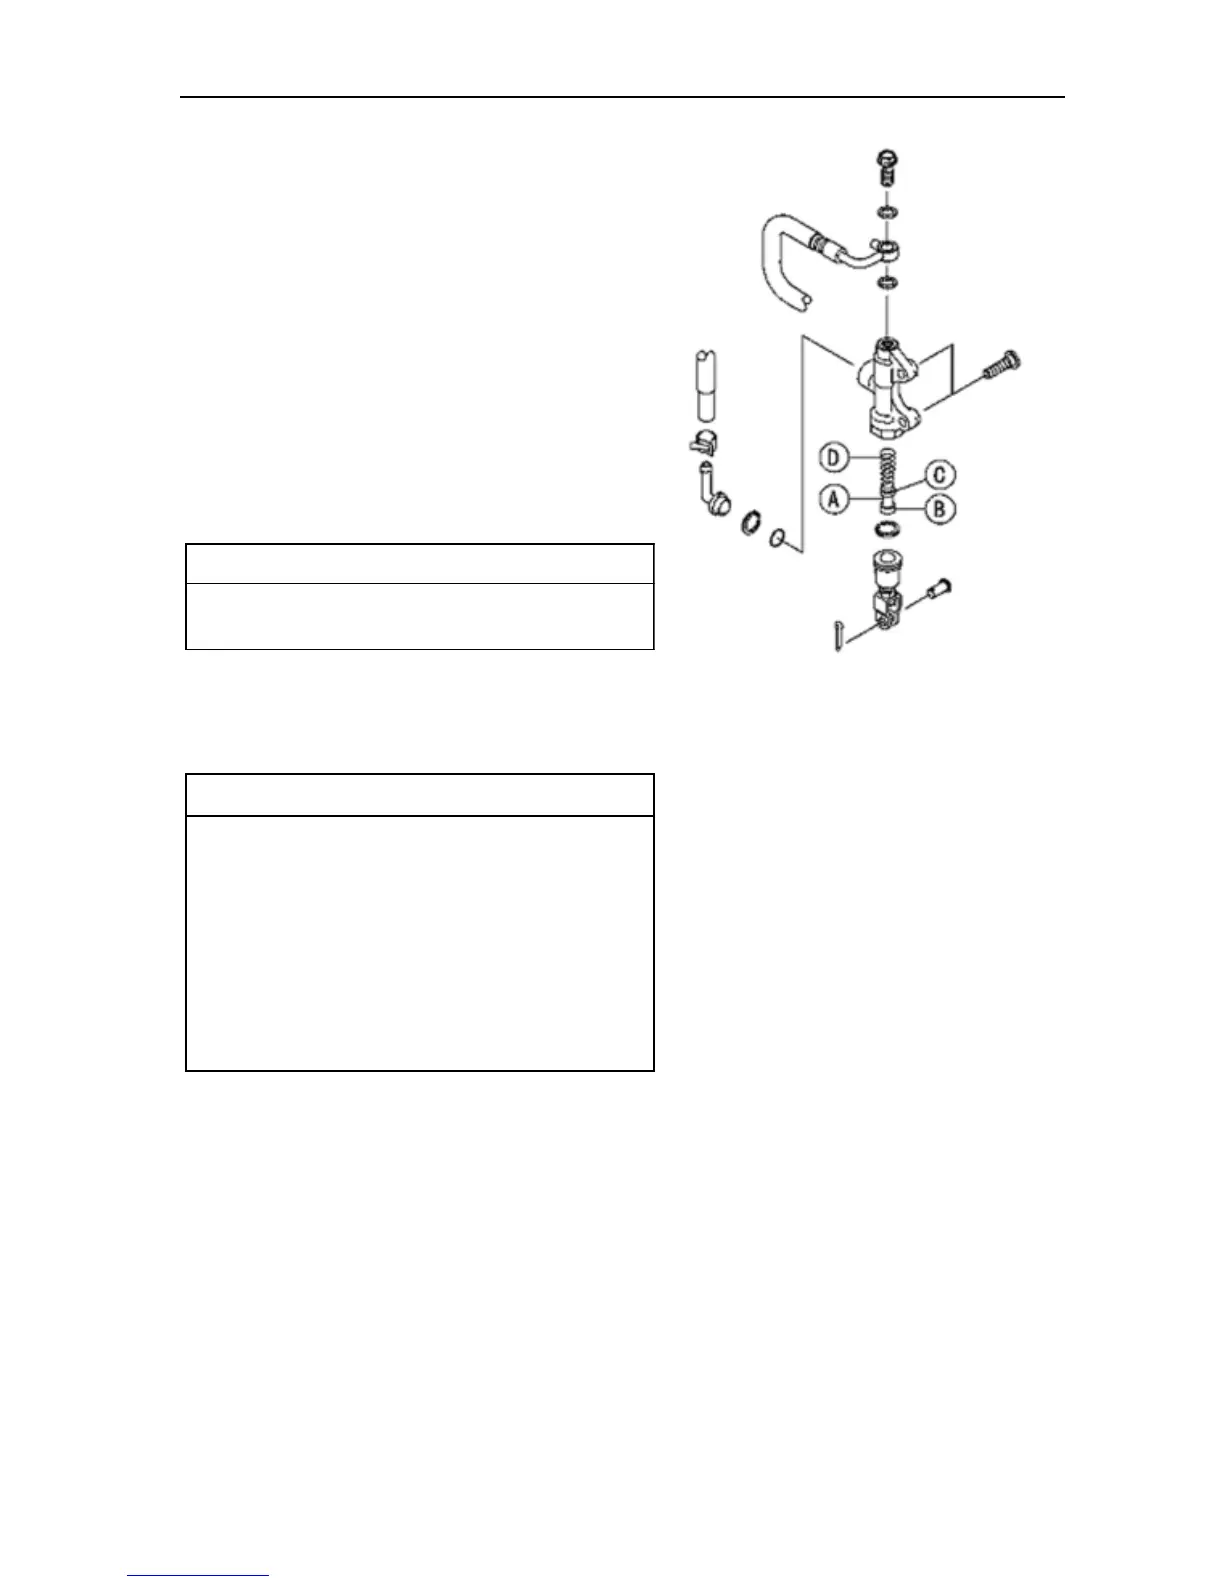
Take off the piston [A], secondary cup [B], primary cup
[C] and return spring [D].
Do not remove the secondary cup from the piston
since removal will damage it.
Master Cylinder Assembly
Before assembly, clean all parts including the master
cylinder with brake fluid or alcohol.
Apply brake fluid to the new parts and to the inner wall
of the cylinder.
Take care not to scratch the piston or the inner wall of
the cylinder.
Tighten the brake lever pivot bolt and locknut.
Apply silicone grease.
Brake Lever Pivot Bolt
Tighten:
Torque - Brake Lever Pivot Bolt: 1.0 N·m
(0.10 kgf·m, 9 in·lb)
Brake Lever Pivot Bolt Locknut: 5.9 N·m (0.60
kgf·m, 52 in·lb)
NOITUAC
Except for the disc pads and disc, use only disc
brake fluid, isopropyl alcohol, or ethyl alcohol for
cleaning brake parts. Do not use any other fluid
for cleaning these parts. Gasoline, engine oil, or
any other petroleum distillate will cause deterio-
ration of the rubber parts. Oil spilled on any part
will be difficult to wash off completely, and will
eventually deteriorate the rubber used in the disc
brake.
NOITUAC
 Loading...