PERIODIC MAINTENANCE 2-53
Apply brake fluid to the outside of the pistons, and
push them into each cylinder by hand.
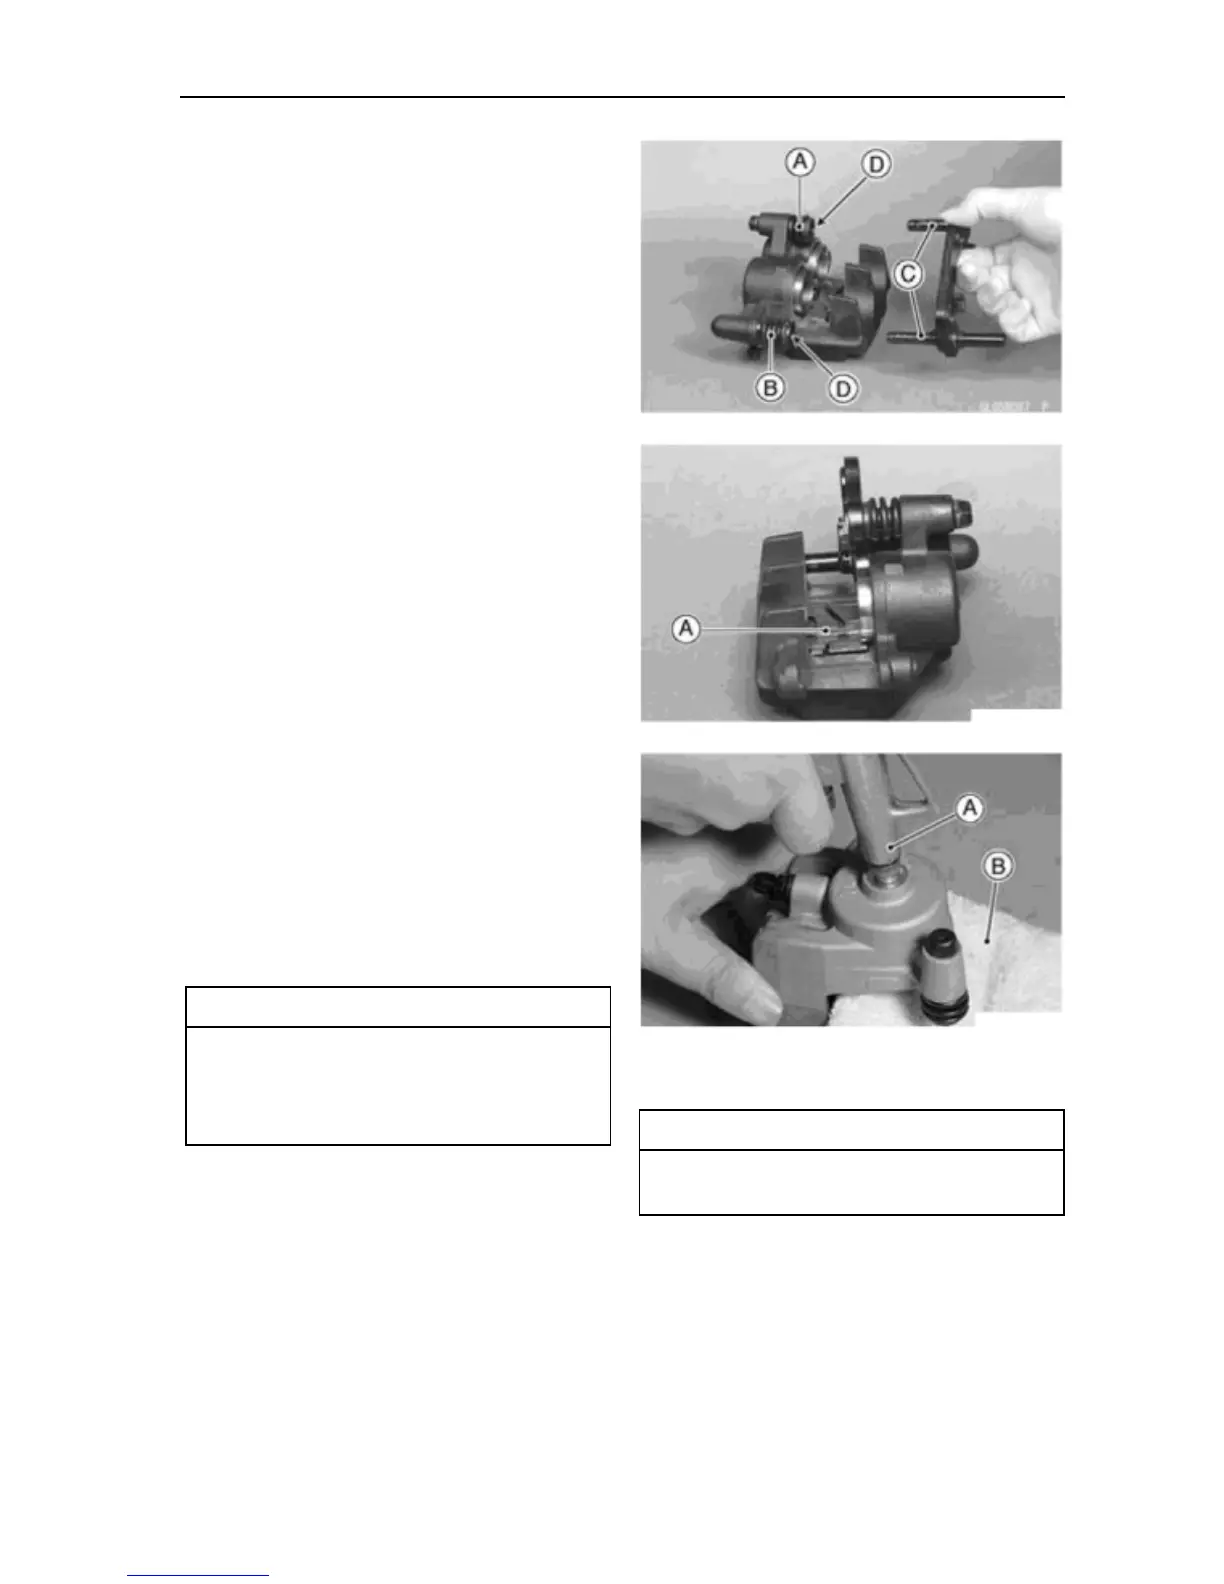
Check the shaft rubber friction boot [A] and the
dust cover [B] replace them with new ones if they
are damaged.
Apply a thin coat of PBC (Poly Butyl Cuprysil)
grease to the caliper holder shafts [C] and holder
holes [D] (PBC is a special high-temperature,
water-resistance grease).
Install the anti-rattle spring [A].
Install the pads (see Front Brake Pad Installation
in the Brakes chapter).
Wipe up any spilled brake fluid on the caliper with
wet cloth.
Rear Caliper Disassembly
Remove the rear caliper (see Rear Caliper Re
moval in the Brakes chapter).
Remove the pads and anti-rattle spring (see Rear
Brake Pad Removal in the Brakes chapter).
Using compressed air, remove the piston.
Cover the piston area with a clean, thick cloth [B].
Blow compressed air [A] into the hole for the
banjo bolt to remove the piston.
To avoid serious injury, never place your
fingers or palm inside the caliper opening. If
you apply com- pressed air into the caliper,
the piston may crush your hand or fingers.
NOITUAC
Remove the dust seal and fluid seal.
Remove the bleed valve and rubber cap.
NOTE
O If compressed air is not available, with the brake
hose still attached, apply the brake pedal to
remove the piston. The remaining process is as
described above.
Rear Caliper Assembly
Clean the caliper parts except for the pads.
For cleaning of the parts, use only disc brake
fluid, isopropyl alcohol, or ethyl alcohol.
NOITUAC
Install the bleed valve and rubber cap.
Torque - Bleed Valve: 7.8 N·m (0.80 kgf·m,
69 in·lb)
 Loading...