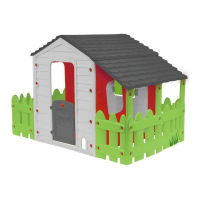
Do you have a question about the Chad Valley Farm Wendy House and is the answer not in the manual?
| Type | Wendy House |
|---|---|
| Assembly Required | Yes |
| Suitable For | Outdoor use |
| Recommended Age | 3 years and above |
| Color | Multi |
Assemble wall connectors on side walls using screws and nuts.
Connect front, back, and one side wall with fence connectors, screws, and nuts.
Assemble the other side wall and fence connectors with screws and nuts.
Connect small fences to the house and mount wall connectors to the fences.
Assemble fence pillars and pillar connectors using screws and nuts.
Connect pillars and a large fence with a middle hole to the assembly.
Connect the large fence (E) to the assembly using screws and nuts.
Place and fix the first roof part to pillar connectors using screws and nuts.
Attach roof connectors to the underside of another roof part using screws and nuts.
Connect the third roof part to the second roof part, minding roof lip direction.
Place the assembled roof onto the structure and fix it with screws and nuts.
Place the window box on the window sill of the back wall.
General warnings for domestic use, age, weight limits, and placement.
Instructions for checking connections, replacing parts, and handling adverse weather.
Physical dimensions of the playhouse and country of origin.
 Loading...