HELPLINE NO 08448012949
10
ORIGINAL INSTRUCTIONS
Turn the appropriate screw with a screwdriver to
obtain ne adjustment (See Fig. J).
6. STARTING THE ROUTER (See Fig. K)
Depress to start and release to stop your tool.
Depress On/Off Switch (3) then Lock On Button
(4). Your tool is now locked on for continuous use.
To switch off your tool just depress and release
the On/Off Switch.
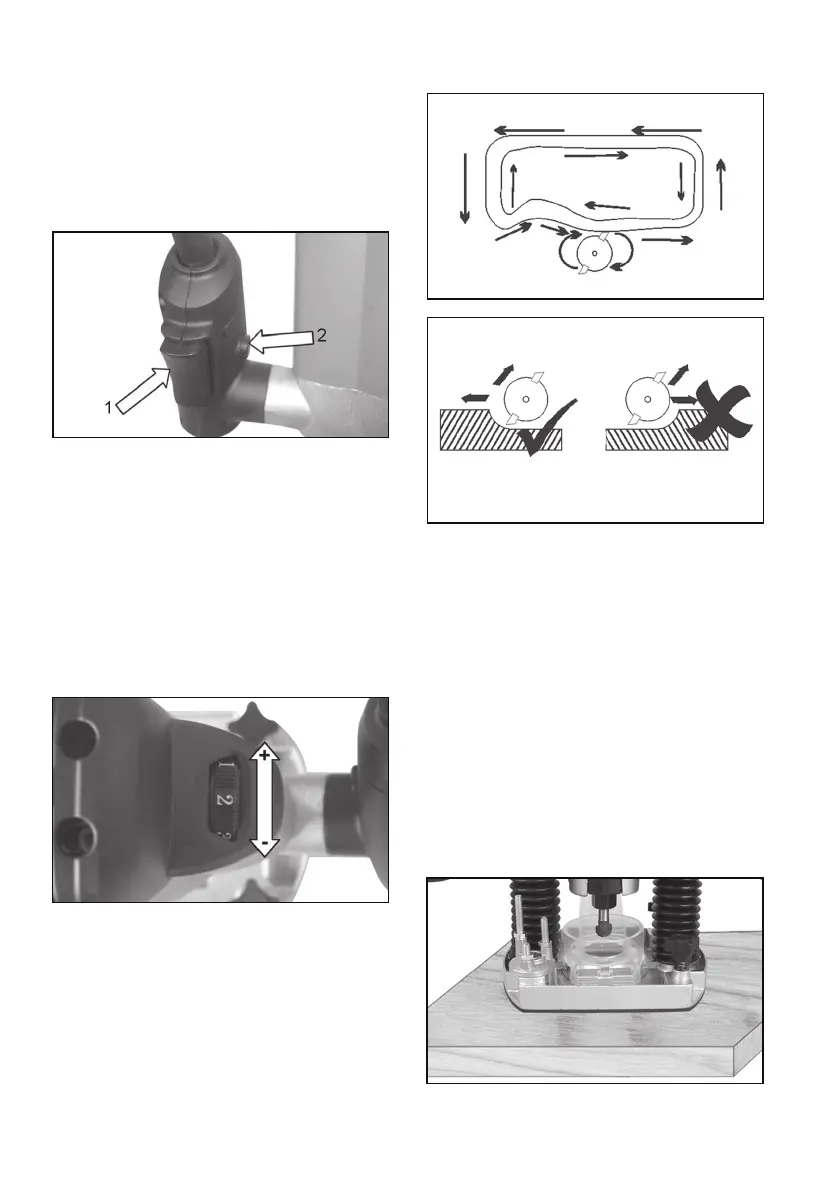
7. VARIABLE SPEED CONTROL SWITCH
(See Fig. L)
The variable speed control switch allows you
to vary the speed of the router, enabling the
optimum speed to be selected for various sizes
of router bits and preventing the workpiece from
being burnt. This can occur especially when
cross cutting. The speed increases as you turn
the switch towards the higher numbers and
decreases for the lower numbers (1 being slowest
and 6 fastest).
8. Soft Start
Soft start delays the increase in motor speed
to reduce the motor “kick” or torque effect to
improve operator comfort and safety.
9. DIRECTION OF FEED (See Fig. M, N)
The router rotates in a clockwise direction.
As a consequence, the router must be moved
from left to right as you face the workpiece and
counterclockwise for outside edges.
10. RATE OF FEED
It is important to move the router at the correct
speed throughout the work. The incorrect speed
may produce a poor quality cut. Moving too fast
can cause bit damage and a rough uneven cut.
A too slow speed can cause the wood to burn
and the bit to overheat. The rate of feed will vary
depending on the size of bit, material and router
speed. To determine the best speed always
practice on a small unseen area or a spare piece
of the same material rst.
11. USING THE ROUTER FREEHAND
(See Fig.O)
The router can be used without any of the guides,
allowing creative freehand work, such as sign
Fig. I
Fig. J
Fig. K
Fig. L
Fig. M
Fig. N
Fig. O
Fig. M
Fig. I
Fig. J
Fig. K
Fig. L
Fig. M
Fig. N
Fig. K
Fig. L
Fig. M
Fig. N
Fig. O
Fig. P
Fig. L
 Loading...