HELPLINE NO 08448012949
8
ORIGINAL INSTRUCTIONS
OPERATION INSTRUCTIONS
NOTE: Before using the tool, read the
instruction book carefully.
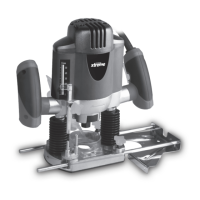
INTENDED USE
The machine is intended for routing grooves,
edges, proles and elongated holes as well as
for copy routing in wood, plastic and light building
materials, while resting rmly on the workpiece.
1. SETTING THE DEPTH STOP (See Fig. A)
a) Loosen the Fixing Screw (11), and adjust the
Depth Stop (13) upward or downward. Note the
position of the scale on the body and raise the
depth stop by the required amount. Each mark on
the scale is equal to 1mm.
b) Tighten the Depth Stop Fixing Screw.
NOTE: If your router comes with the Depth Stop
not assembled, be sure to t the Depth Stop on
the machine before use.
Loosen the Fixing Screw (11), insert the Depth
Stop (13) into the hole of holder.
2. FITTING THE VACUUM ADAPTER
(See Fig. B, C)
For the sake of your health and working
environment, always connect the machine to a
vacuum cleaner. You must fasten the Vacuum
Adapter (14) to the Router Base (9) with two
screws and connect a suction hose. The suction
hose can be connected to the vacuum cleaner
through an extraction adapter.
3. FITTING THE ROUTER BIT
(See Fig.
D, E)
WARNING! Use only routing tools with
an allowable speed matching at least the
highest no load speed of the machine. The shank
diameter of the router bit must correspond with
the rated diameter of the Collet.
Press in the Spindle Lock Button (4), loosen the
Collet Nut (6) and insert the required router bit.
Be sure to leave at least 3mm of shank visible
when inserting the router shank. Tighten the
Collet Nut with the Spanner. Release the Spindle
Lock Button.
Fig. A
Fig. B
Fig. C
Fig. D
Fig. E
Fig. F
Fig. G
Fig. H
Fig. B
Fig. C
Fig. D
Fig. E
Fig. F
Fig. G
Fig. H
Fig. C
Fig. D
Fig. E
Fig. F
Fig. G
Fig. H
Fig. D
Fig. E
 Loading...